Paper Dolls: make them stand up. Here's a tutorial on making my flat folding stand... [and here’s an update on a simplified version for a smaller stand]
To begin by way of design explanation:
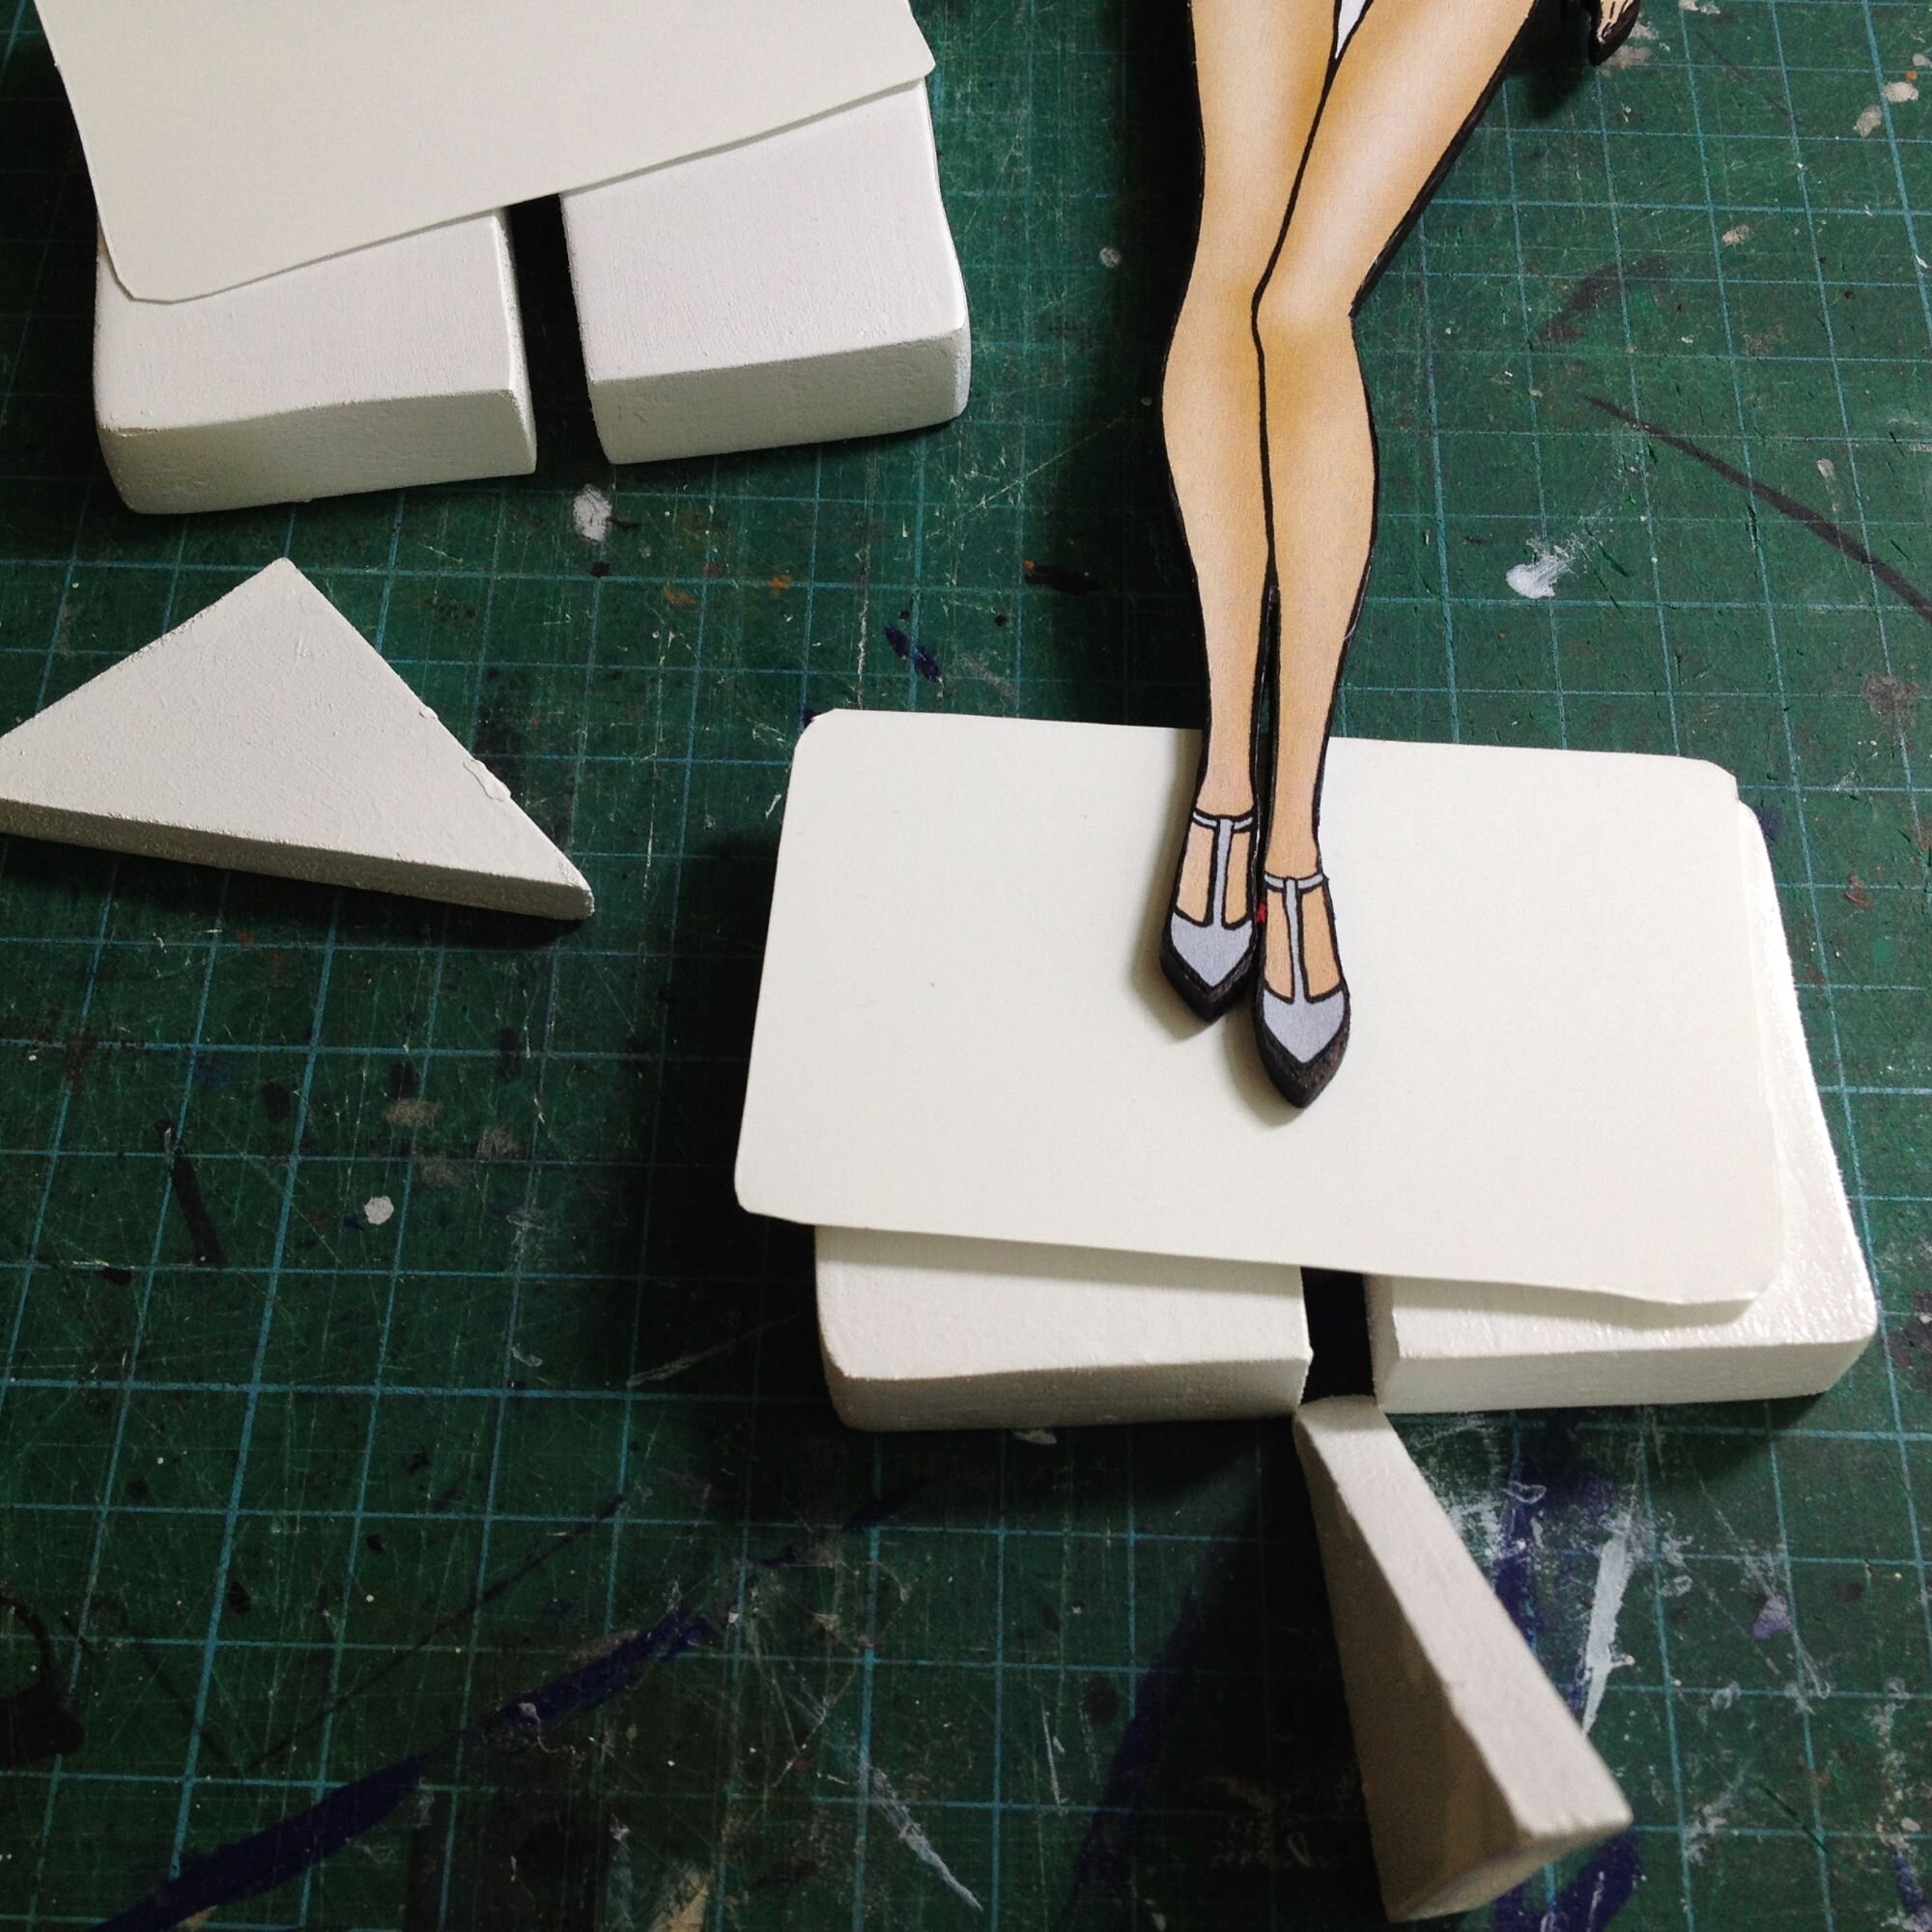
I like the base already drawn on some of the dolls as seen below, so this is what I’ll use for my stand.
It elevates the figure slightly, provides a practical straight, stable terminal edge and conceals any fixings behind.
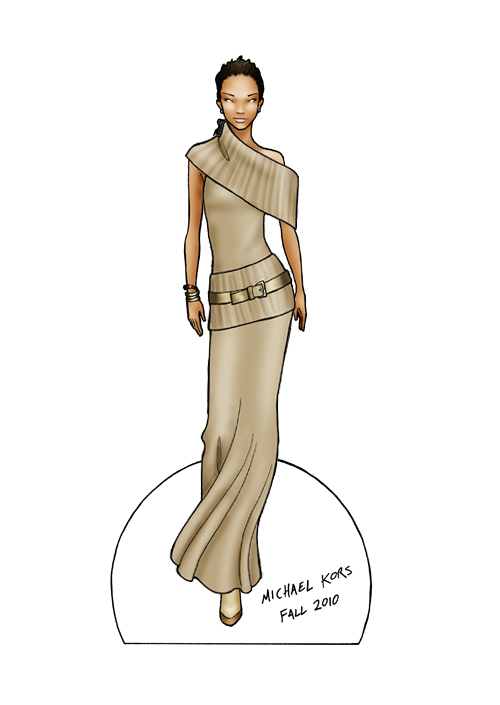
Image from finalfashion.ca Michael Kors doll.
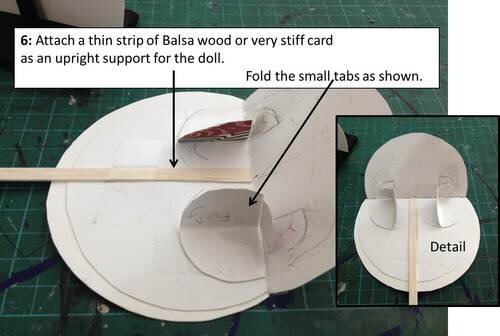
I used spray adhesive to fix the printed doll onto card, then cut out on the outlines, reasonably carefully, leaving the base attached. Then I made the stand, fixed it onto this and then glued on the balsa upright support.
Read on...


Step 1

Step 2

Step 3

Step 4
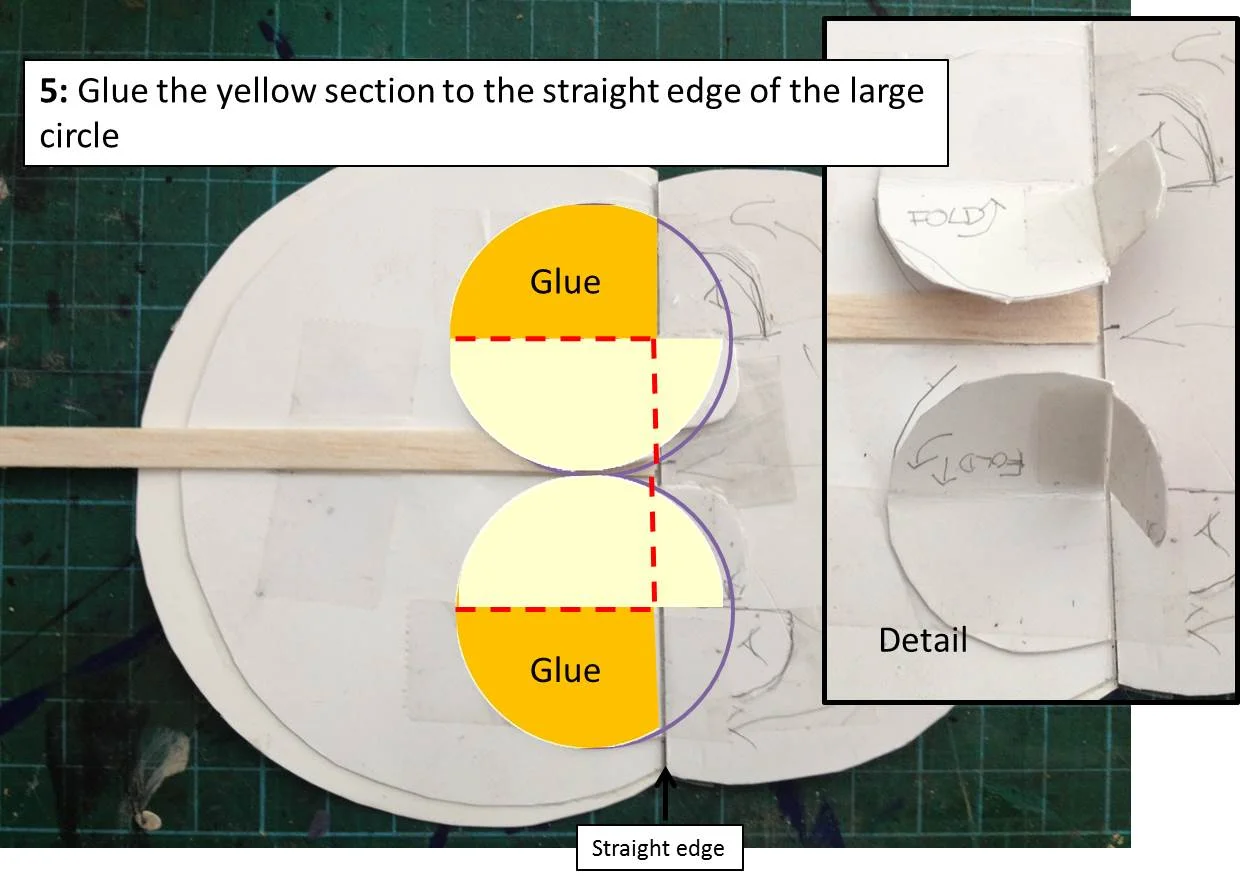
Step 5

Step 6
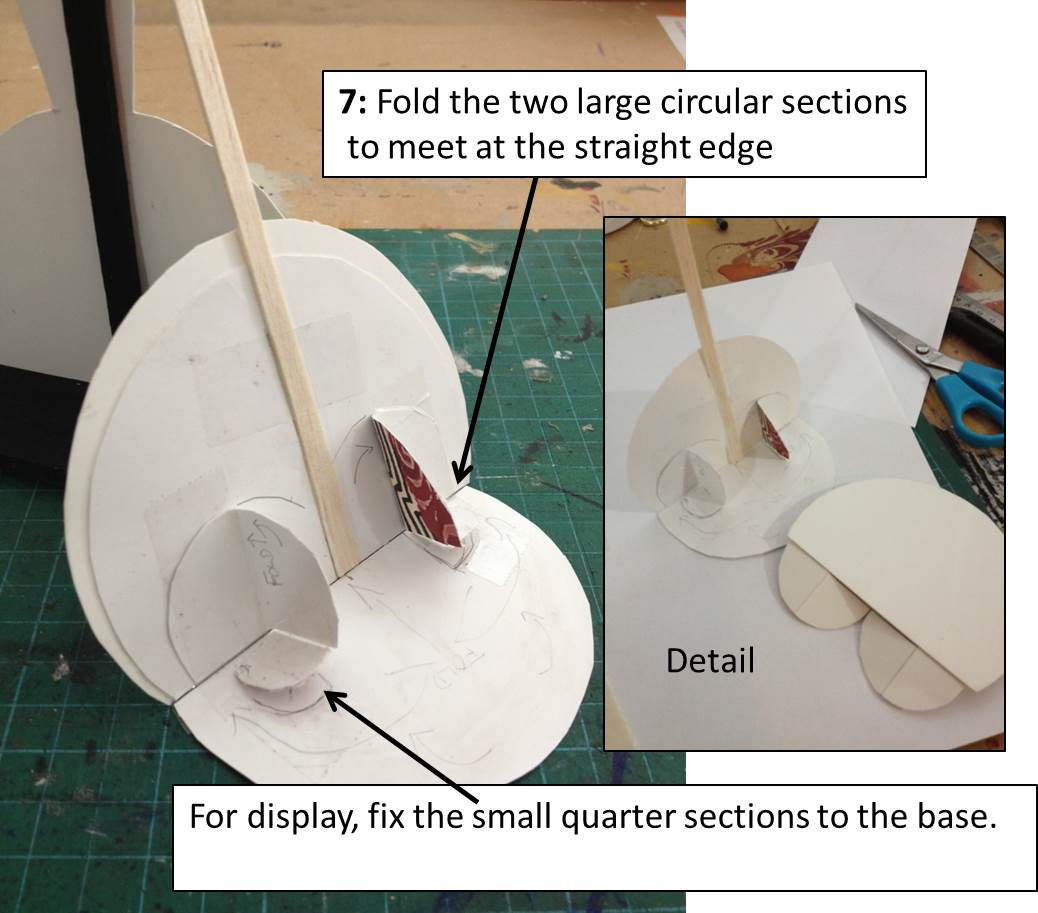
Step 7
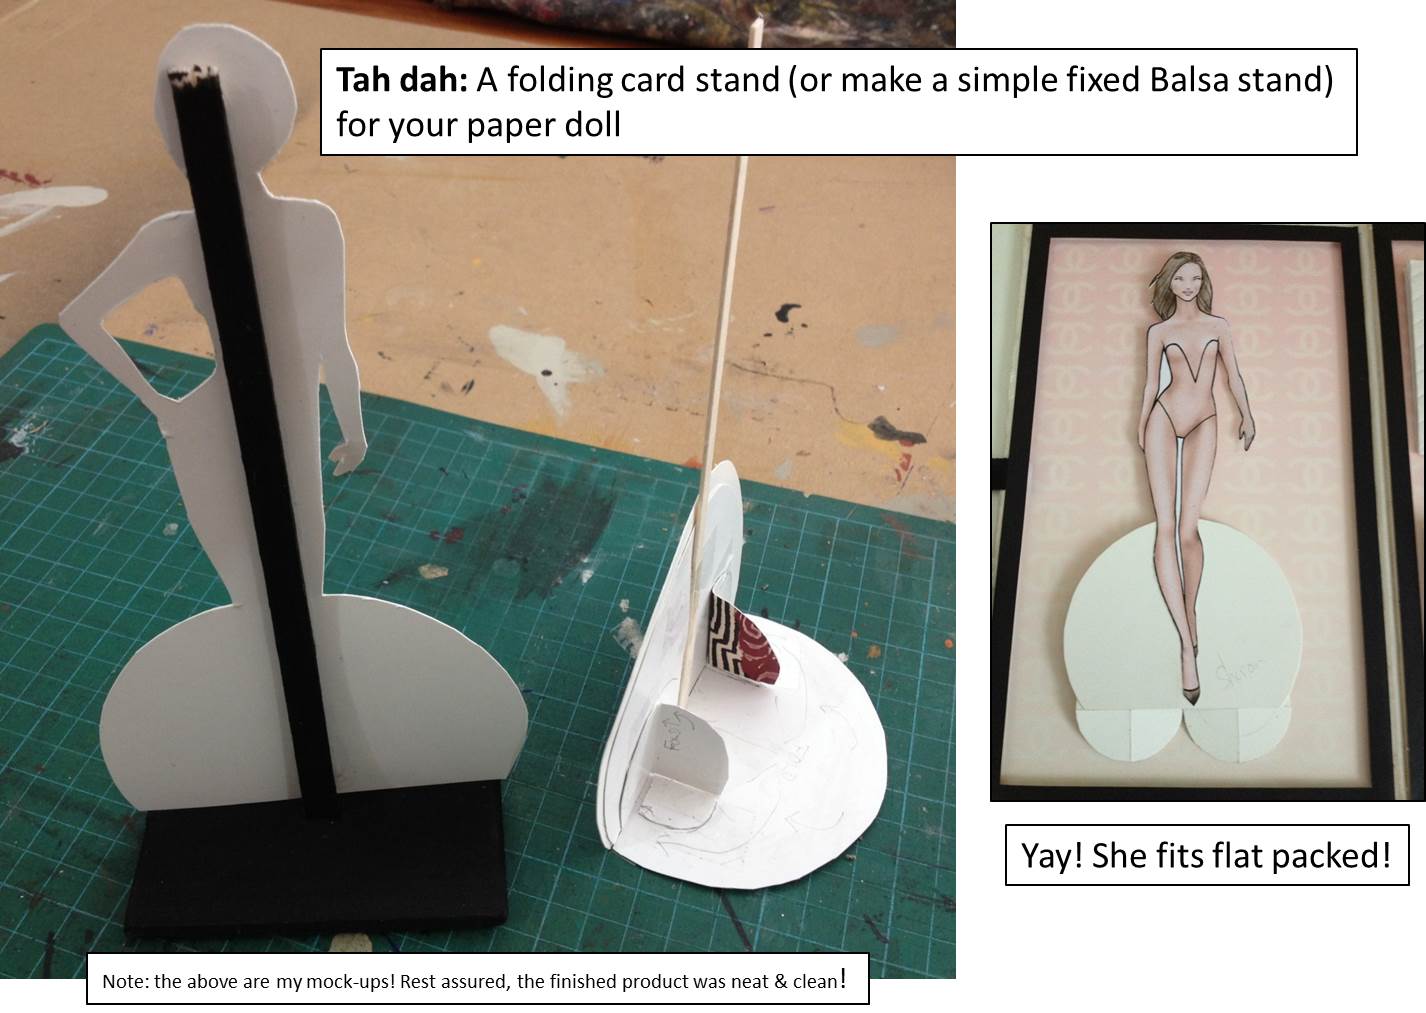
Huzzzah. Wasn't that fun?!
**By the way, the small circle bracket pieces can fold up behind the main base if one prefers. I just kind of liked to see the two little semi-circles underneath, so it's clear that there's a stand function available. I leave it with you.