A long time ago I made these paper doll gifts as presents to my best girlfriends in London. Satin and velvet covered folders full of clothes, very over the top and gorgeous.
Today’s instructional on making stands is for small, single pieces of jewellery, a bracelet or necklace, displayed on a 6 x 9cm card. It is sturdy enough to reliably stand up forever, or as a flat-pack, which you could make as giftable package.
Sit back and enjoy a long read, I have much to say
I begin from where I started with the paper dolls and I’m delighted to post more photos of them, they were amazing! I threw myself into that project and it was immensely enjoyable, much like this project
The original post is here
I admit those stands were not a super quick make, but the dolls were fairly tall & required a different solution to these jewellery display stands.
These smaller displays can also be very decorative and here you will find a guide to covering them in fabric scraps, the use of which is every sewist’s dream. Definitely my dream; the more I sew, the more those scraps keep making themselves lol
Plz note that I took all these photos here and there, so this DIY comprises a variety of sessions. None of this is mega-brain, but do it right and you’ll be pleased
The cards I am using are readily available 6x9cm jewellery cards but if you dont have them, and why would you, use any medium weight card you have to hand. That could be cereal box, in which case do two layers because that might not be beefy enough on its own, so cut out two cards & glue them together… or better still, glue two layers of cereal box card together before cutting out the cards. That makes for clean cuts. Consider leaving the glued layers under a weight overnight before cutting, it would be Gold Standard and you know I’m down with that. But I digress, and I’m bound to do so again.
If possible, make the stand a heavier weight than the card.
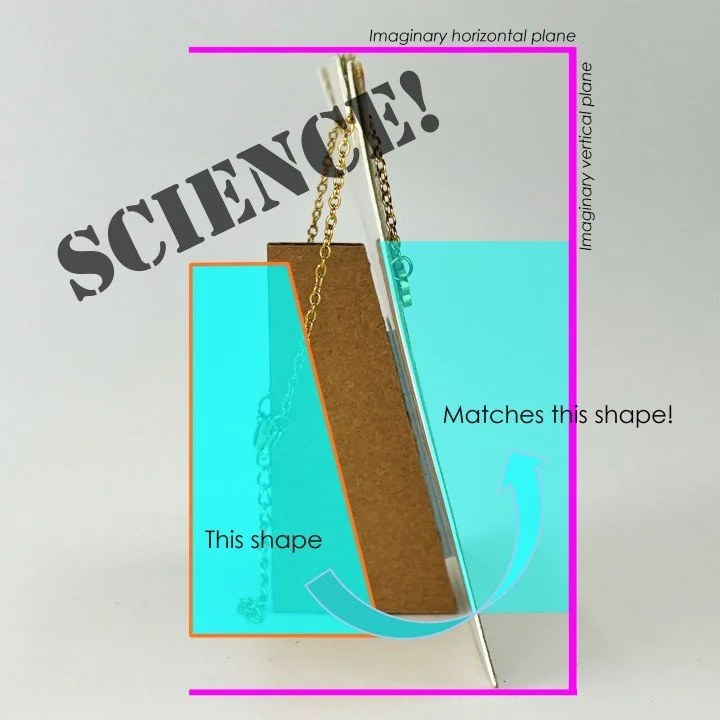
And warning there is SCIENCE ahead!
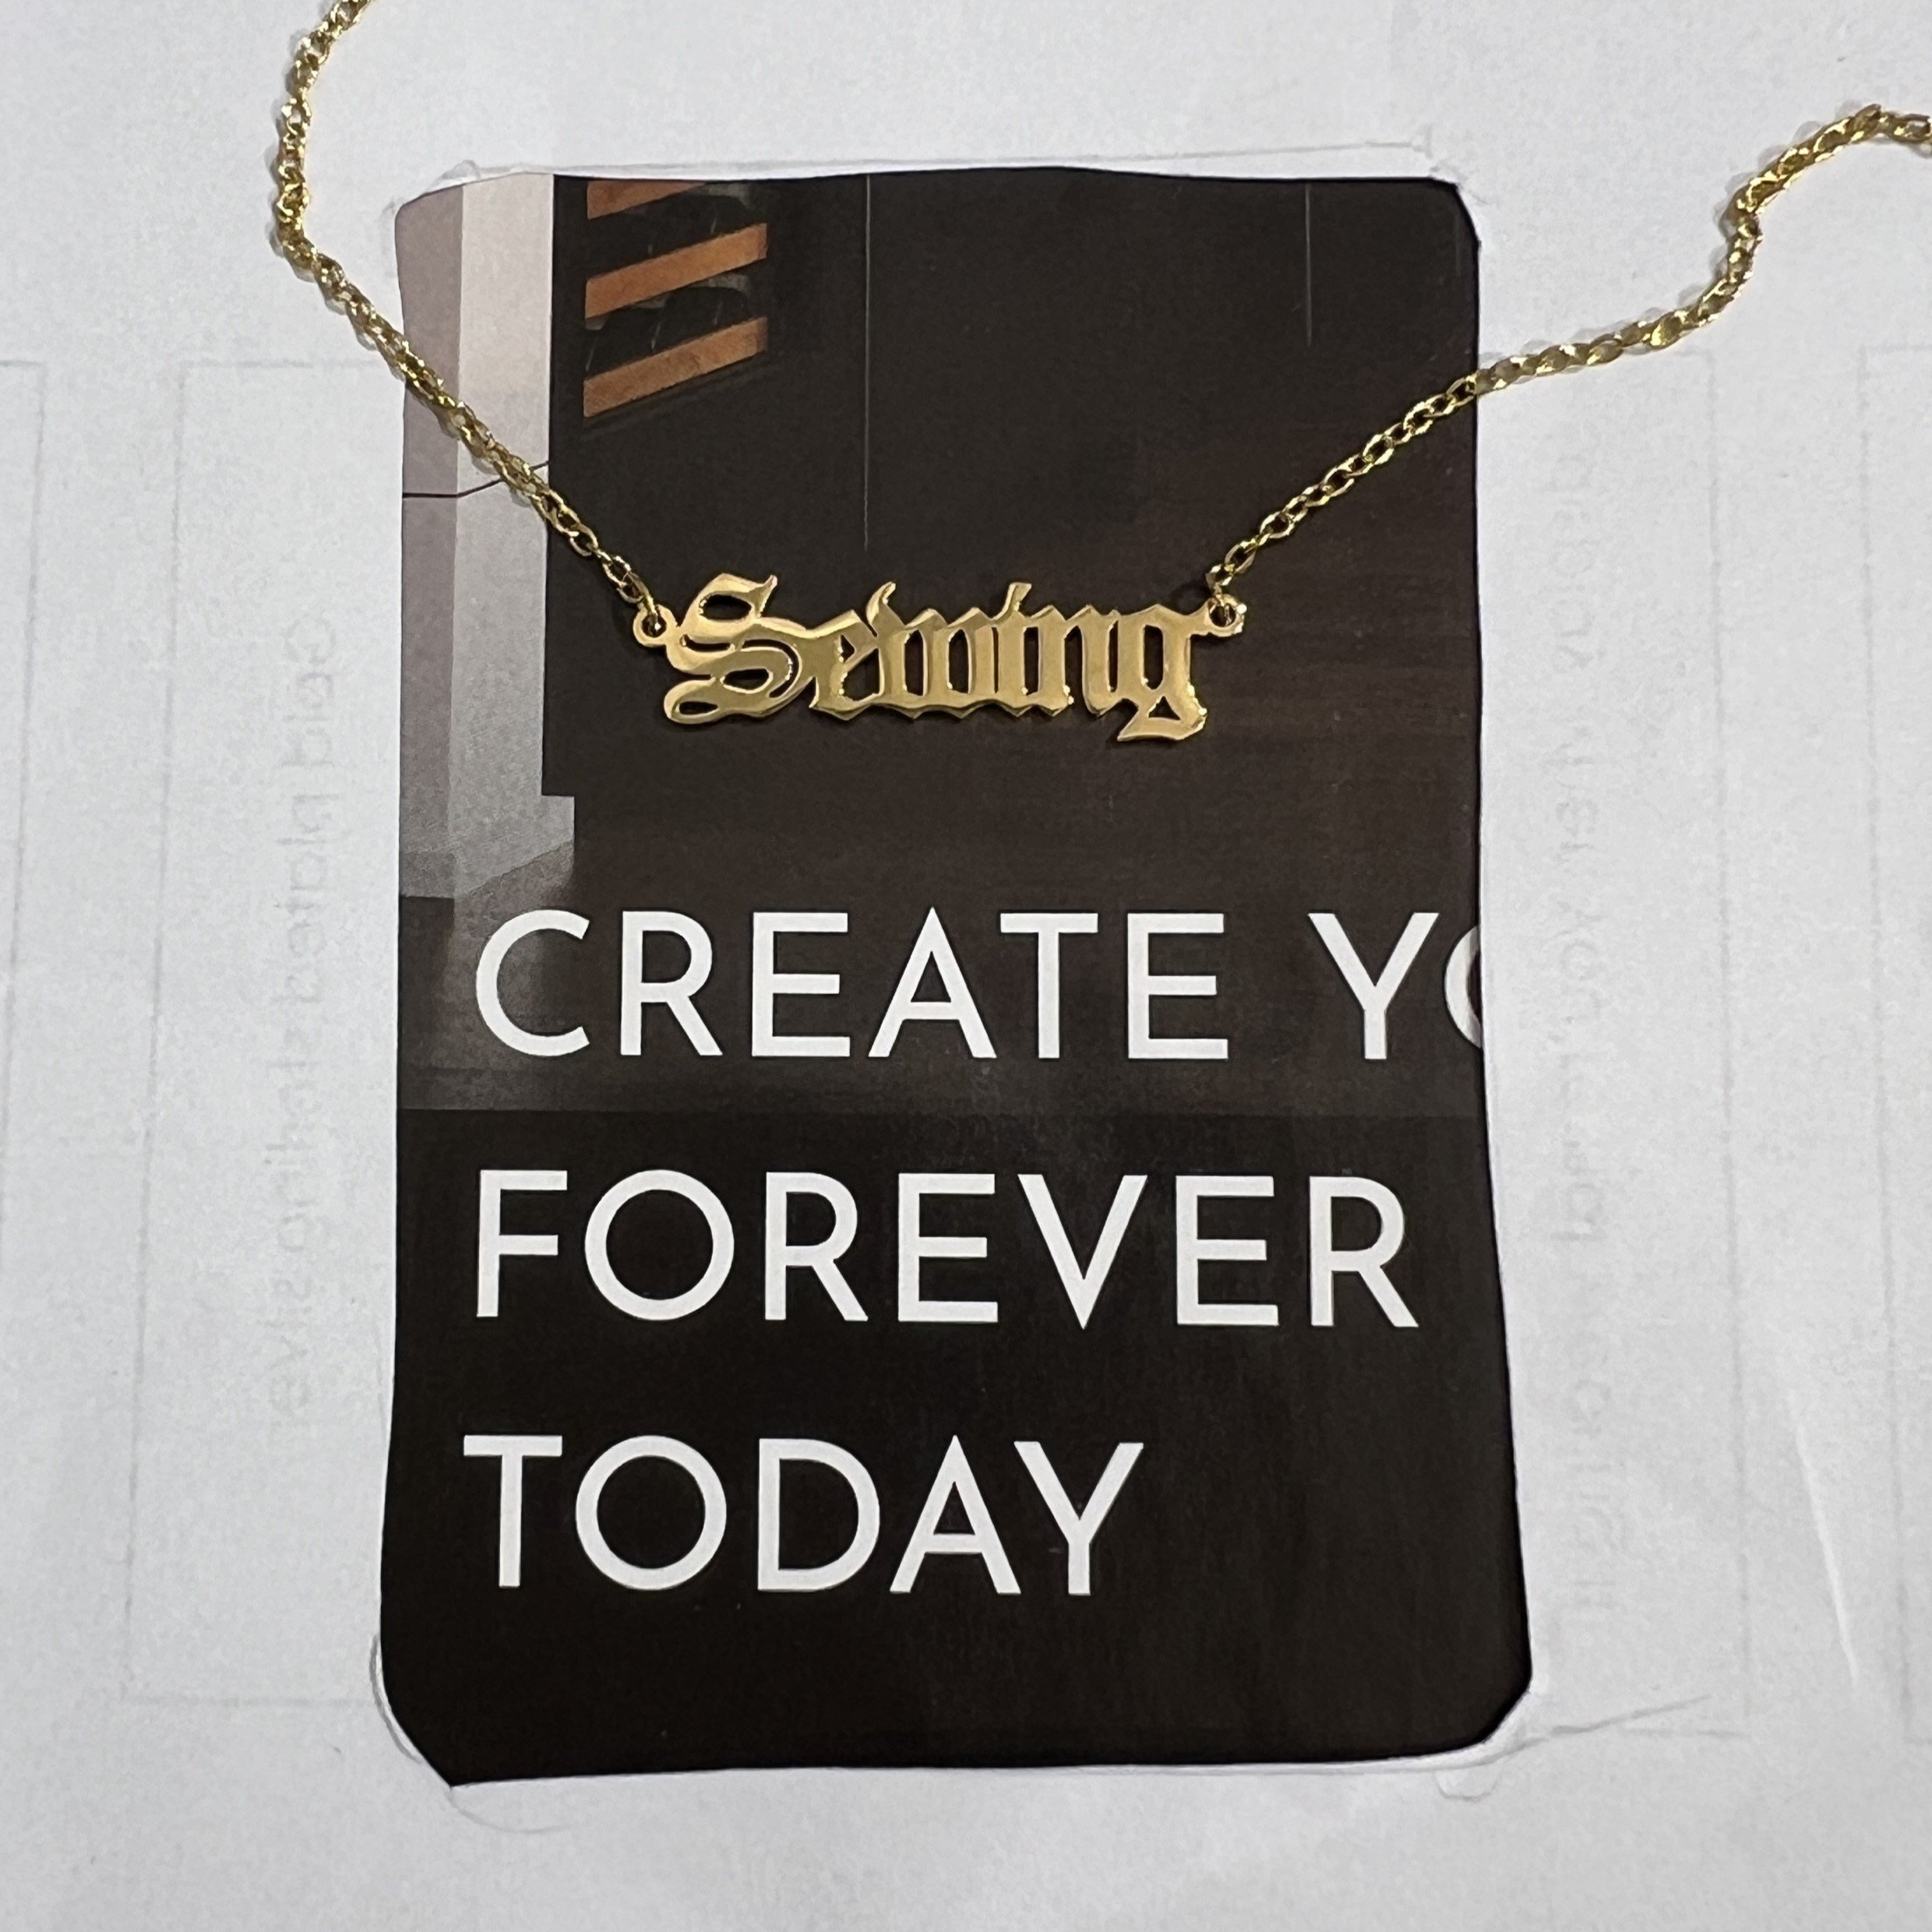
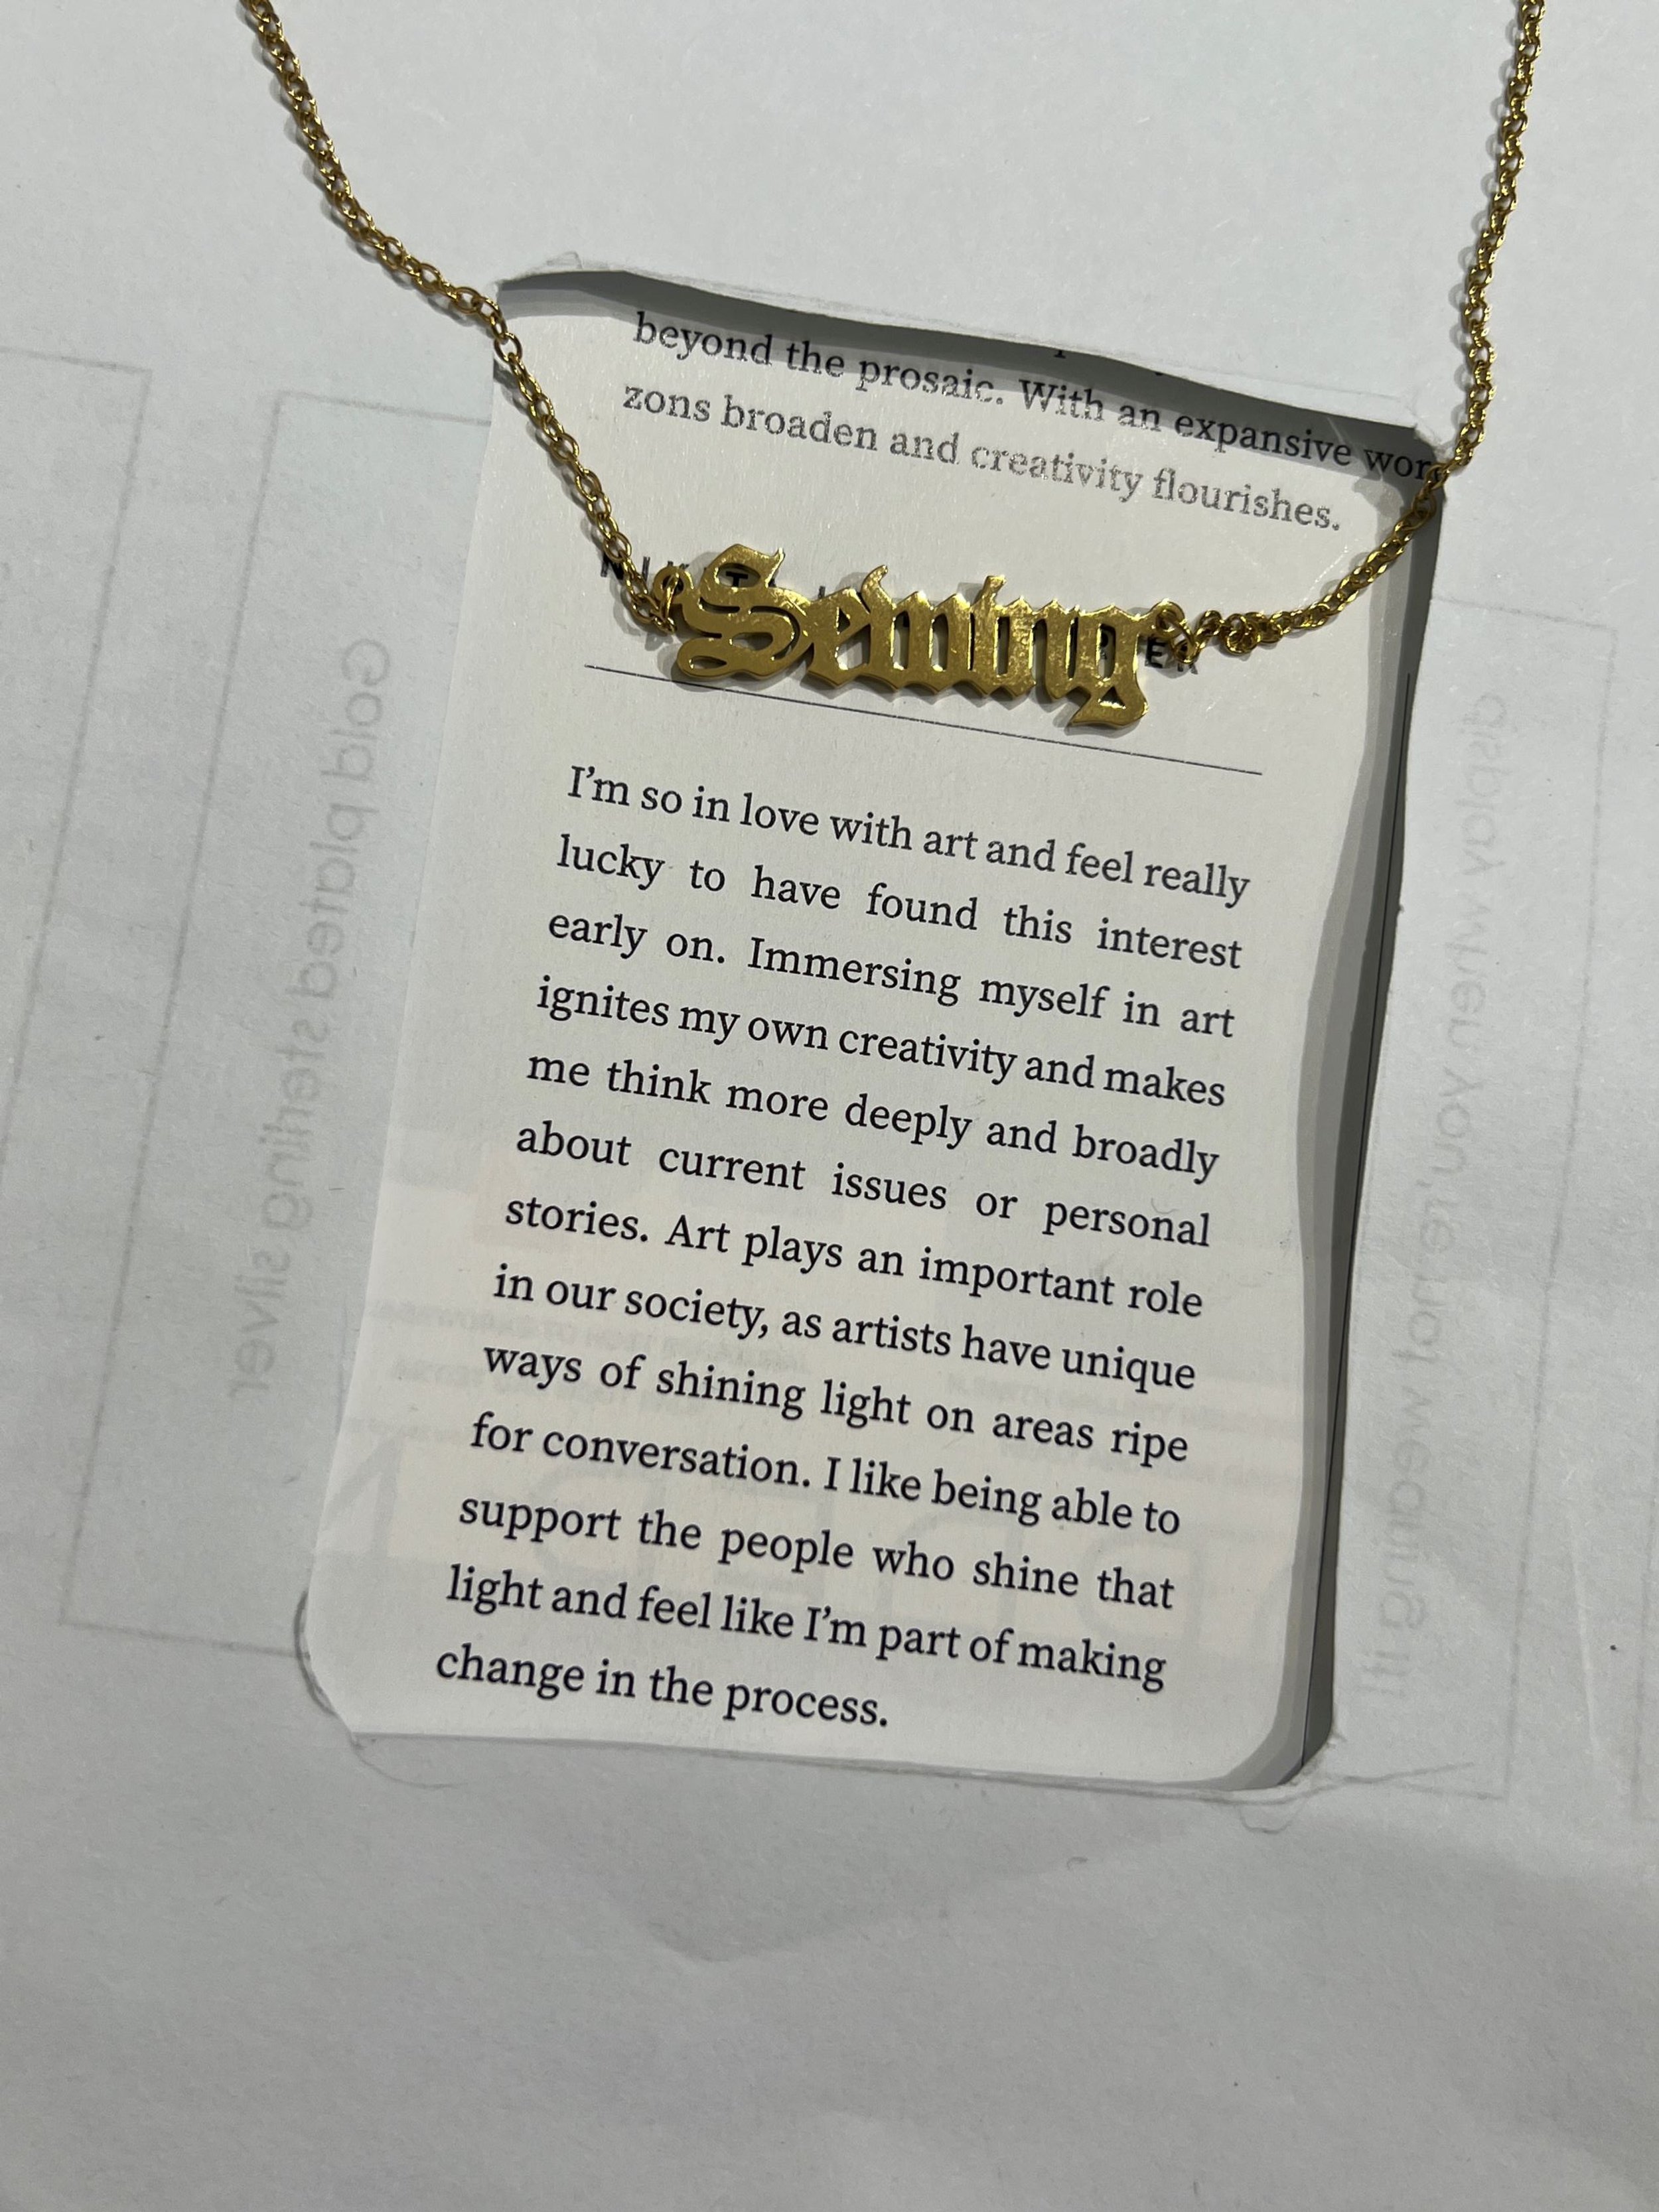
But first, please allow a moment to properly appreciate these, my products. Sewing and Quilting necklaces. I’m sure you’ll agree they are pretty major. Beautiful, solid products and they are all my heart
Anyway.
Covering these cards with scrap fabrics sewn together to echo the sewing/quilting theme is pretty cool, so lets take it from the beginning. BUT if you just wanta make the stand already, skip this & scroll on
TOOLS REQUIRED: metal ruler, circular blade/rotary cutter, snips to cut the corners, hard rubber brayer
MATERIALS: fabric, spray adhesive, card and sticky tape, baking paper
MEASUMENTS given down the page so you read the instructions first lol
If not using ready made cards, make the ‘cuts’ from which the chain will hang before you cover the card with fabric or paper or whatever. That way the blade only has to go through the fabric when you make the cuts, not the card as well
Spray both the back of the fabric and the card, you need both surfaces cooperating in locking down the fabric fibres
Lay the card onto the fabric and gently press together
Turn the card over so the fabric side is up, lay some baking/silicone paper over the top as a shield, and use a hard roller/brayer to press all over and particularly around the edges of the card so the fabric is at max hard contact with the spray adhesive
Always use a shield when roller and adhesive find themselves co-working, sticky rollers are disqualified from doing just about anything, so look after them, they’re amazingly handy things to have. [And never store with the roller down! The roller is always uppermost or even better, hanging off something, otherwise you will have a dent on the rubber which may ruin it for some future job]
If you dont have a roller, deploy a kitchen rolling pin, straight edged glass or jar or your pretty hands, concentrating on smushing the edges to prevent fraying
Feel free to weigh them down overnight under something heavy before trimming. You know I do
For the next part, its important to have really sharp snips and a circular blade/rotary cutter. Using scissors to trim the edges, and particularly the cuts to hold the chain, will bend the card and likely tear some threads. If using a blade like an Xacto, make sure its new and very sharp, and keep the angle of the blade low to the surface so it slides through
To trim, have the fabric side down, card side up, and line up a steel ruler right on the edge of the card, and with the rotary cutter, use good downward pressure when rolling the blade along the edge of the card and steel rule, so you cut through in one pass
“Its important to snip the corners at 45 degrees just a little bit, because doing so will be effectively cutting on the cross grain so they wont shed threads. Sharp corners can get ratty quickly ”
When making the ‘cuts’, place the circular blade as close as you can see to the beginning of the cut line on the card side, then press down firmly and roll it back slowly to the edge of the card. If you aren’t using ready made cards, and why would you, the length and position for them is given further down the page
If using a straight blade, also use a steel ruler and bury the tip of the blade at the beginning of the cut, drawing it toward the edge using good pressure, its lucky you made the cuts on your card already, because that fabric is gummed up with adhesive and the blade will drag the weave if you haven’t cut that card previously.
If you haven’t and that’s an even probability, you’ll need to mark the line on the card and then you will be cutting through the card first and the fabric is underneath. Go slow at a low angle of blade to surface/roll your rotary cutter slowly, and with very good pressure. Its tricky to make a clean cut through both of them.
Once that’s all done, flip the card fabric side up, place the baking paper shield back over the card, and roll over those edges again good & proper, re-trimming any fluffy bits if needed
If you aren’t covering the card with fabric, so much the easier! And so unlike me
Make the stand as follows…
the stand
Lets not do this
Do you see the image above? You see the blue tape appearing between the stand and the back of the card? This is how you get useless wobbly stands. The tape should be hard up against both card and stand, and I’ll show you how I do it
How to begin:
“lean the card backwards till you feel it tilts sufficiently in showing the display and looks steady enough. Not too lean backy, not too verticalish. ”
This dumb sounding quip is a guide to stands generally; you might need to make a stand for something big or small at some other time, perhaps years from now, and you’ll need to figure out the balance somehow. This is how you do it. Make a stand according to your desired lean-back and draw that shape as seen below, and that will be your stand. Affix it firmly just as this post details.
If you have something tall or weighty that needs a stand, I have successfully exchanged the tape for strips of fabric soaked in PVA glue and it works fine and dandy, as long as the joinage is tight, as it were
Maybe you’ll need to something to stand dead vertical. Thats when you need a deadweight or counter weight and the paper dolls post might help
Science! [*Measurements for the card shown above given down the page* It would have been more scientific to have the dimensions on the illustration. Not good at science]
Process in a nutshell: draw the shape onto some card, keeping top and bottom parallel, then cut the shape and sticky tape the longest side to the back of the card.
Mailable gift pack
You’ll be surprised that I will now elaborate upon that nutshell process at length, because there are two options, depending whether you want to have the stand folding down or a rigid stand that will forevermore be upright. So you can tape only one side or tape both, ergo these two options.
This can be useful, for example when I ship an order, it needs to flat pack, but at markets I can tape both sides on demand. Or direct to this post to DIY, thereby empowering everyone! Always here for you.
Either way, the KEY to successful work comes down to how well you place the tape. It has to RIGHT INTO the joinage of card and stand
First place two pencil dots at 3cm, on the middle of the card on the bottom portion. This is where you will line up the stand.
Cut your stand from something of structural consequence. If, like me, you are using corrugated cardboard, take your hard rubber roller or a rolling pin (or anything rolly) to it to compress it a bit, it makes it stiffer at this scale. You will still get enough thickness to tape to
lol
Place the tape on the longest, slanty side
Accept that my hands belong to an artworker and this is how they look. When taping the stand the tape should have total contact with the side of the stand, run your nail down it so you get a nice right angle, even if you have really thin card. In this way, you can get the stand and the card really well hinged. Are you still listening? Because this is getting long isn’t it. Imagine actually being me.
Then hold back the tape as much as you can and locate the edge to the dots you marked at 3cm mid point of the card, as close as you can, and positioned so the base is exactly meeting the bottom edge of the card.
Oh my God my fingernails but I cant stop now
I do it all at one time here because legend
tight
Legend
easy
If you want to have the stand foldable, you can stop here in taping only one side of the stand, and know that Blu-tack is a furtherance to standing up long term dont be ashamed of it.
To make this display really sturdy, continue to tape the other side of the stand as follows, in excruciating detail. You know I am a professional artist. My hands sometimes dont look like this but mostly do. Like I tell my mother, occupational hazard. Then she says, I thought thats why you wear black all the time and I say mum, fine whatever.
The stand can now only lay flat on one side.
Fold the stand down flat on the card & place tape. Scrape down the ‘flat’ edge (not the return) to ensure good adhesion. Do not scrape along the return like the previous step, just the flat of the stand
Hold the stand at 90*, straight upwards vertical, and run your nail down the tape right at the join to make a really tight corner. Tricky when you’re holding a camera with one hand but you should be fine
Do it right and this happens
BOOM
Stationary
It is stable and will stay this way
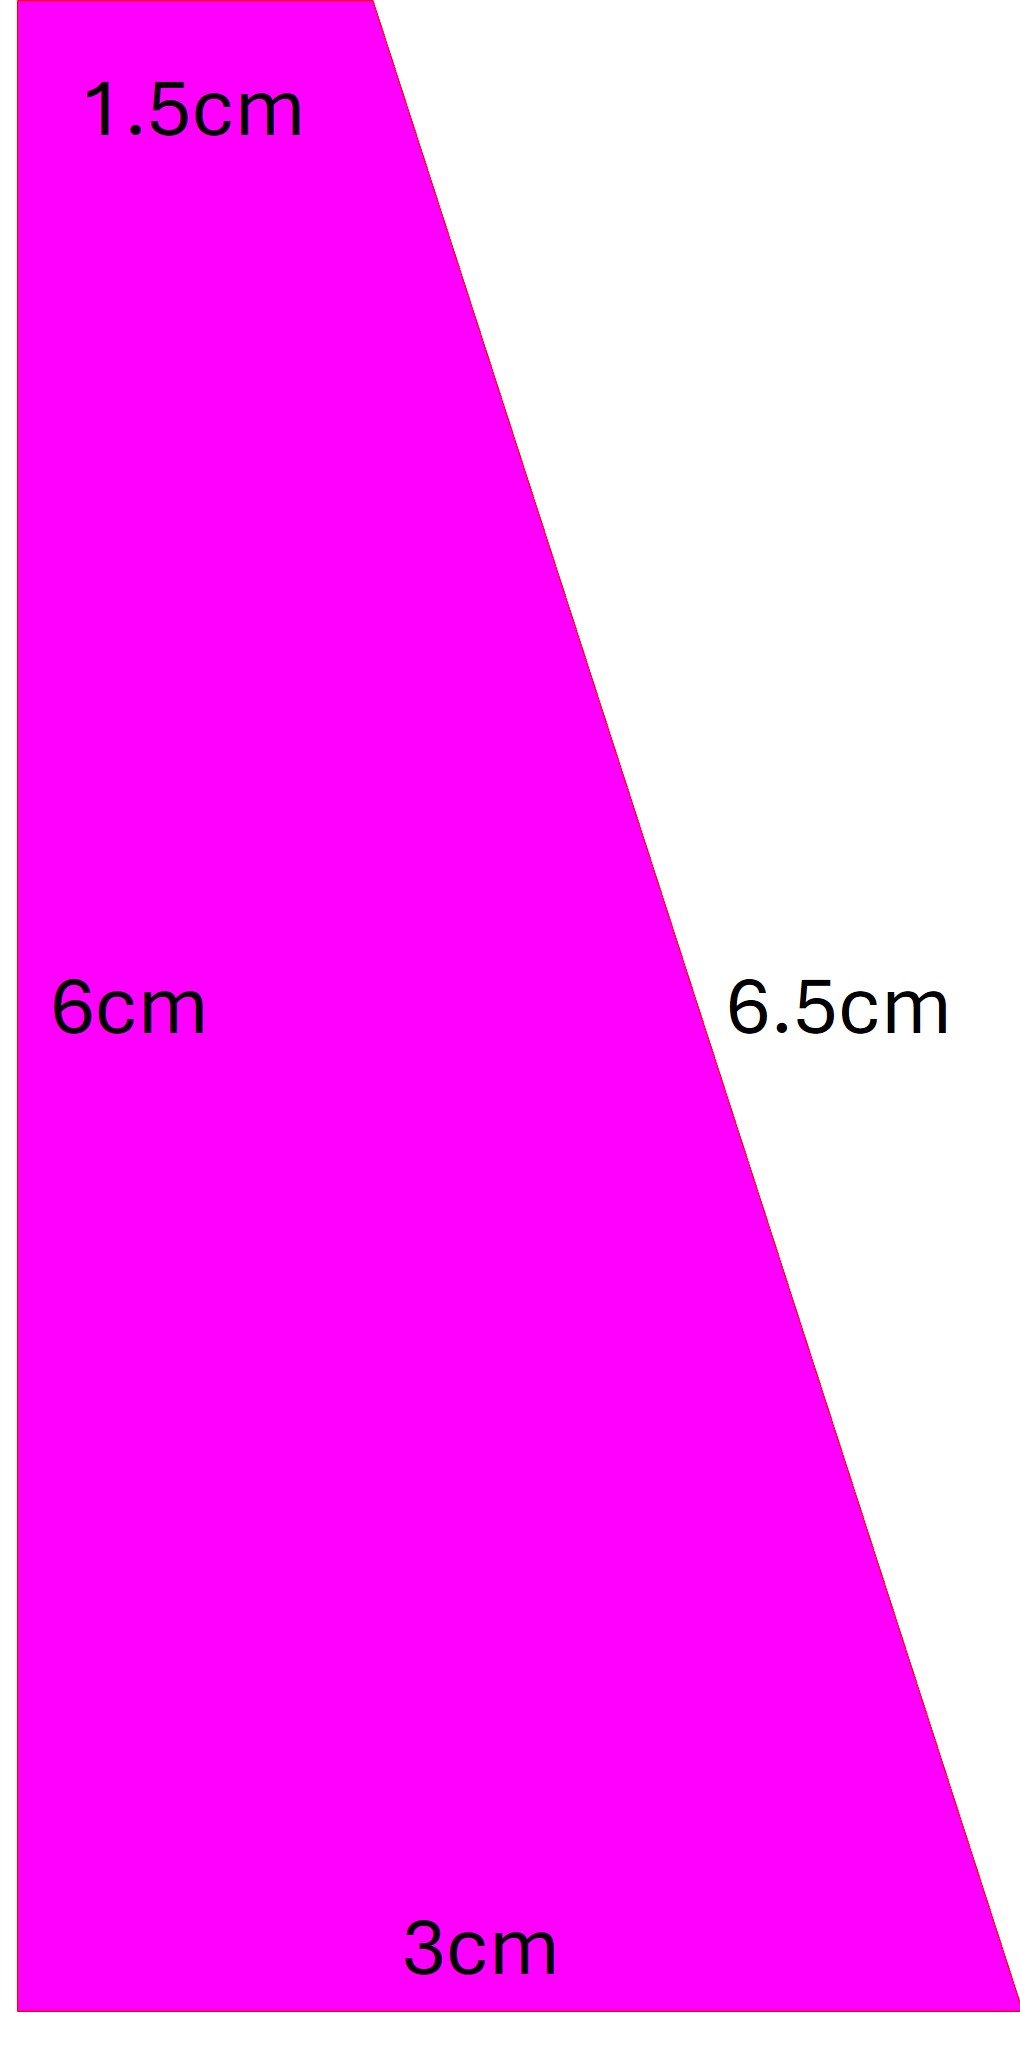
And here are THE DIMENSIONS
The Stand Dimensions
Given the card is 6x9cm
The *Cuts*
Given I am using very fine cable chain. You may need deeper cuts depending how chunky your chain
As the whole idea is making a display for whatever is on the show side, I leave the back as it is, masking tape on card, free in the sunshine… but if you want to make work of covering it somehow, thats on you. Zero need to do that imho.
Maybe you’ll think the stand would be better at a less acute angle, more lean backy, or it should be wider or longer…go for it! Its only a small bit of cardboard so why dont you check it out & see how a different size goes, no biggie
Vintage Pucci silk
Then I have an idea.
Respect to Abdul Abdullah and one of the best paintings I’ve seen.
I flick through an old Belle interior design magazine then go to town on a two year old copy of Art Collector magazine I got for free at Sydney Contemporary two years ago and have some fun
GOLD
DIY note; in doing this it helps to cut a rough ‘viewfinder’ a little bigger than the card, like a window to help frame whatever looks best.
Cut out that good area a little oversized & spray adhesive it to the card.
Trim it & make the cuts with a steel ruler & sharp blade
If the paper is flimsy, or if your card is flimsy, use a double layer of card, one on top of the other to give it enough substance to stand up well
Omg biting commentary on art world
Respect to Sabrina Baker, Anja Loughhead, Nadia Hernandez, Michael Lindeman and our fearless leader Oliver Watts, who’s work appears on this piece of card
Sturdy.
Possibilities! Woven multi-coloured card, or covered in washi paper or sewing patterns or sewing instructions or, or embroidery on the card, it would be nice in a Sachiko style embroidery, or could perforate it so when theres a light coming from behind it glows thats enough now
Perfect. This is it.
Then my interest peaks and this project has run its current course
Good luck and please come back to tell me how you go and any tips I’ve missed! Cant imagine I’ve left anything out…
(Sewing and Quilting and Artworker necklaces available here!)
Thank you!
