

Because I saw this
The fold of the fabric & the buckle stirred a fancy within to see how this would be made

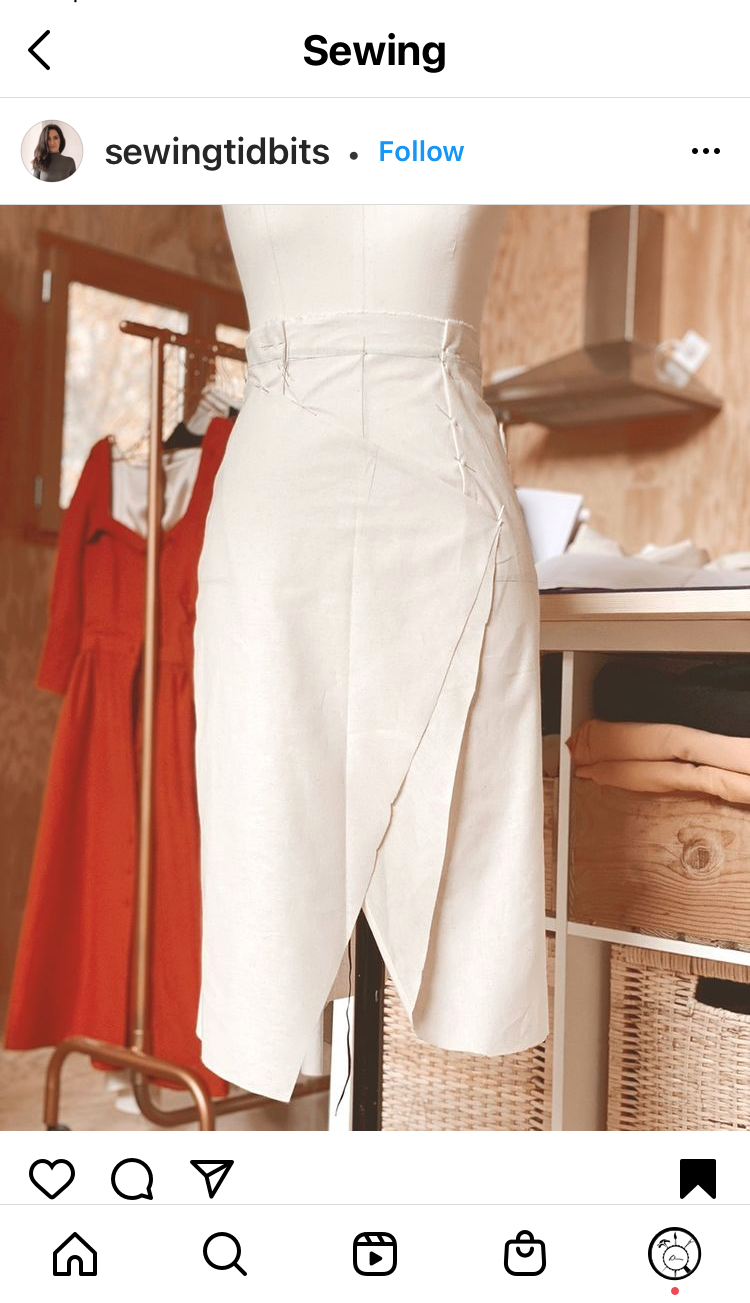
Delphine of Just Patterns, aka sewingtidbits

And then this
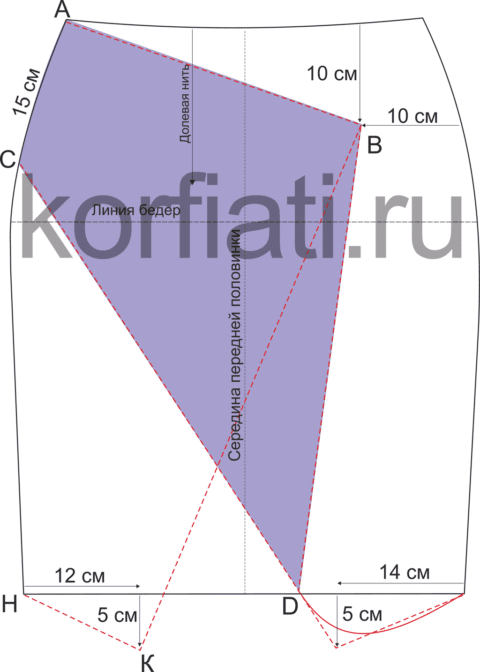
Pattern dimensions by Anastasia Korfiati here

Spoiler
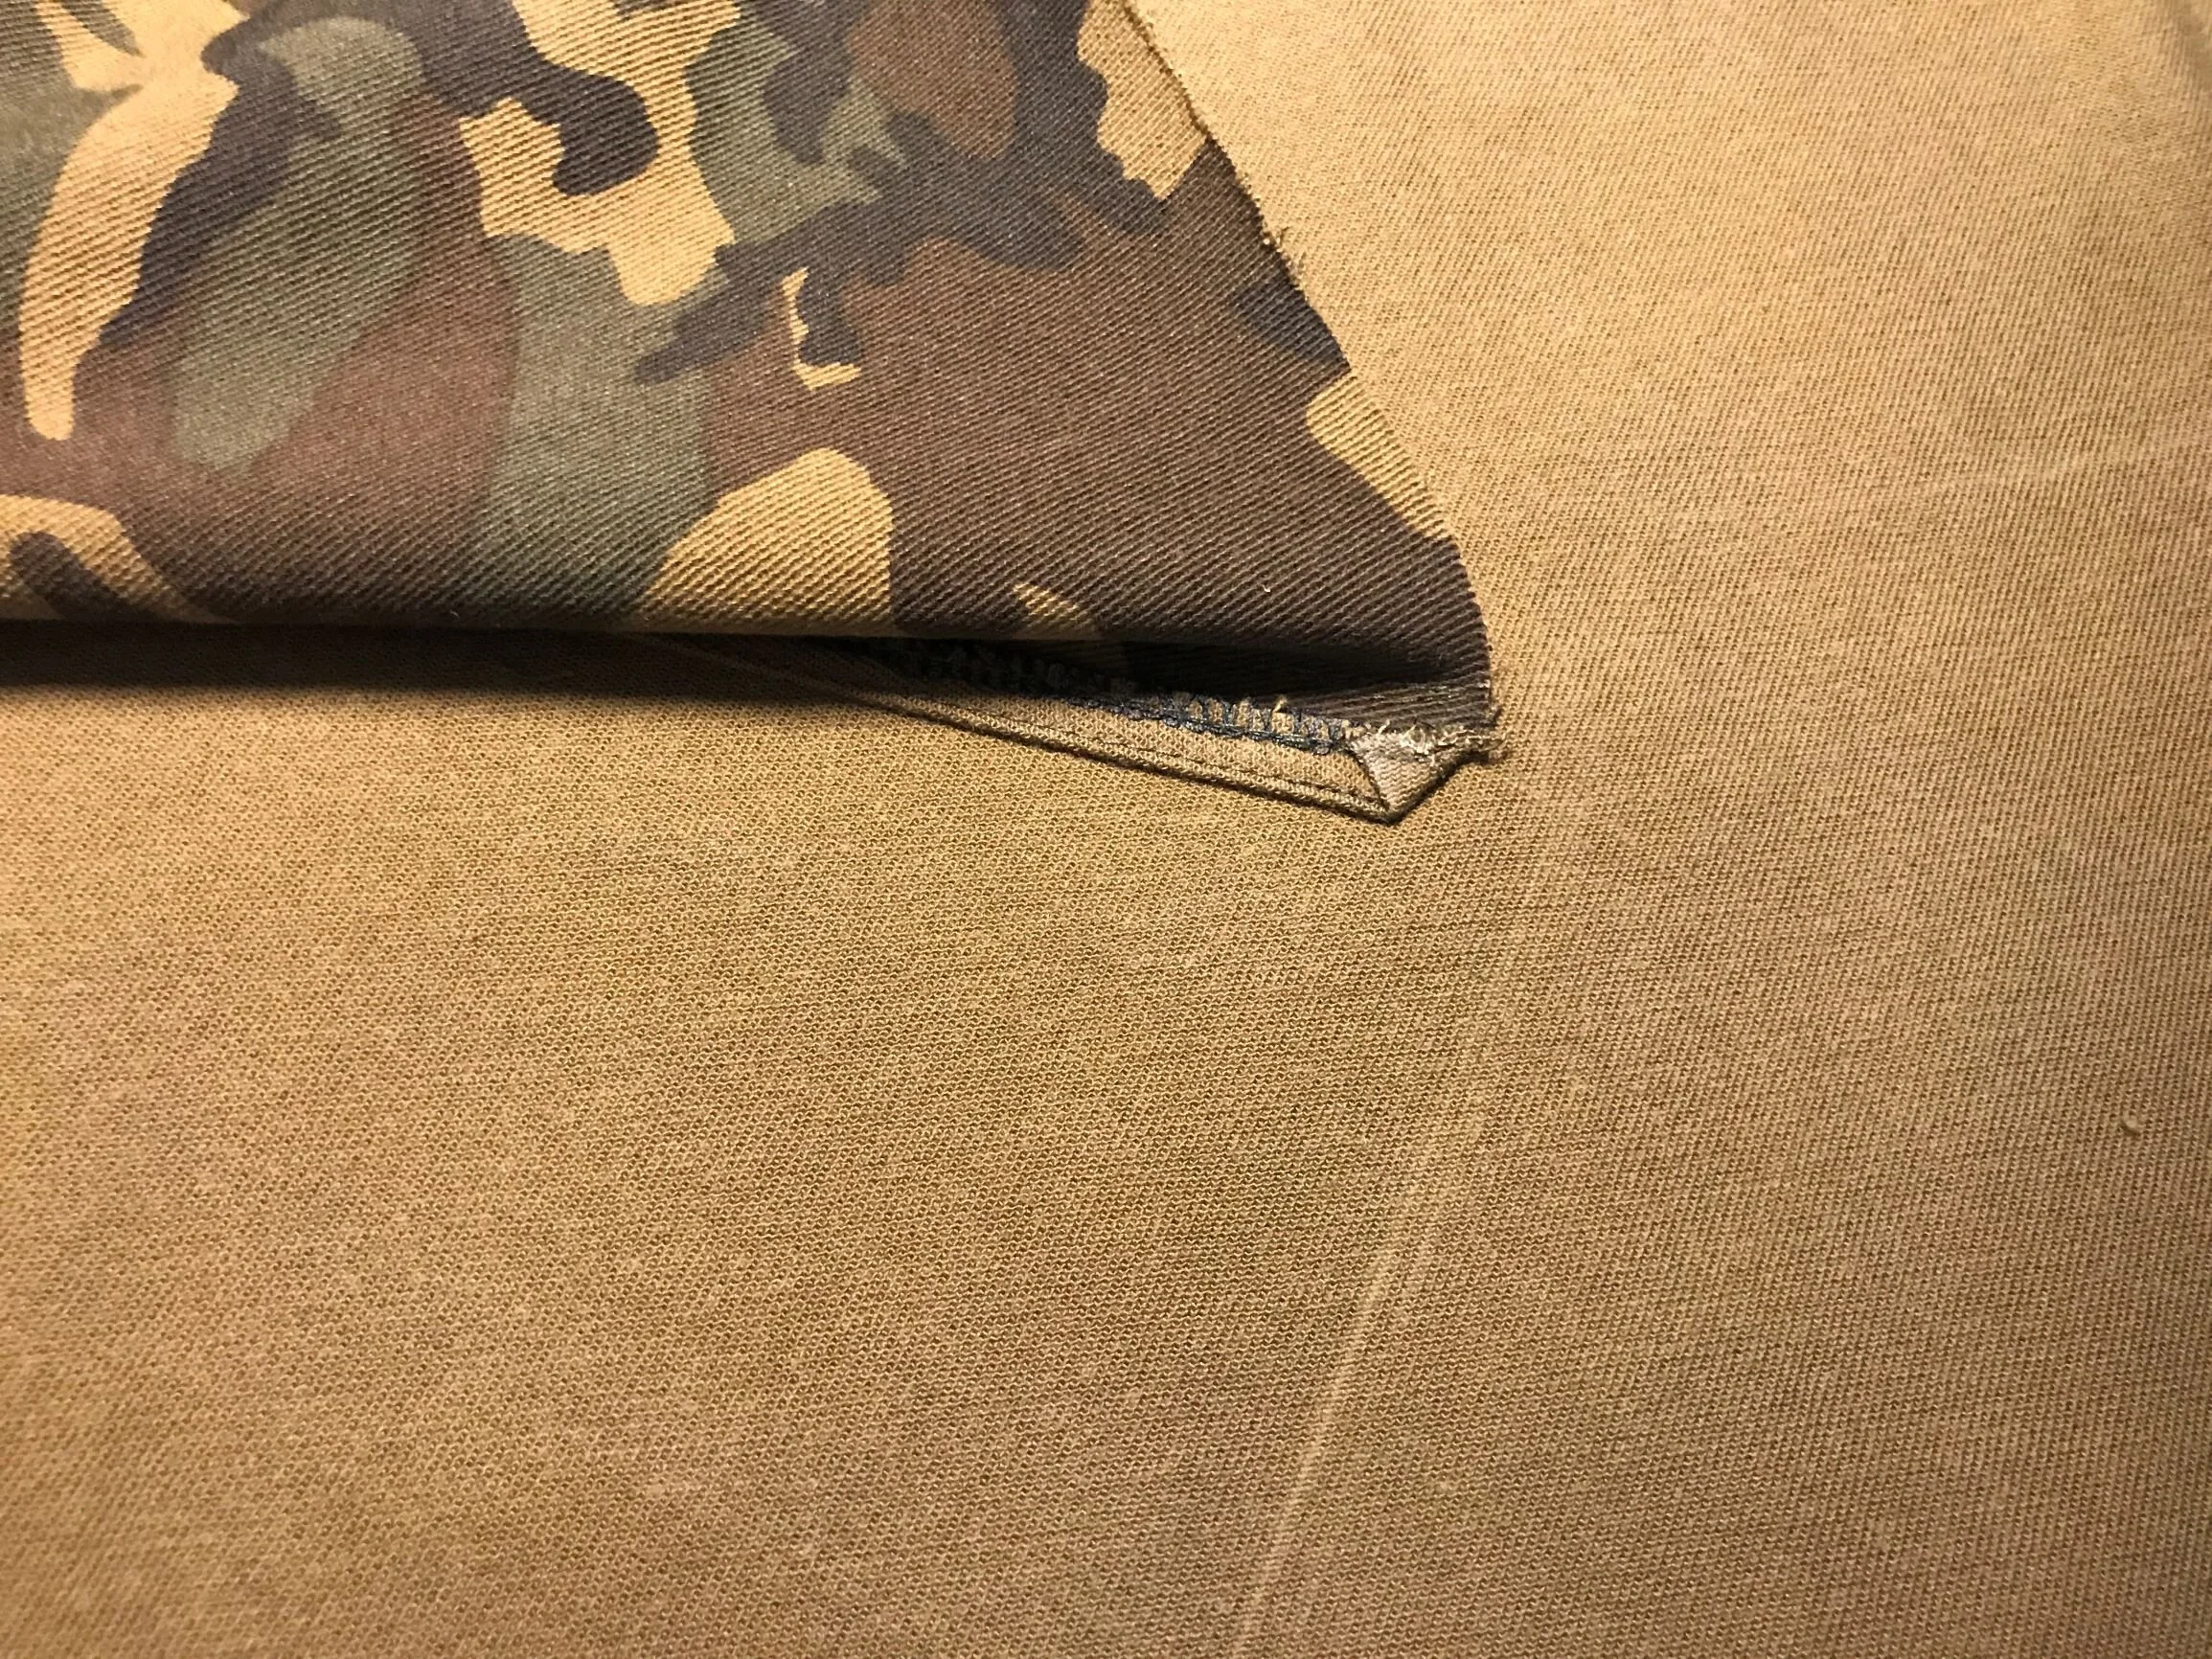
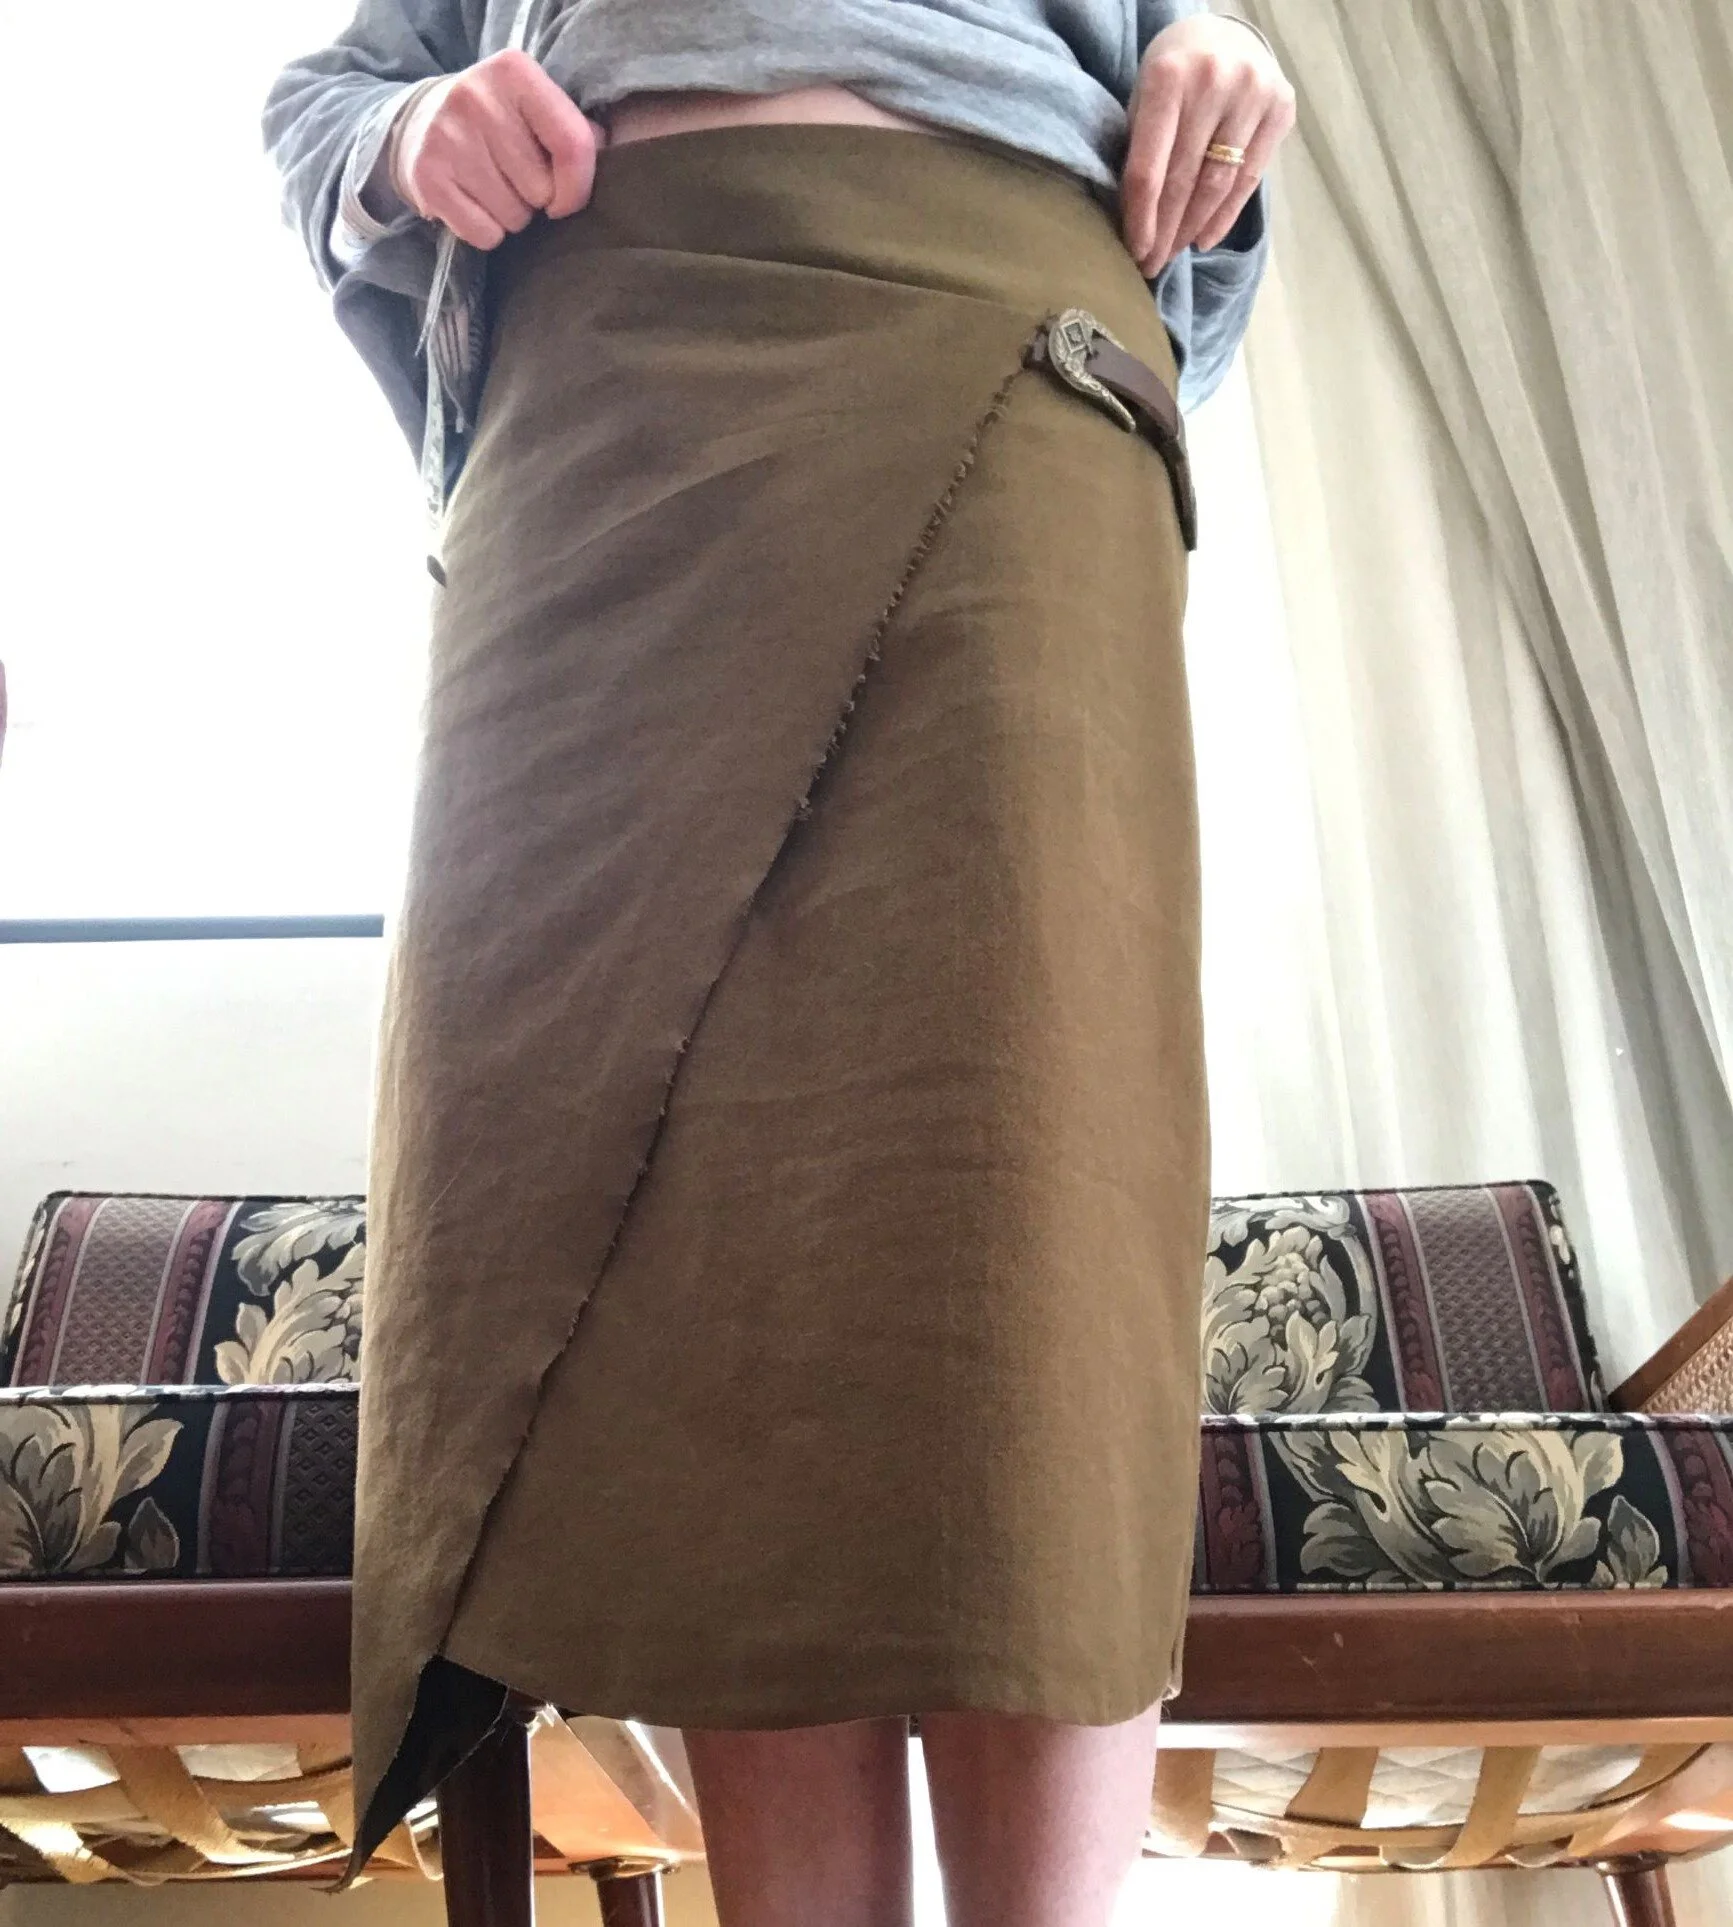
This is how it ends up; not an envelope but a faux wrap style with buckle detail but its good.
The need to experience how something is made is central to my art practice, its largely what motivates me to action. I need to see it when it’s made, to see what it looks like, to go through the start to finish of it, to find its meaning, examining the reason of things. In a way, that applies to my sewing too (it’s speaking with my hands and mind) but its much more accessible (meaning is fairly self evident & garments are ultimately static) so once I’d seen these images, I was intrigued, it was too much to resist & I had to get on it, I had to make a skirt. I had to make a skirt!

To begin with, let’s establish some truths around me & this garment’s design:
I am nothing like Dion Lee’s fit model or even his targeted age demographic so this design it wont work on me as it does on them
my shape is nothing like Delphine's, so its not her look I’m after either
the measurements on Anastasia Korfiati’s pattern are not graded to my size
but. But….

Incredibly cool pattern shape
This is why. It just took my fancy, I had to see how it was made, so I made one.
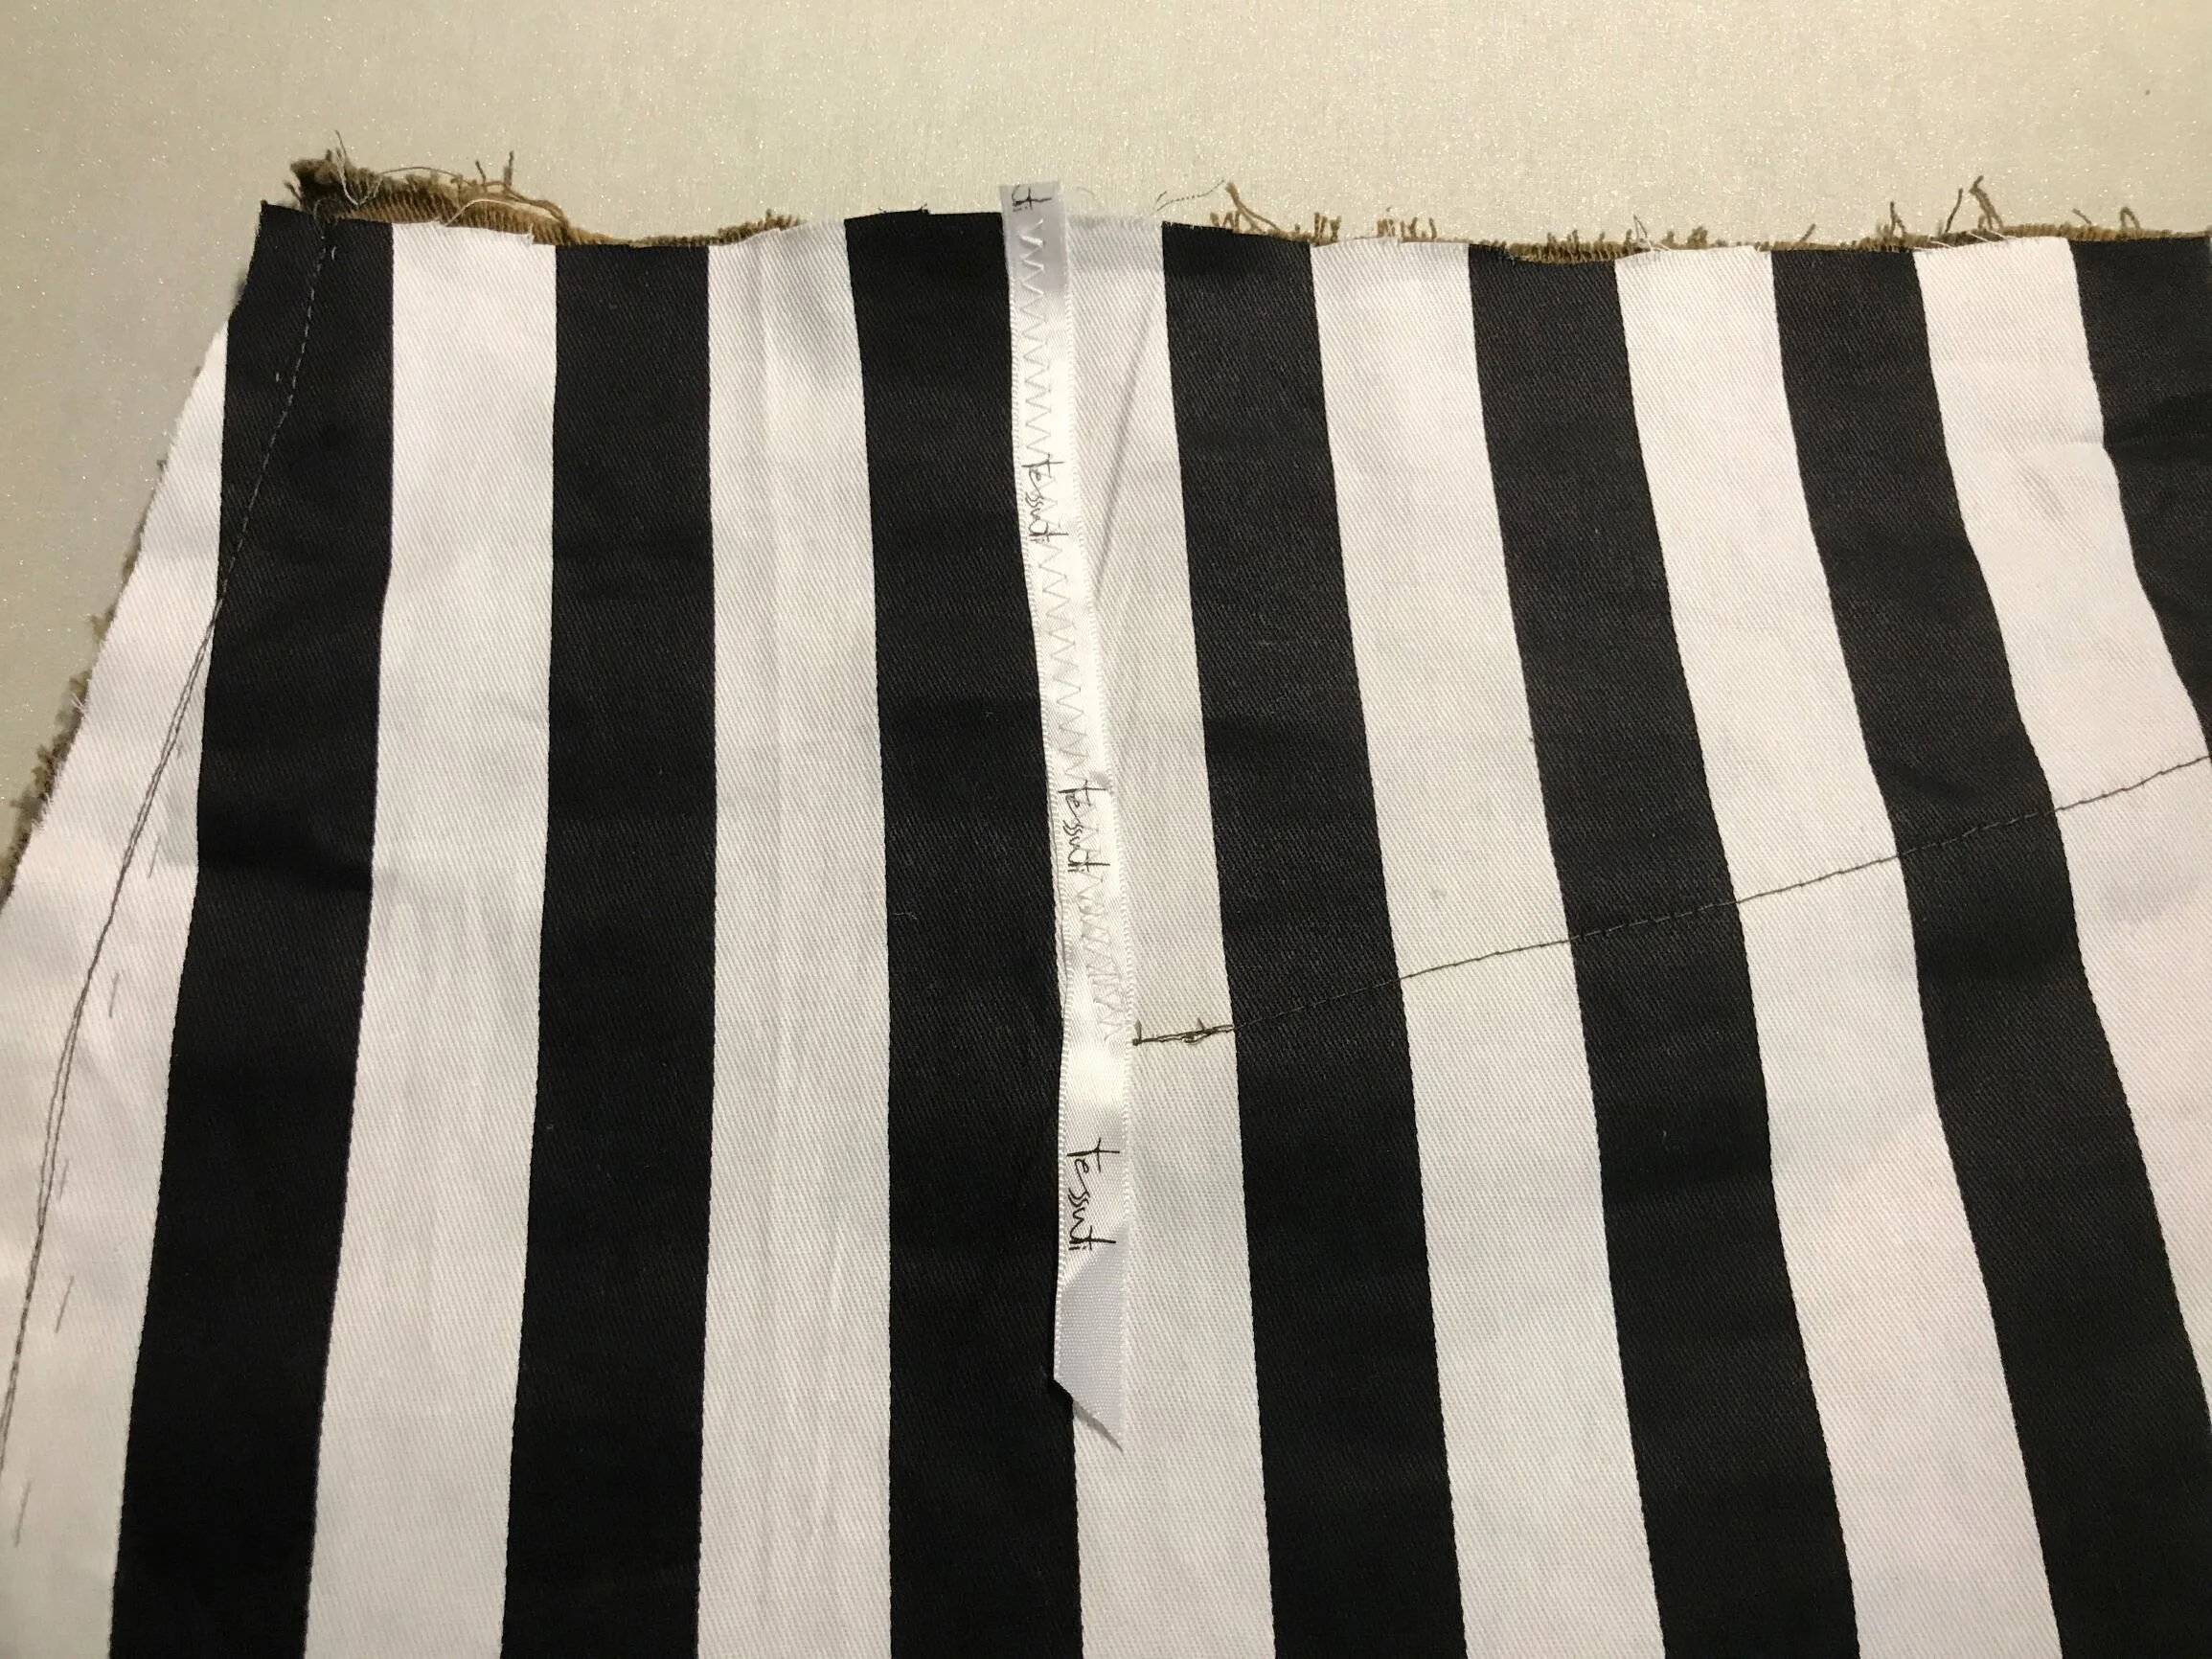
I bought several meters of this stretch cotton drill when it was on sale from the Fabric Store a few years ago, because of the lovely olive green on the wrong side (not keen on the camo) and because it has a really soft handle and is very stretchy & rather heavy. It’s colour, coincidentally, matches that of a previous buckle related inspiration….
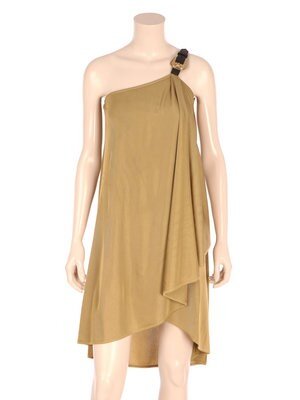
Silk jersey kilt buckle dress by Alexander McQueen from years and years ago

ooo la la!
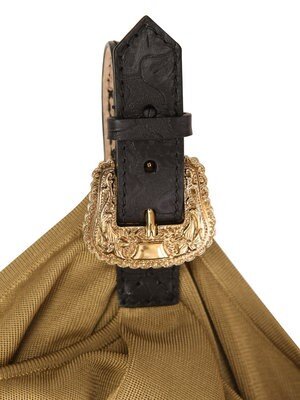
This is my Tessuti Kate top - inspired by that Alexander McQueen dress - which I converted to a cowl/drape front bodice complete with leather straps & fancy buckles….so its nothing like the Kate top at all. Tessuti ran a competition for Kate Tops but I went too far (typical) and didn’t get a mention. I wore this top out twice (its tricky to re-wear something so memorable) and its amazing, but it was sacrificed for the betterment of this new project. I needed the hardware.
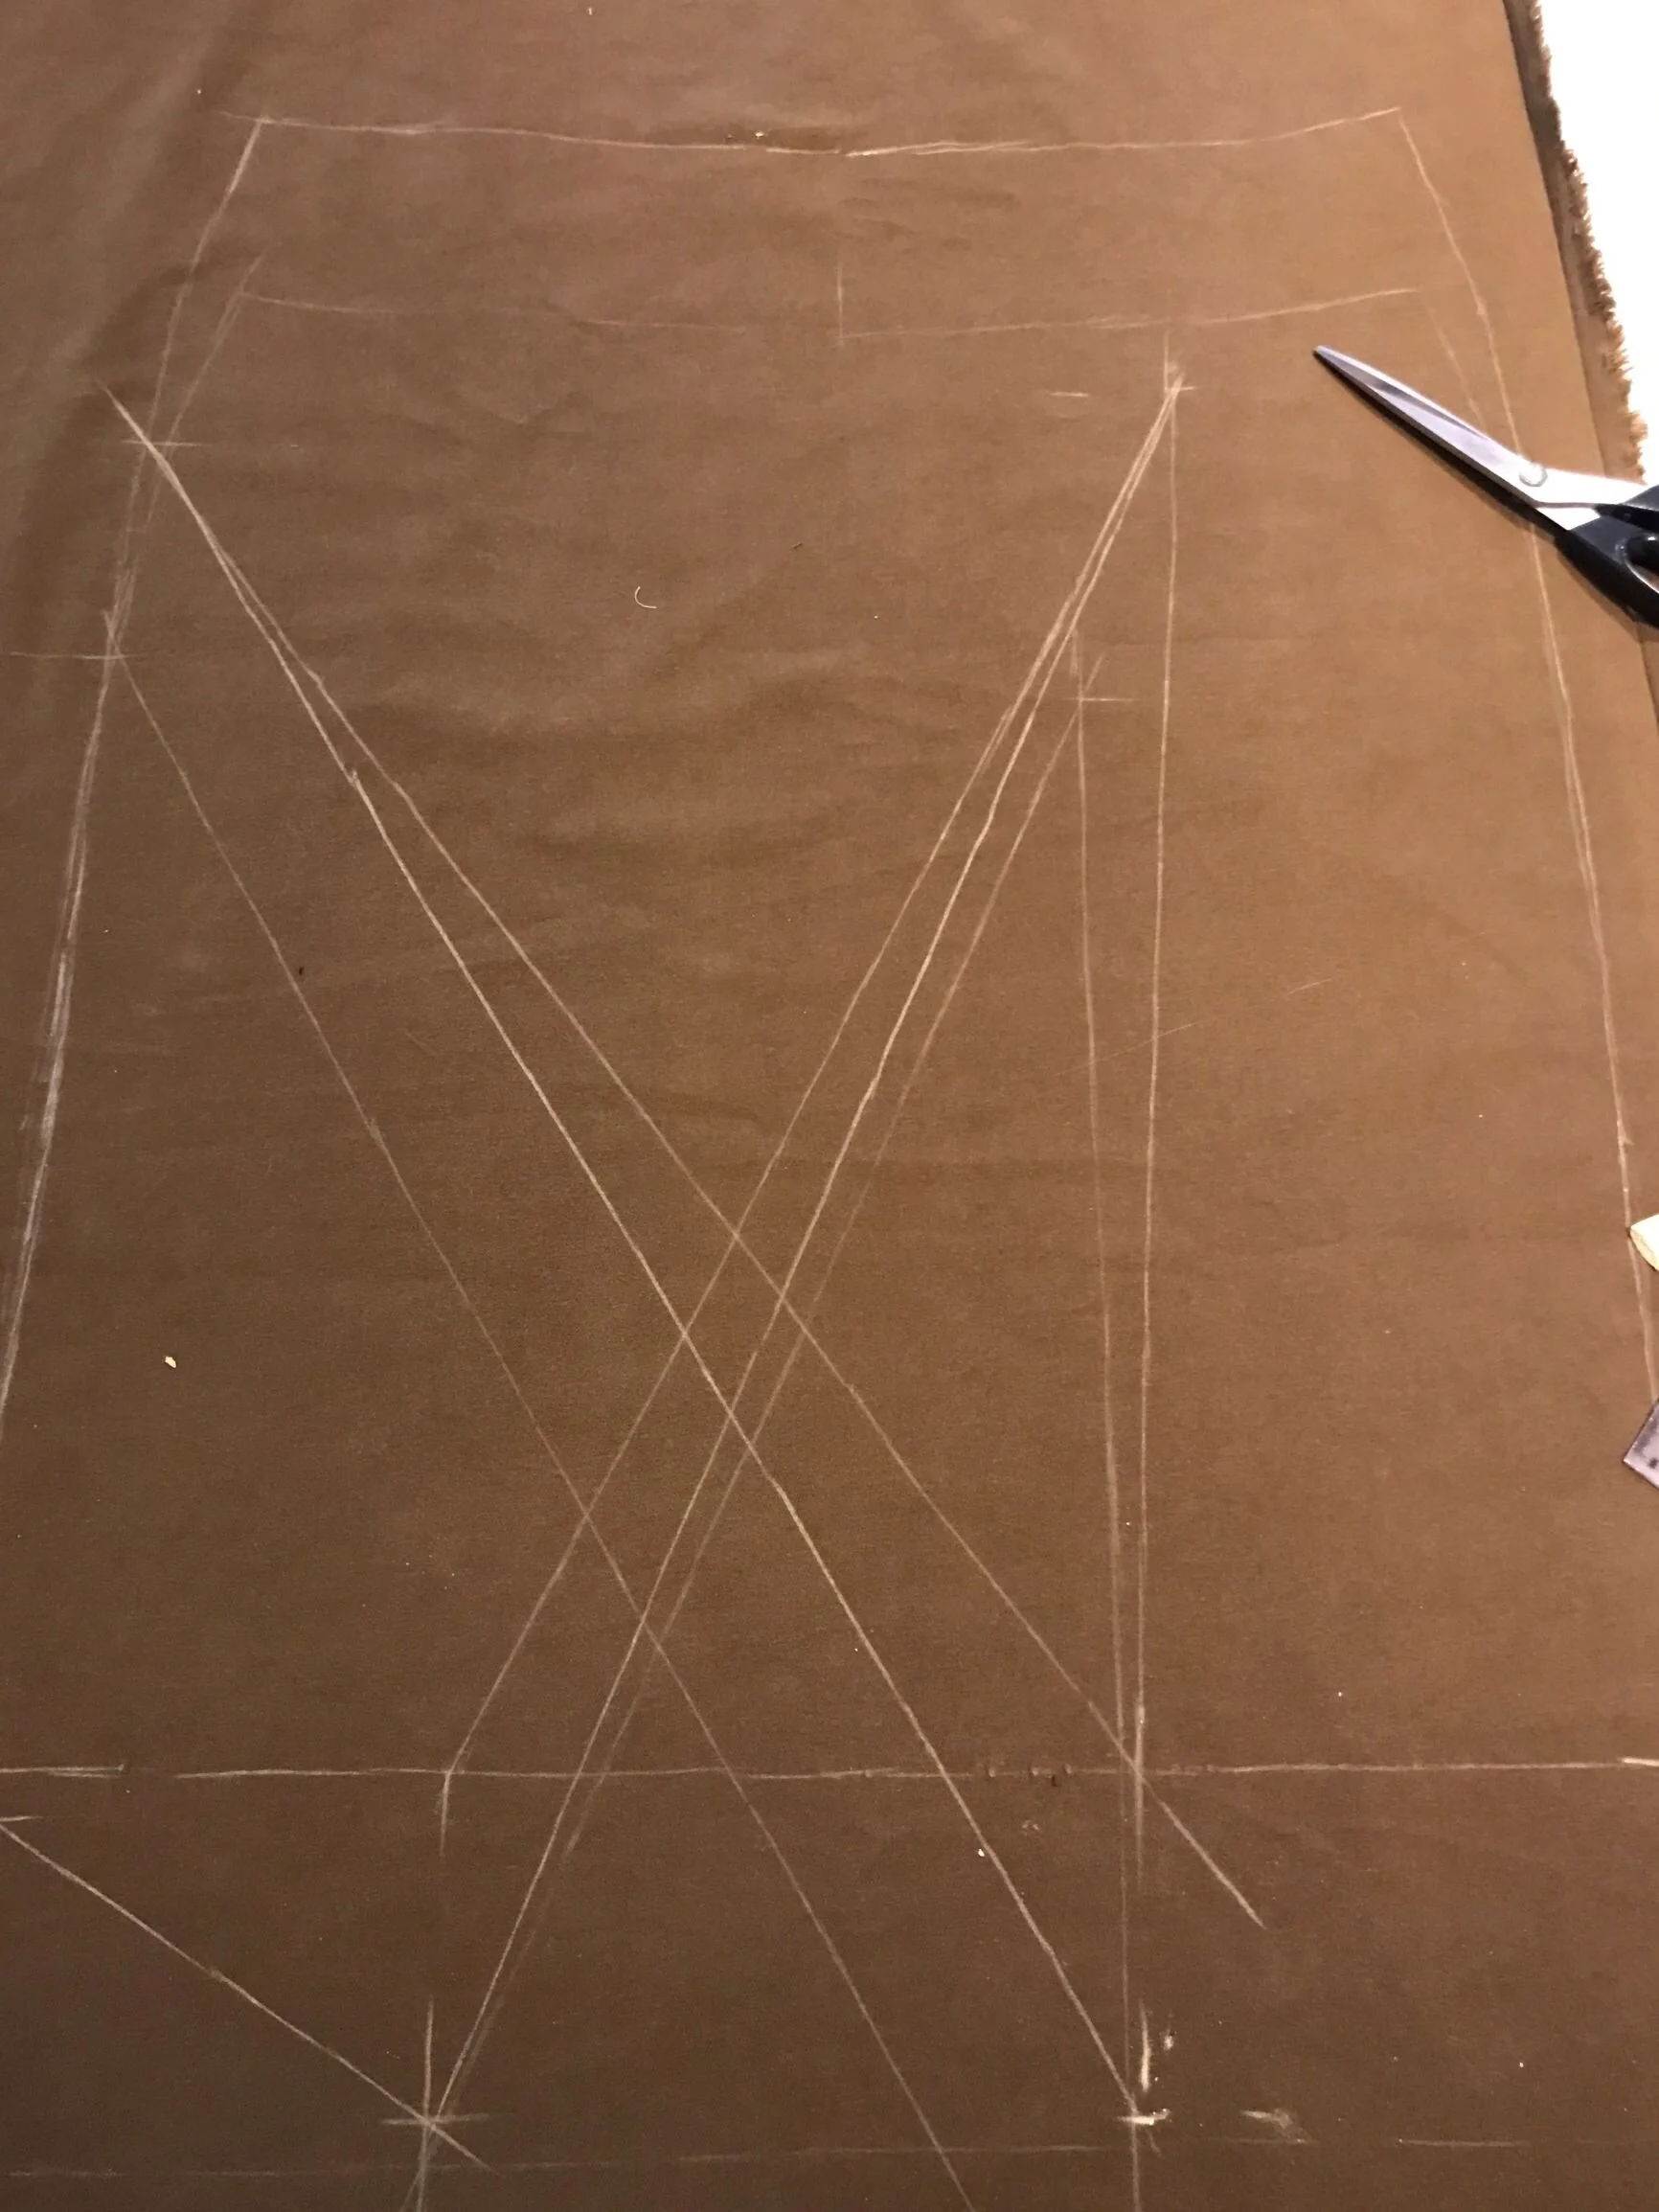
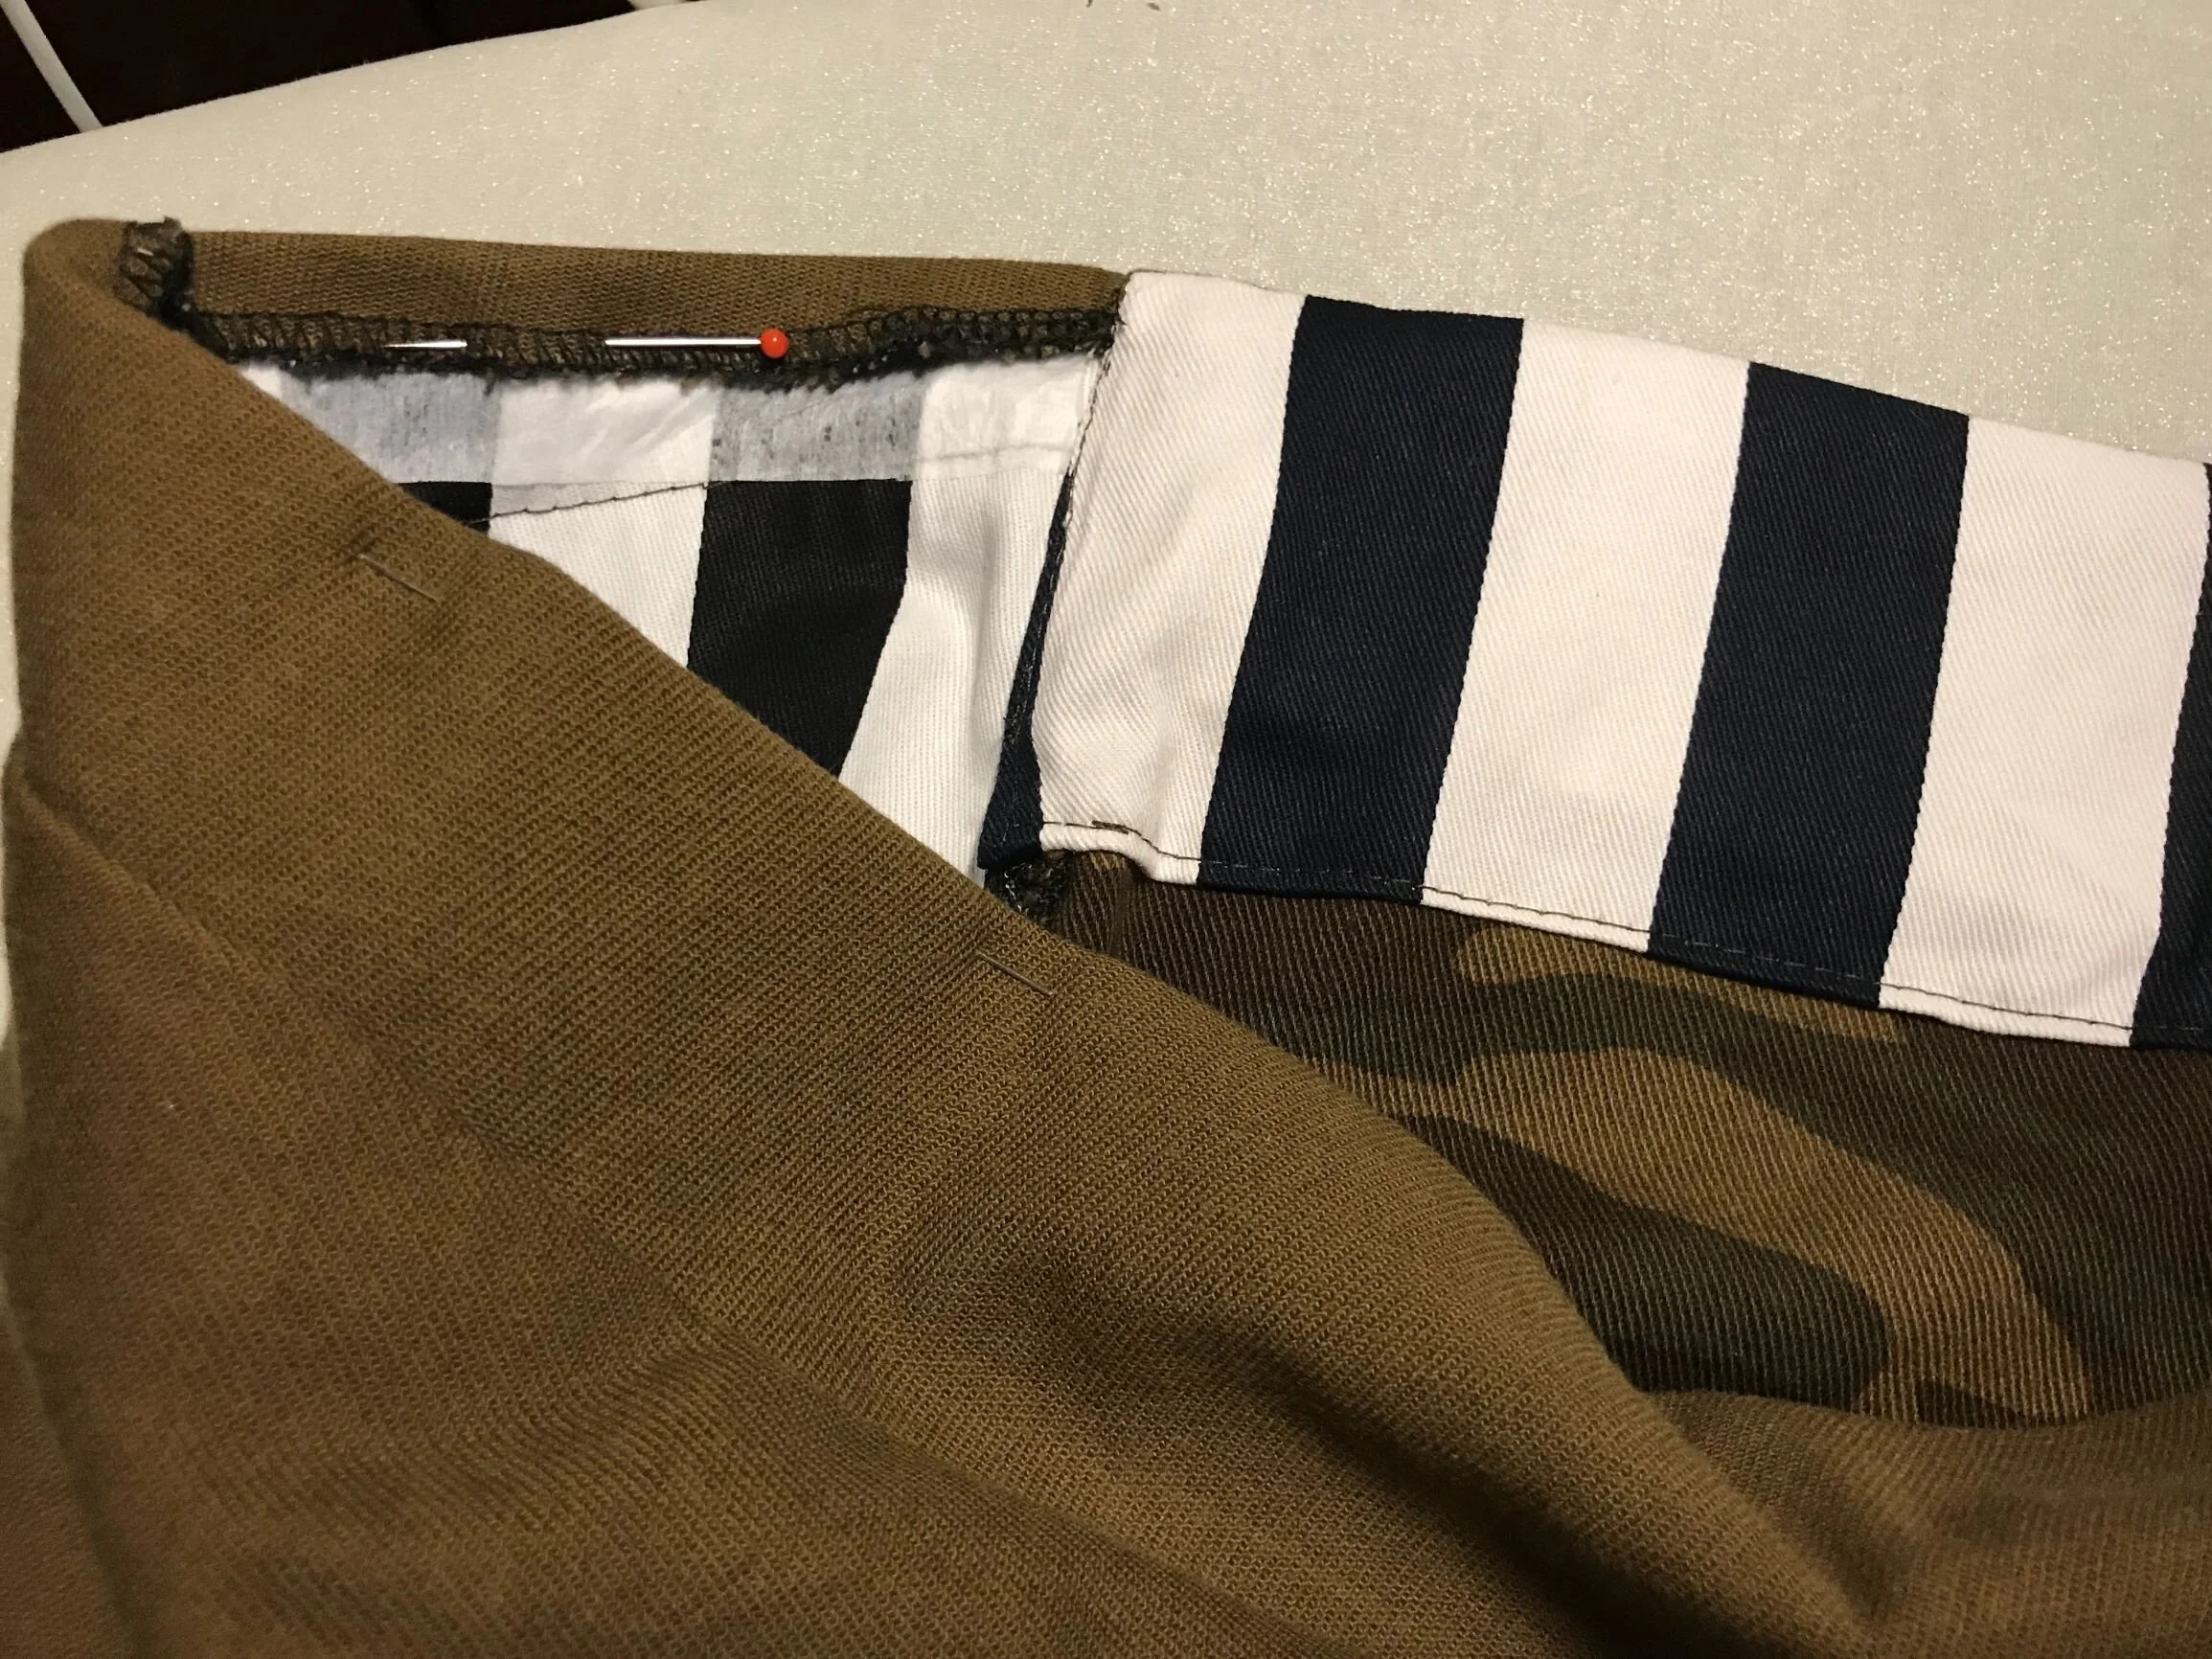
Changed things a bit, eyeballing it before cutting*

So I measured everything up according to the Korfiati illustration & tried it on but it left me unsatisfied. This shouldn’t have been hugely surprising given my precognition of body type disparities & zero fitting adjustments, but because the fabric has to be cut out in a unique way to achieve the finished look, there’s a finite capacity for change. Any changes in proportions would have to be draped on me which was nigh impossible to manage given the fold and…everything. So I suddenly had a skirt that was sort of ok, but not enough & I suddenly wondered what the helI was doing. I had just wasted fabric and time and I like the fabric and am short on time. I usually follow through on sewing projects but my initial curiosity had burned out, the thrill of the make had totally deflated, I didnt like it so I packed it away, disgruntled. Thunderclap, its gone. That’s it.
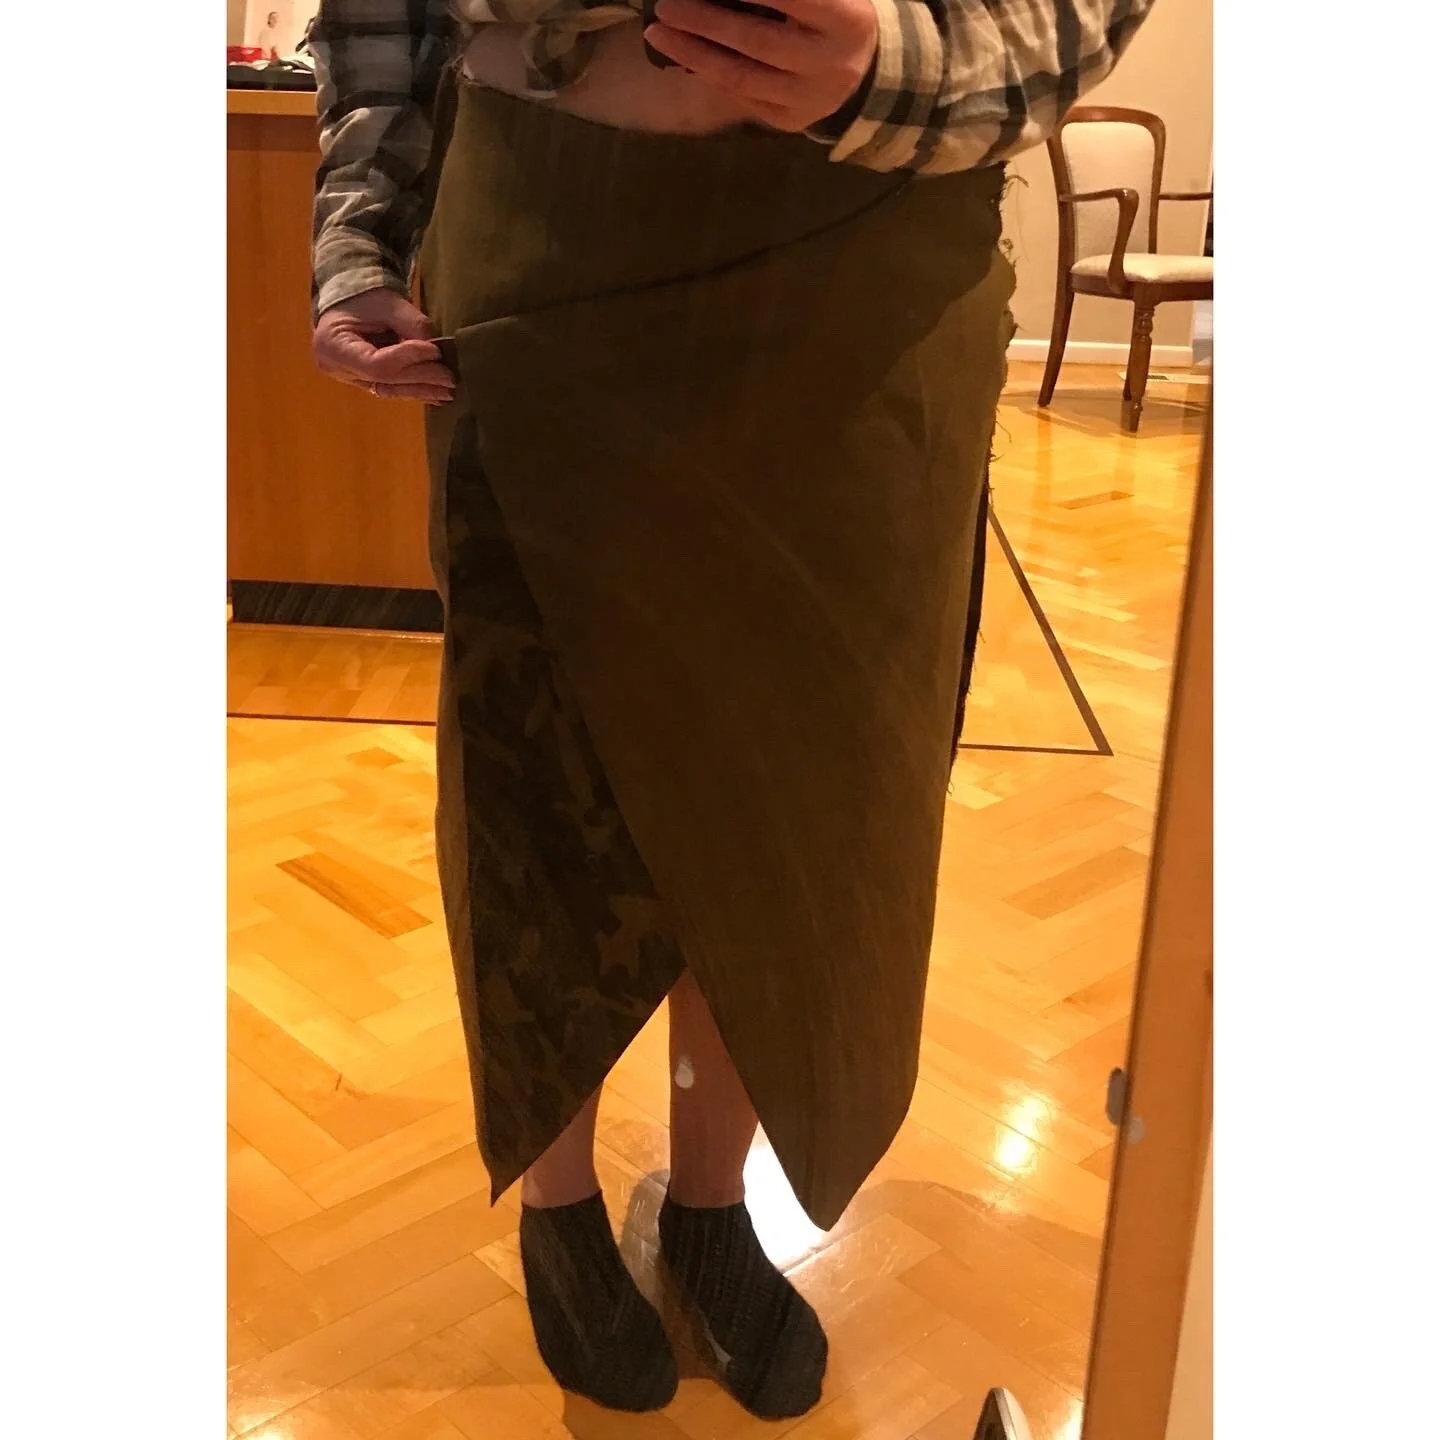
I wonder if I got the direction of the buckled side around the wrong side. Should I buckle to the left or right? It crossed my mind, once it was too late
But although I buried it, I continued to resent it & dwell upon it. It niggled at the edges of my thinkings.
I wondered if I could make good with what I had without re-cutting it, if I could bare to face a defeat with the possibility I’d just consolidate a failure by doing it twice over & lose more time. And I felt over committed to the fold-over function which was cramping a design change
Upon this reflection, I regarded the fabric choice as a major issue. Even though my beautiful friend Donna said at the beginning “definitely a woven, you dont want negative ease”….this fabric is a stretch woven. It is heavy and very stretchy and I went ahead and used it anyway. But Donna is usually right and she was. The fabric should be taut. Have structure. You don’t want stretch because if there’s any give and elasticity, it wont hold the fold and the buckle, they will drag everything down so the buckle wont sit flatly or flush to the body. It’ll all droop. Hang off & sag down.…fall off and slide away. Wont work, I tell you, it wont work at all.
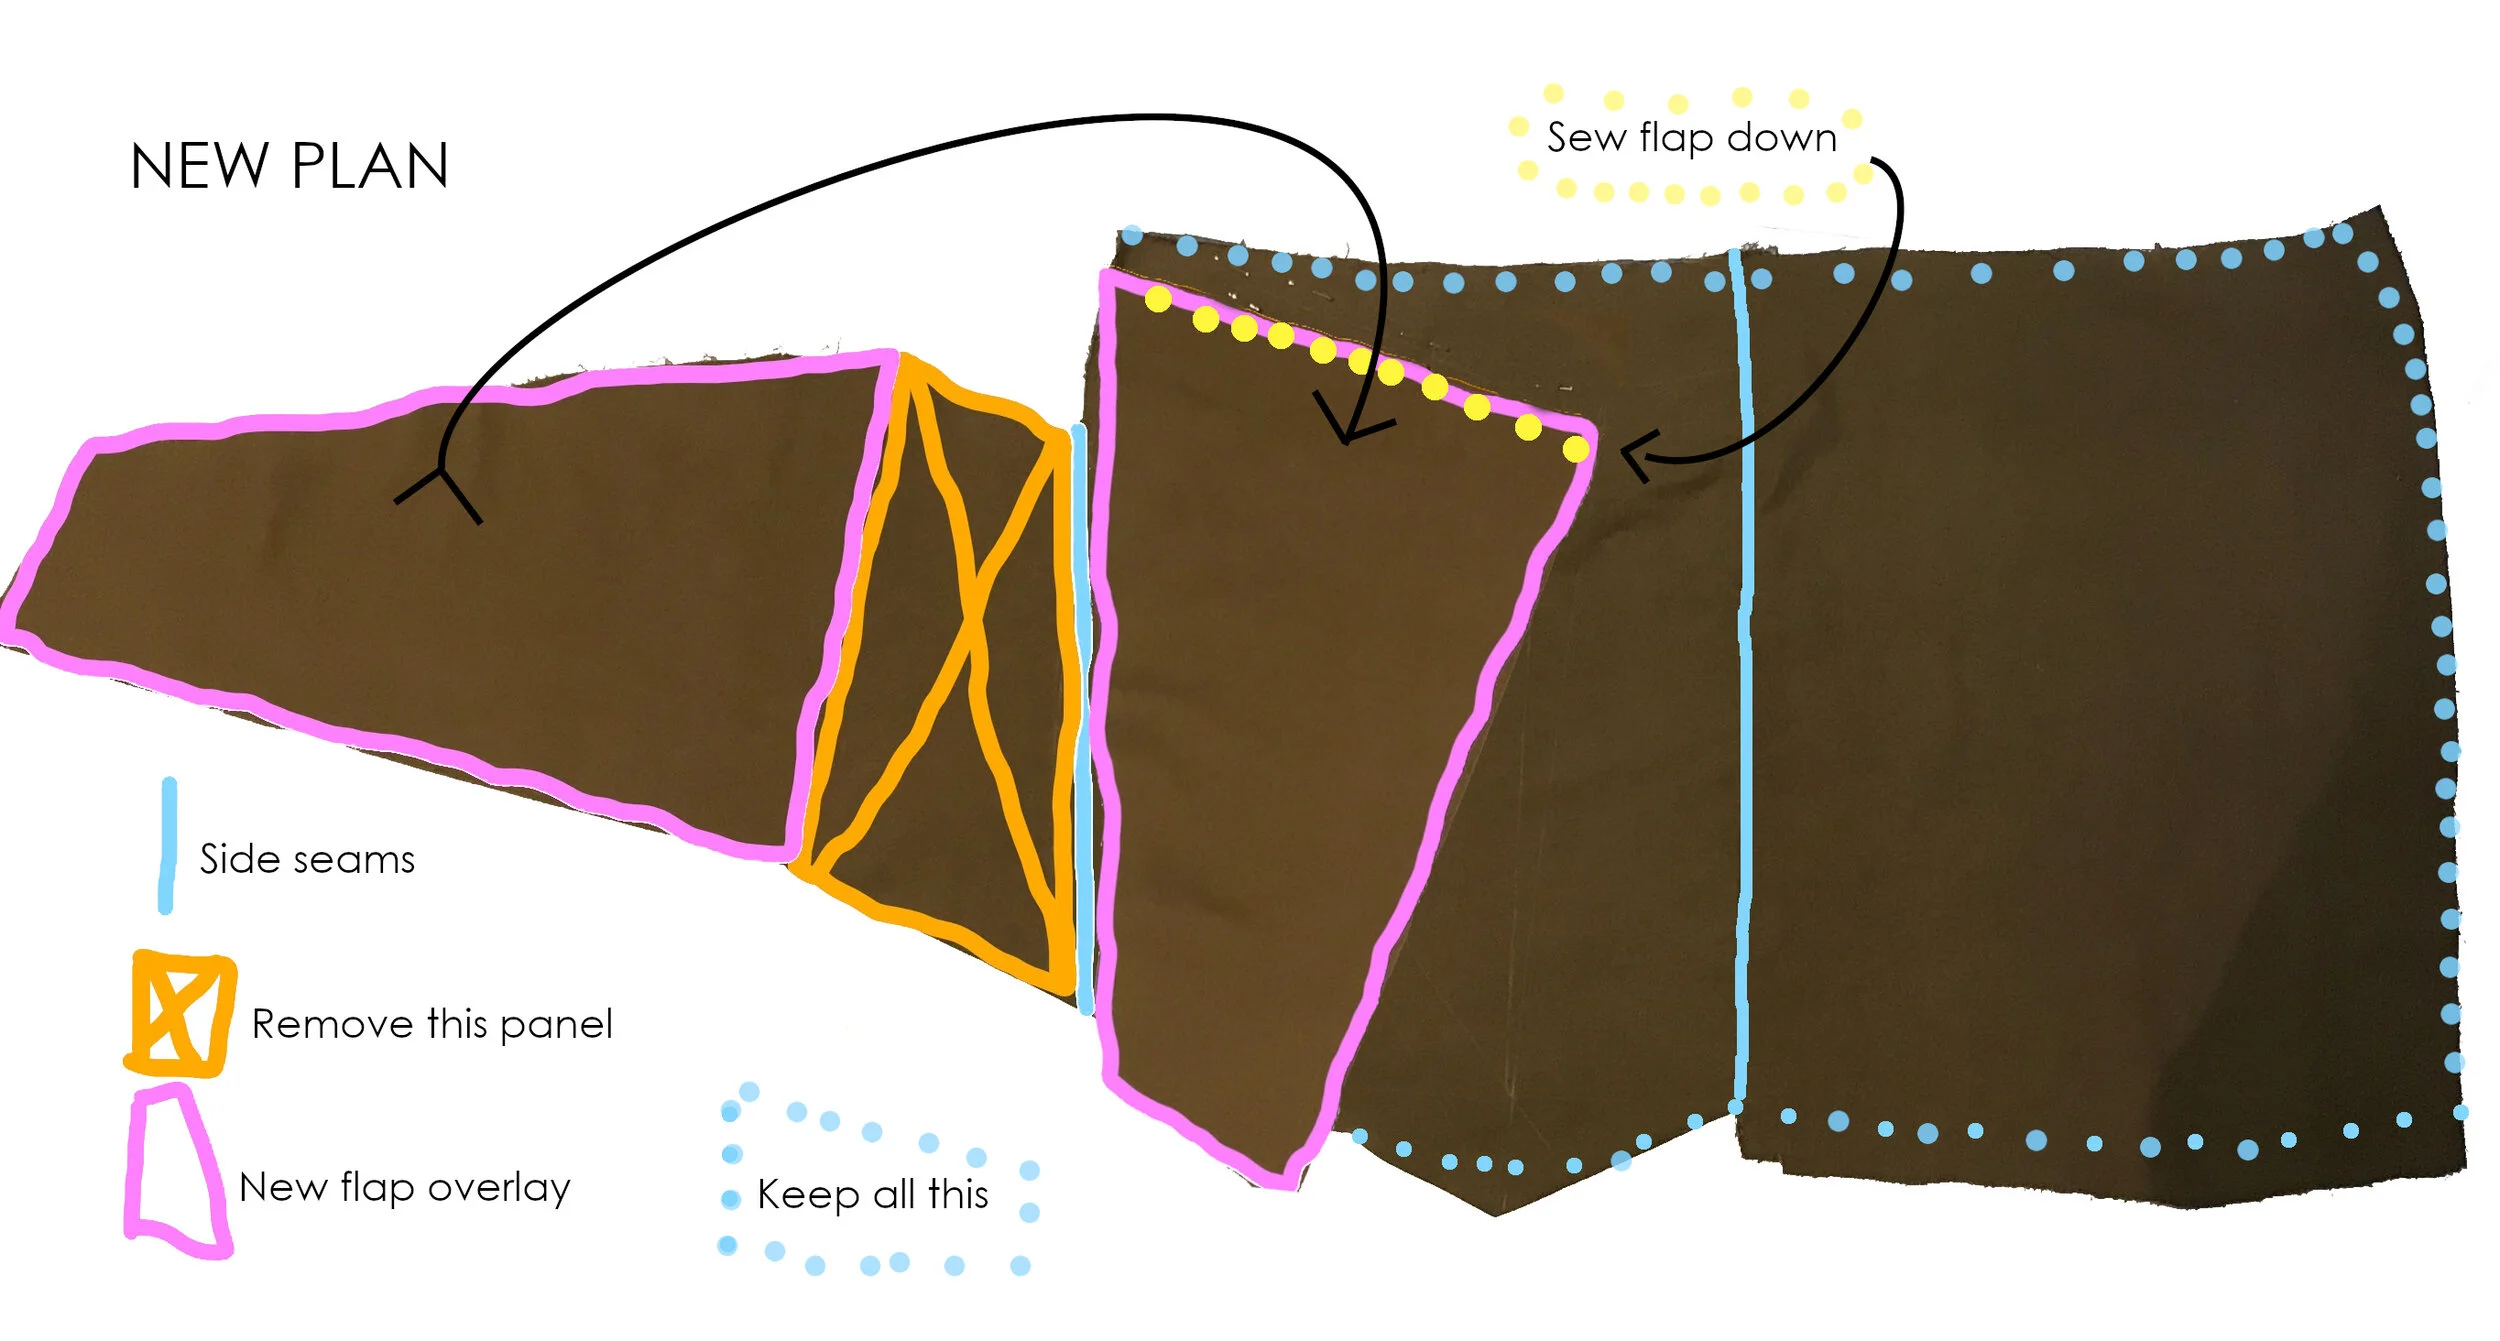
New plan.
Having now experienced the pattern shape folding phenomenon, I came to realise that I love the buckle feature maybe more than the fold-over, so perhaps I could now move on & leave that kind of skirt as done and make something new.
I was back in the game.
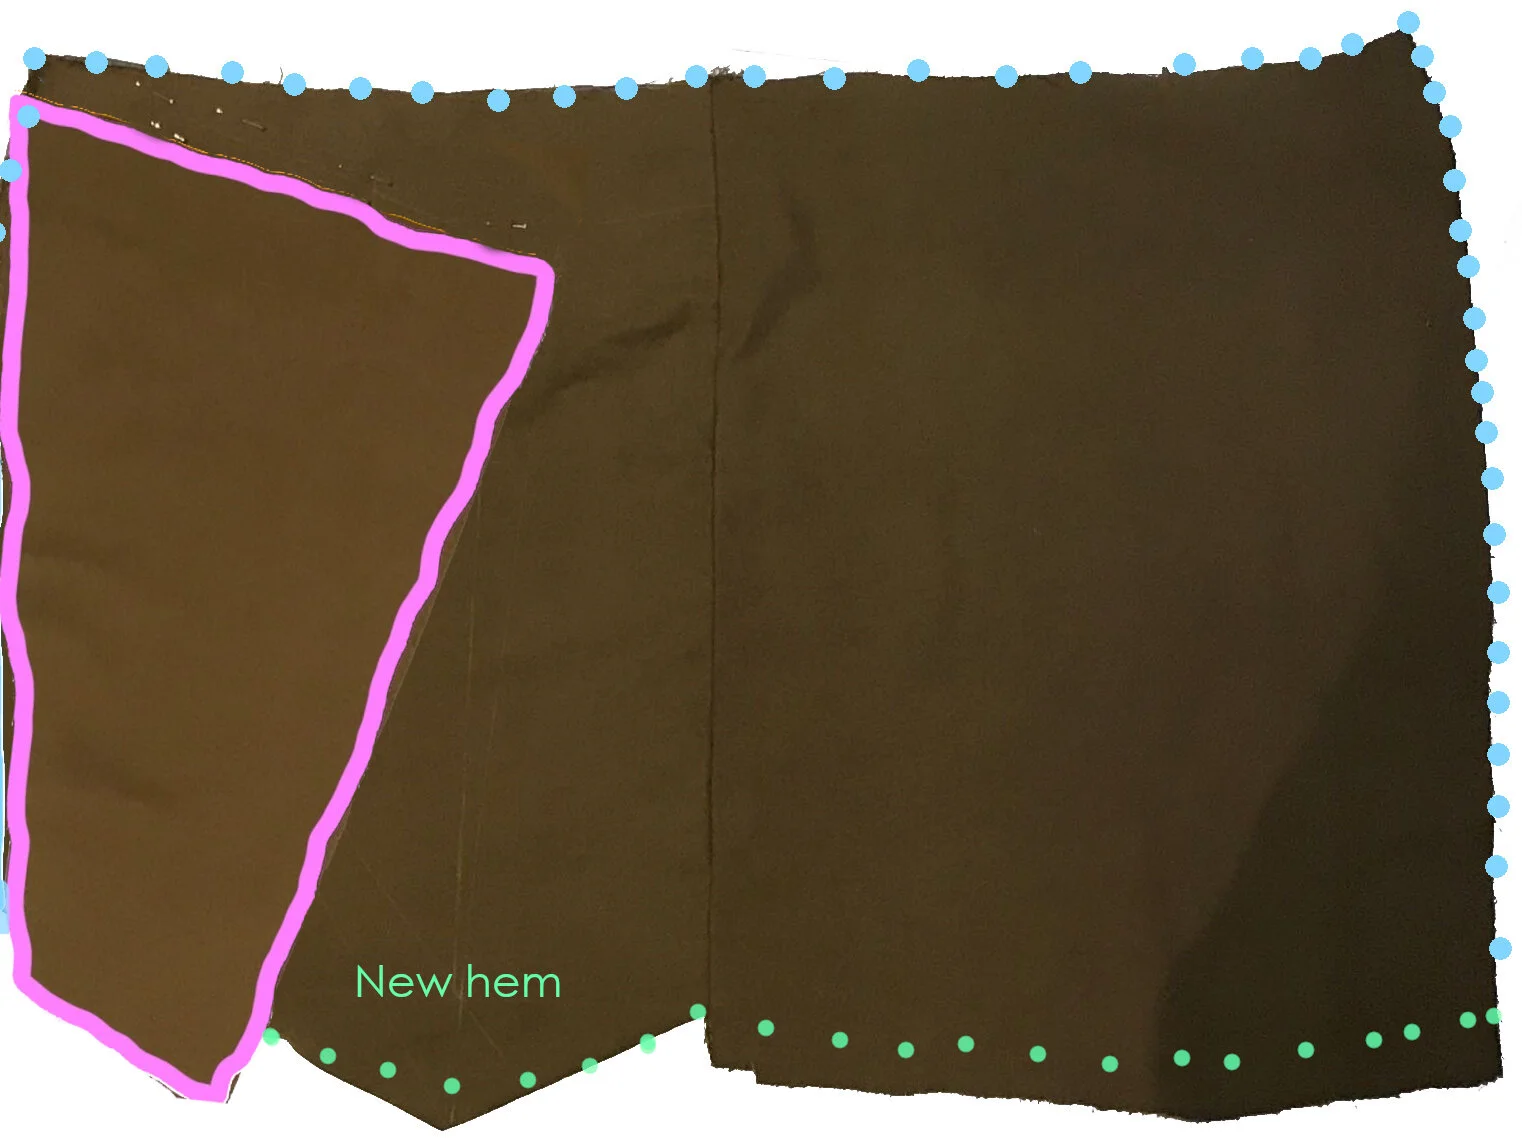
And so to a simple transition: remove the under-fold panel, retaining the top angular ‘flap’ to make it a faux-wrap skirt to accommodate the belt & buckle coming from underneath because I love them. And a new kind of fold + buckle skirt would be mine!
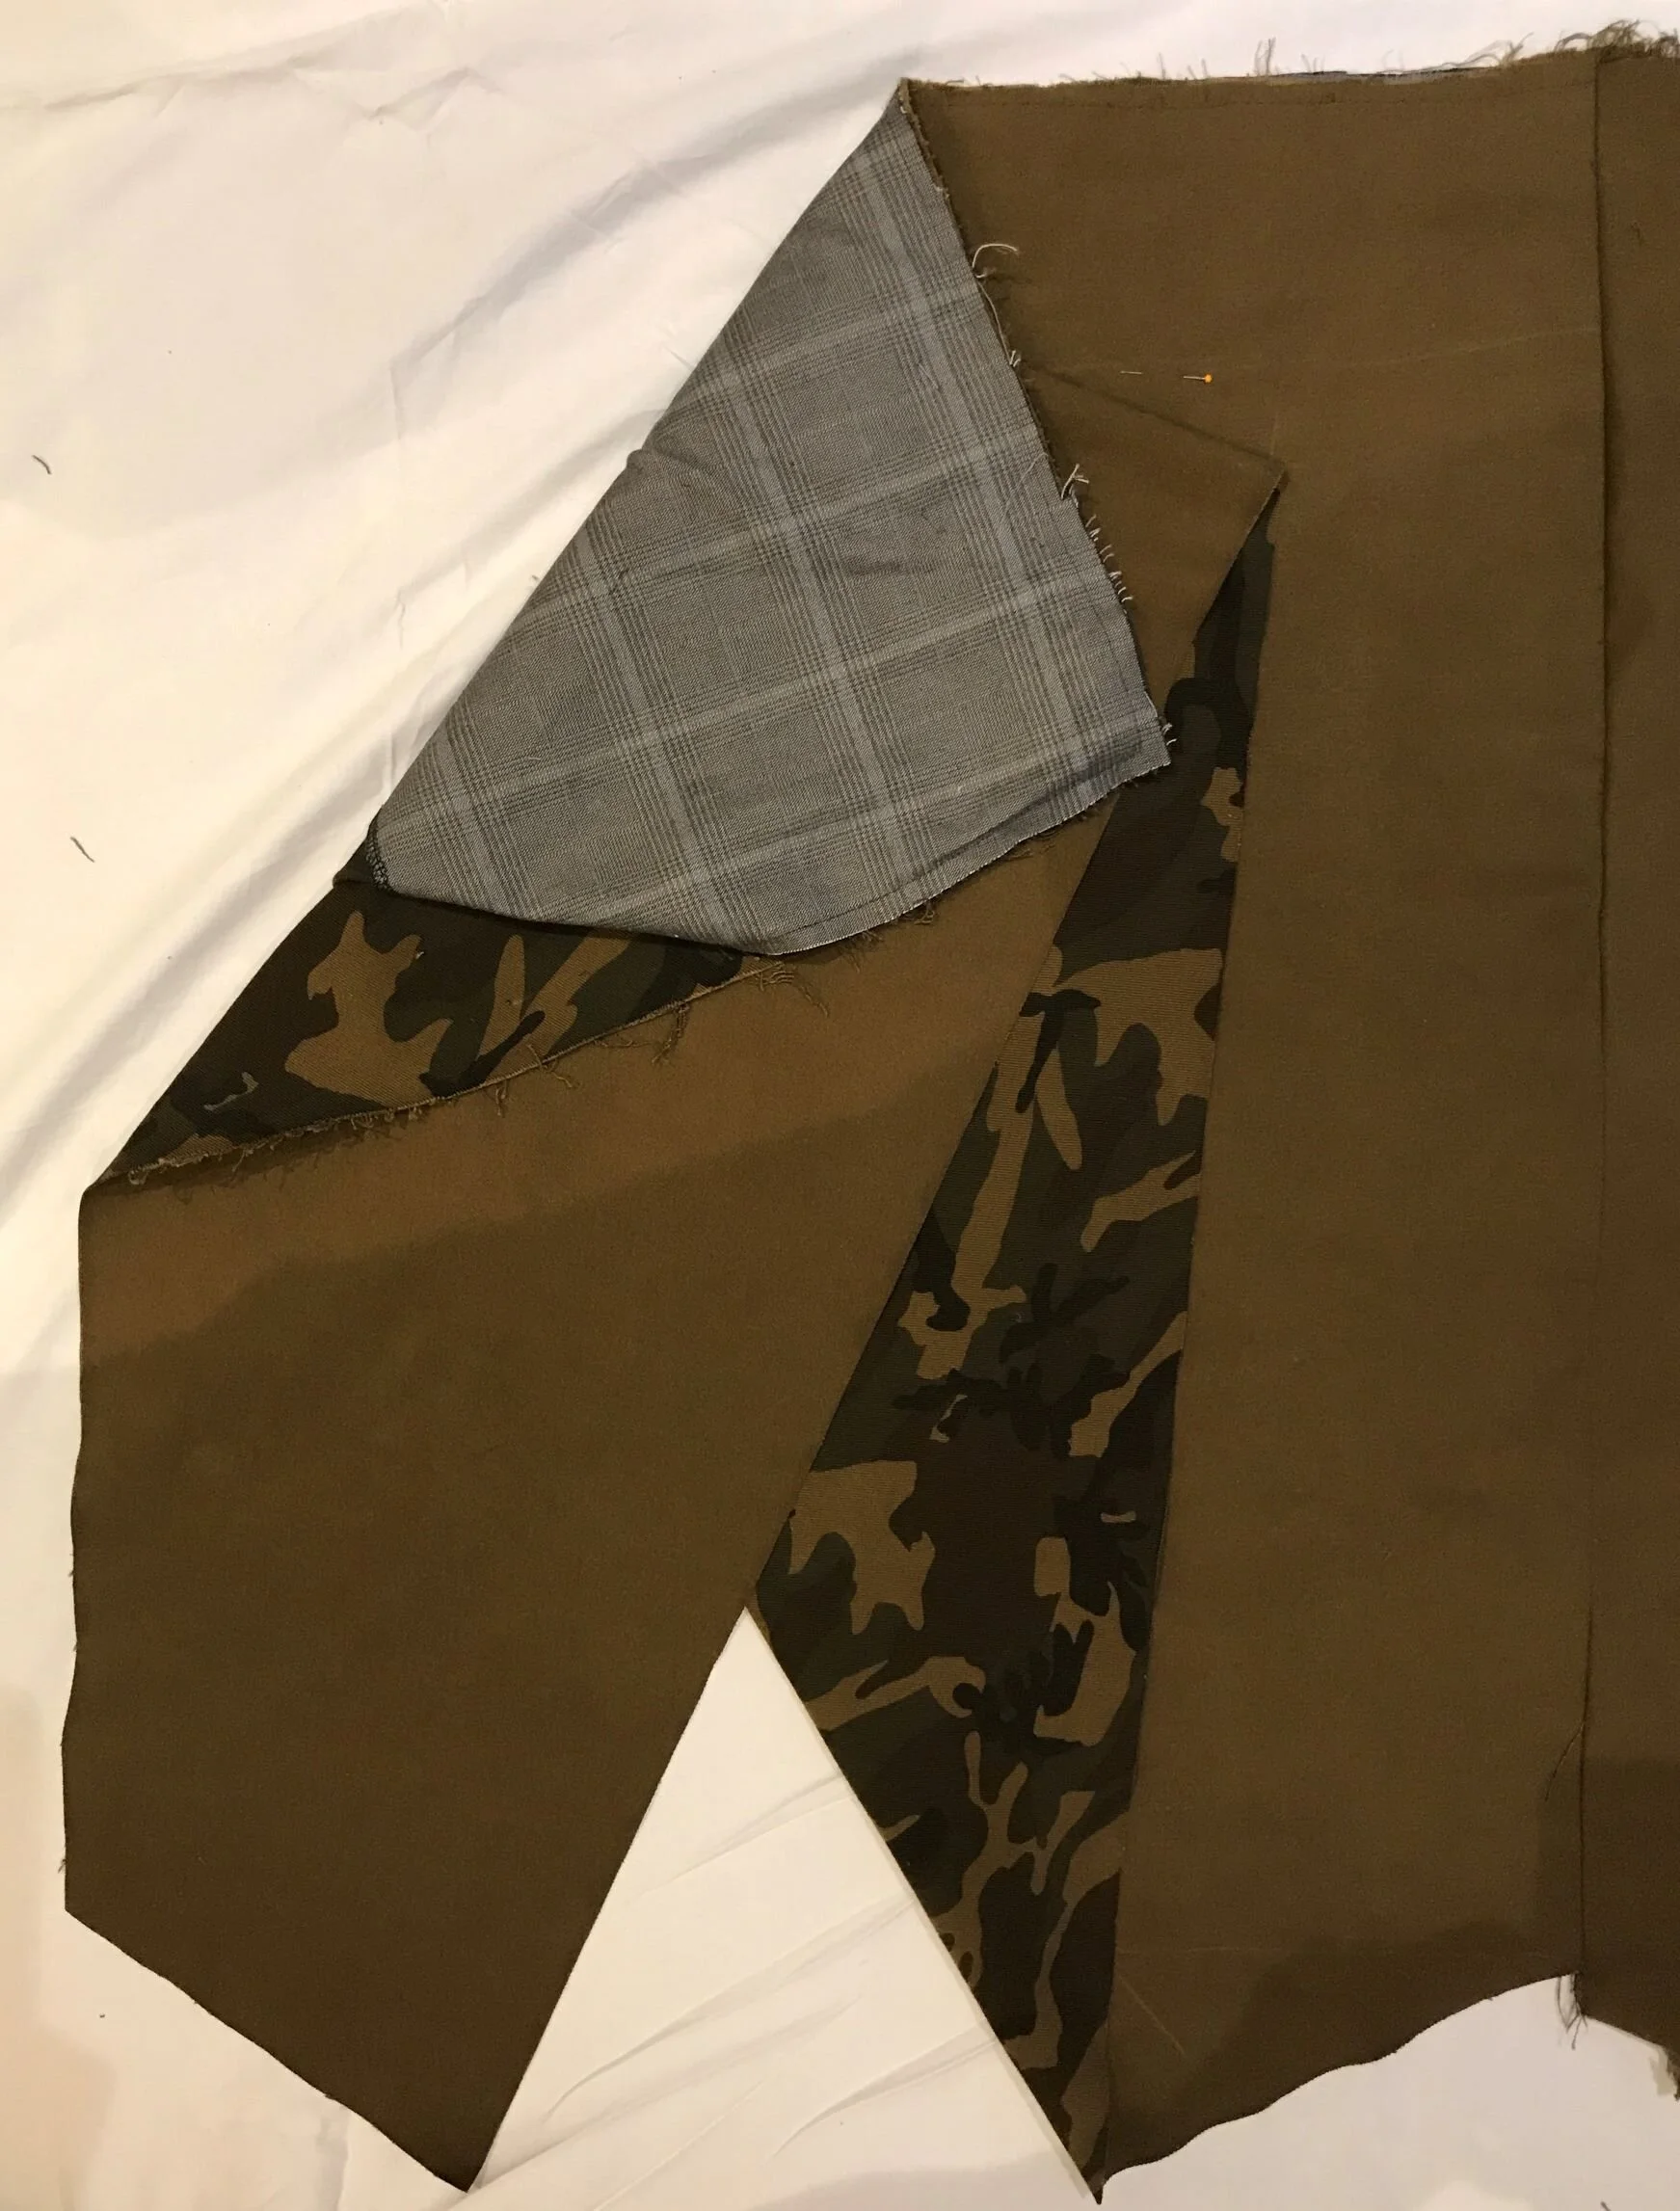
Not this
The grey checked backing fabric contains elastane. This is wrong. Reinforcing a stretch fabric with stretch fabric just makes a really thick stretch fabric not a rigid one. I’m embarrassed I even have to explain this to you. You should be smarter
I still needed to correct the stretch factor so I sewed a heavy woven cotton panel inside the upper half of the front skirt for structural improvement. But that didnt seem to work out much better. UNTIL I REALISED THAT IT WAS STRETCHY TOO. I just hadnt noticed. So I took it all apart for the fourth time & found some very rigid cotton to back it with. That worked.
Better
Properly reinforced with rigid cotton, with the ‘flap’ sewn through the lot. Added extra strength via a narrow ribbon sewn vertically from waist to termination of flap. I went on to interface all the hells out of this

Nice clean ‘fold-over’
Then, after all that, it came to me: INTERFACING. Its fixed everything! Nothing does rigid like three layers of interfacing. And hopefully it now it should also be a bit of a girdle (girdle!) & minimise belly crease above the belt when worn.

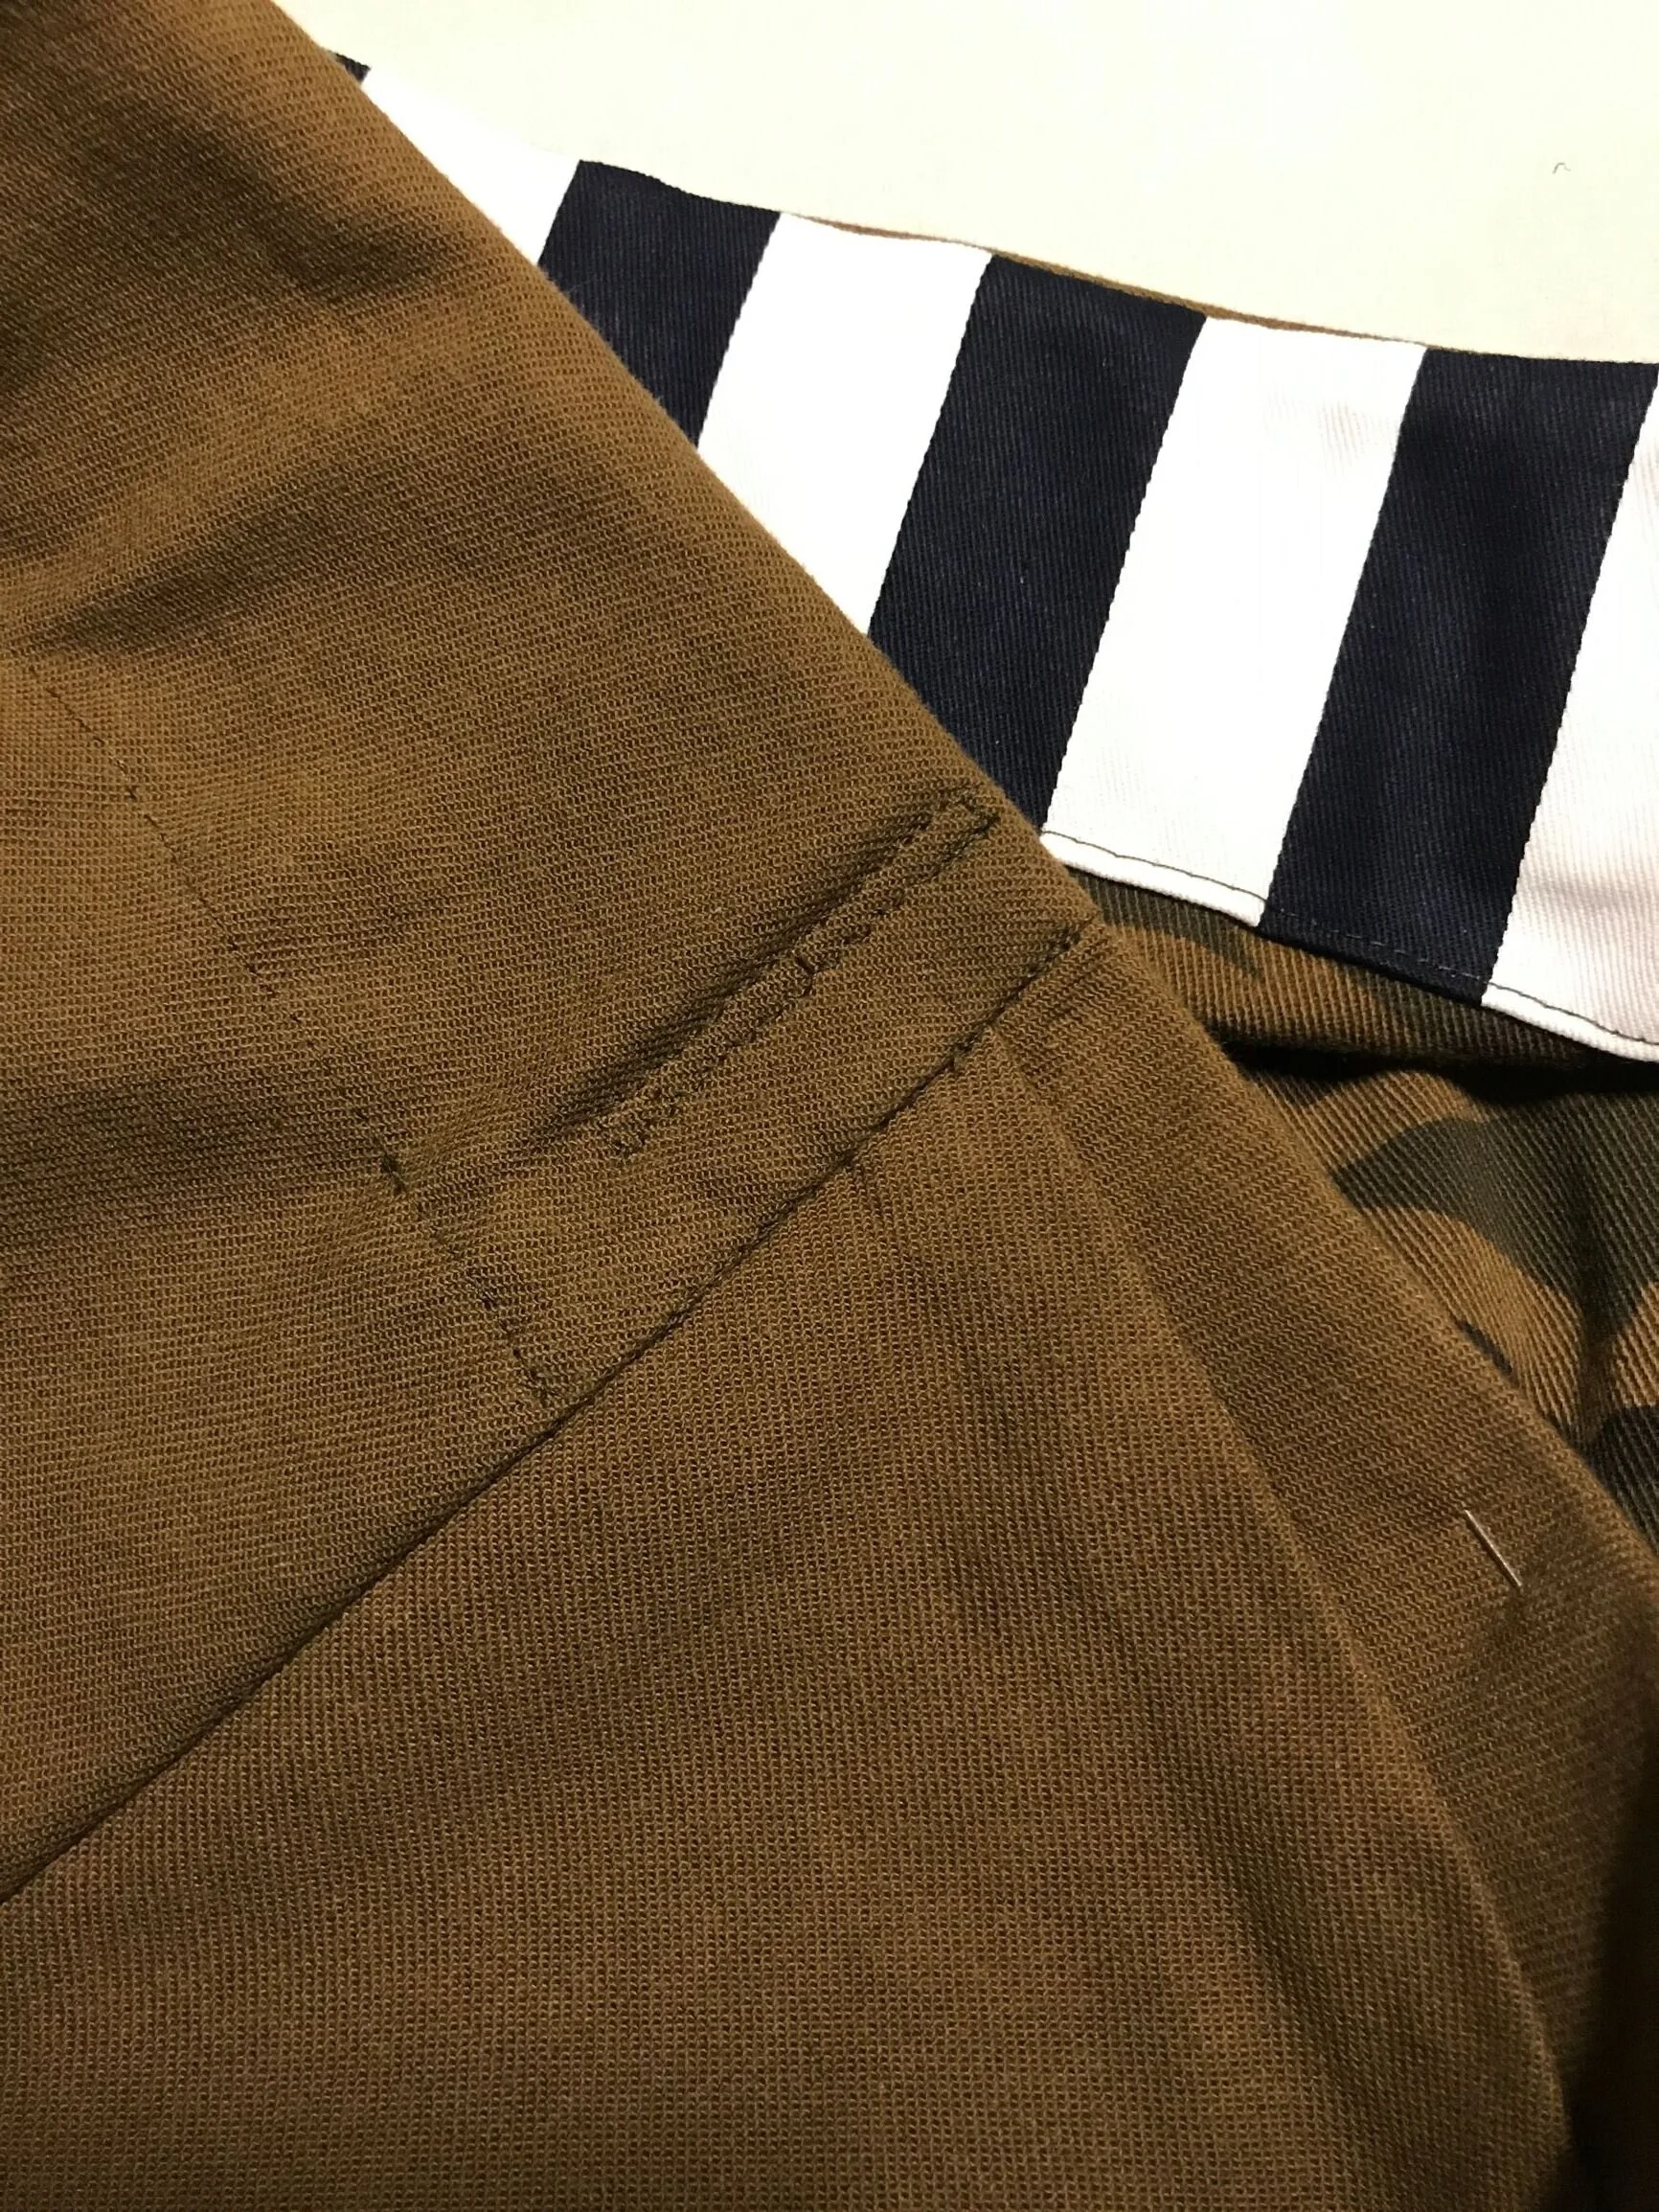
Even though I have a skirt block, I mostly fit knit skirts around me to follow my curves smoothly down the side seams every time, because every fabric is different & I change too. Sometimes I add a seam at centre back to really perfect the fit but for this one I just added two small darts at the back waist as its more A-line than my usual straight/tapered pencil look.
It felt way too late in the proceedings to introduce a zipper on this skirt so I fitted it as much as I could while still being able to pull it on & off because while the front was now rigid, the back skirt retained stretch. So the stretch factor is now in my favour! Nice turnaround! To make it foolproof (haha! foolproof!) The remaining stretch could be controlled by hidden elastic at the back to pull it in that little bit firmer just like they do at Uniqlo. Some 35mm wide no-roll ribbed elastic, which is really stiff with not much give & wont bend or buckle, should be structurally ideal
Make
it happen
So thinking through the sewing order of progression, the belt had to go on before the waist elastic because it’d be heavy & cumbersome up there with that in, and the hemming should go before the belt and elastic for the same manoeuvrability reasons
Hem first
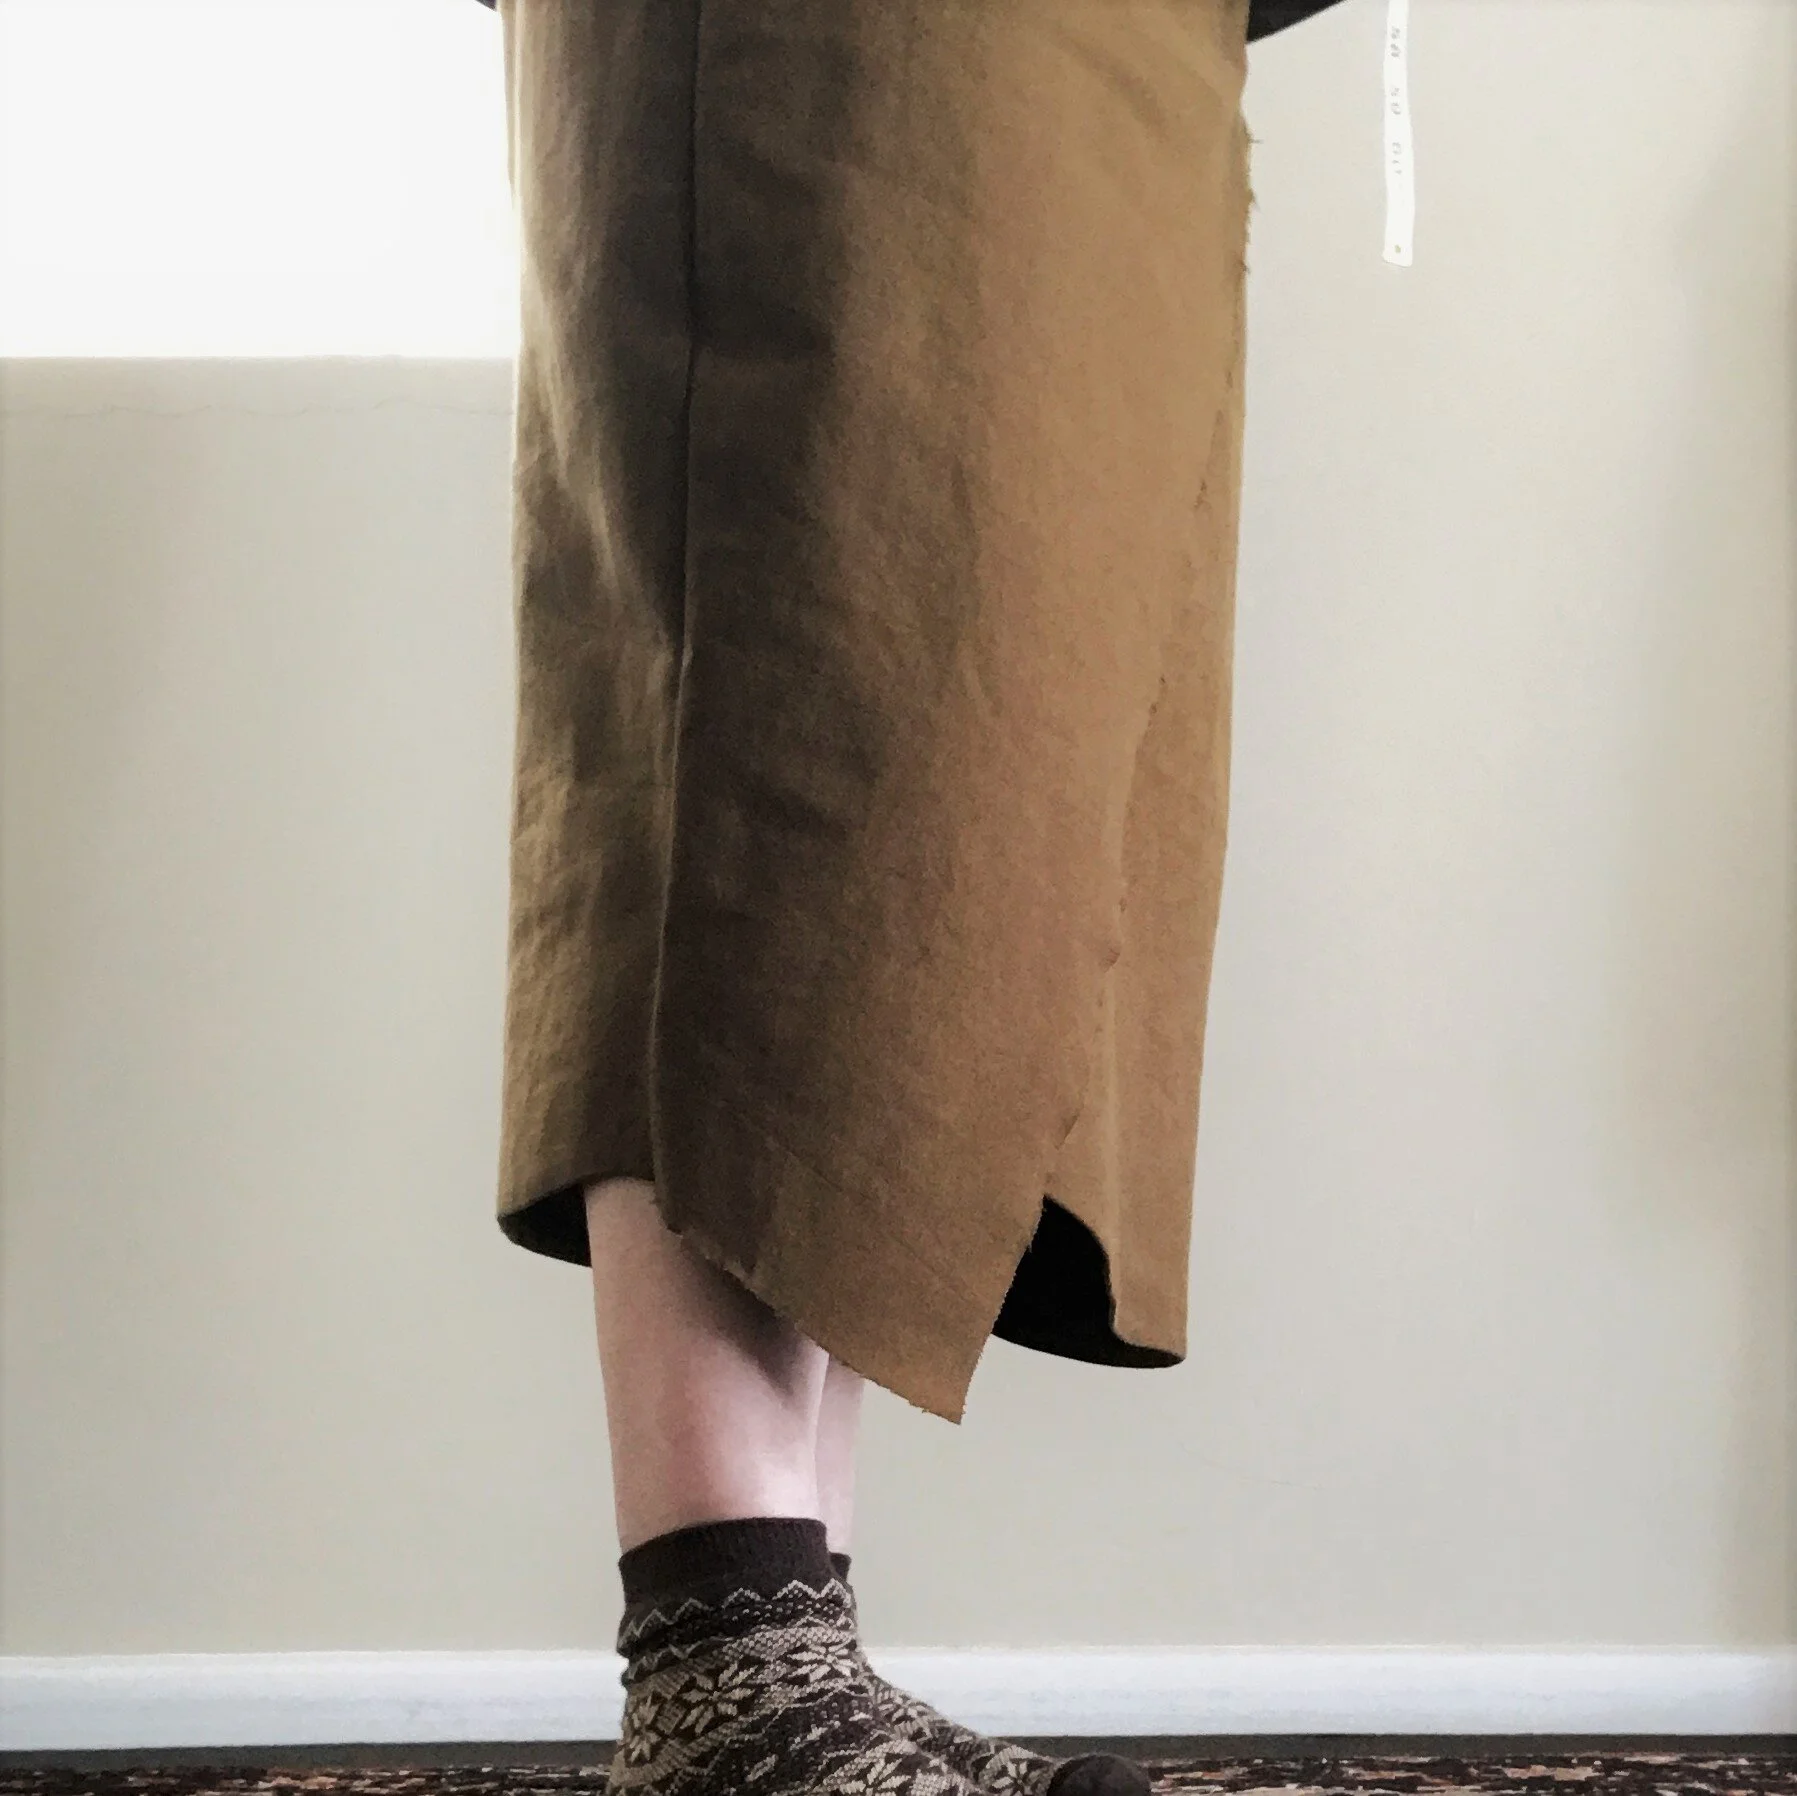
So the hem had to be dealt with first. I thought the ‘wrap’ effect looked more convincing as a slight curve when I tried it on so I trimmed the angle down & evened it up at the back
To the hemming
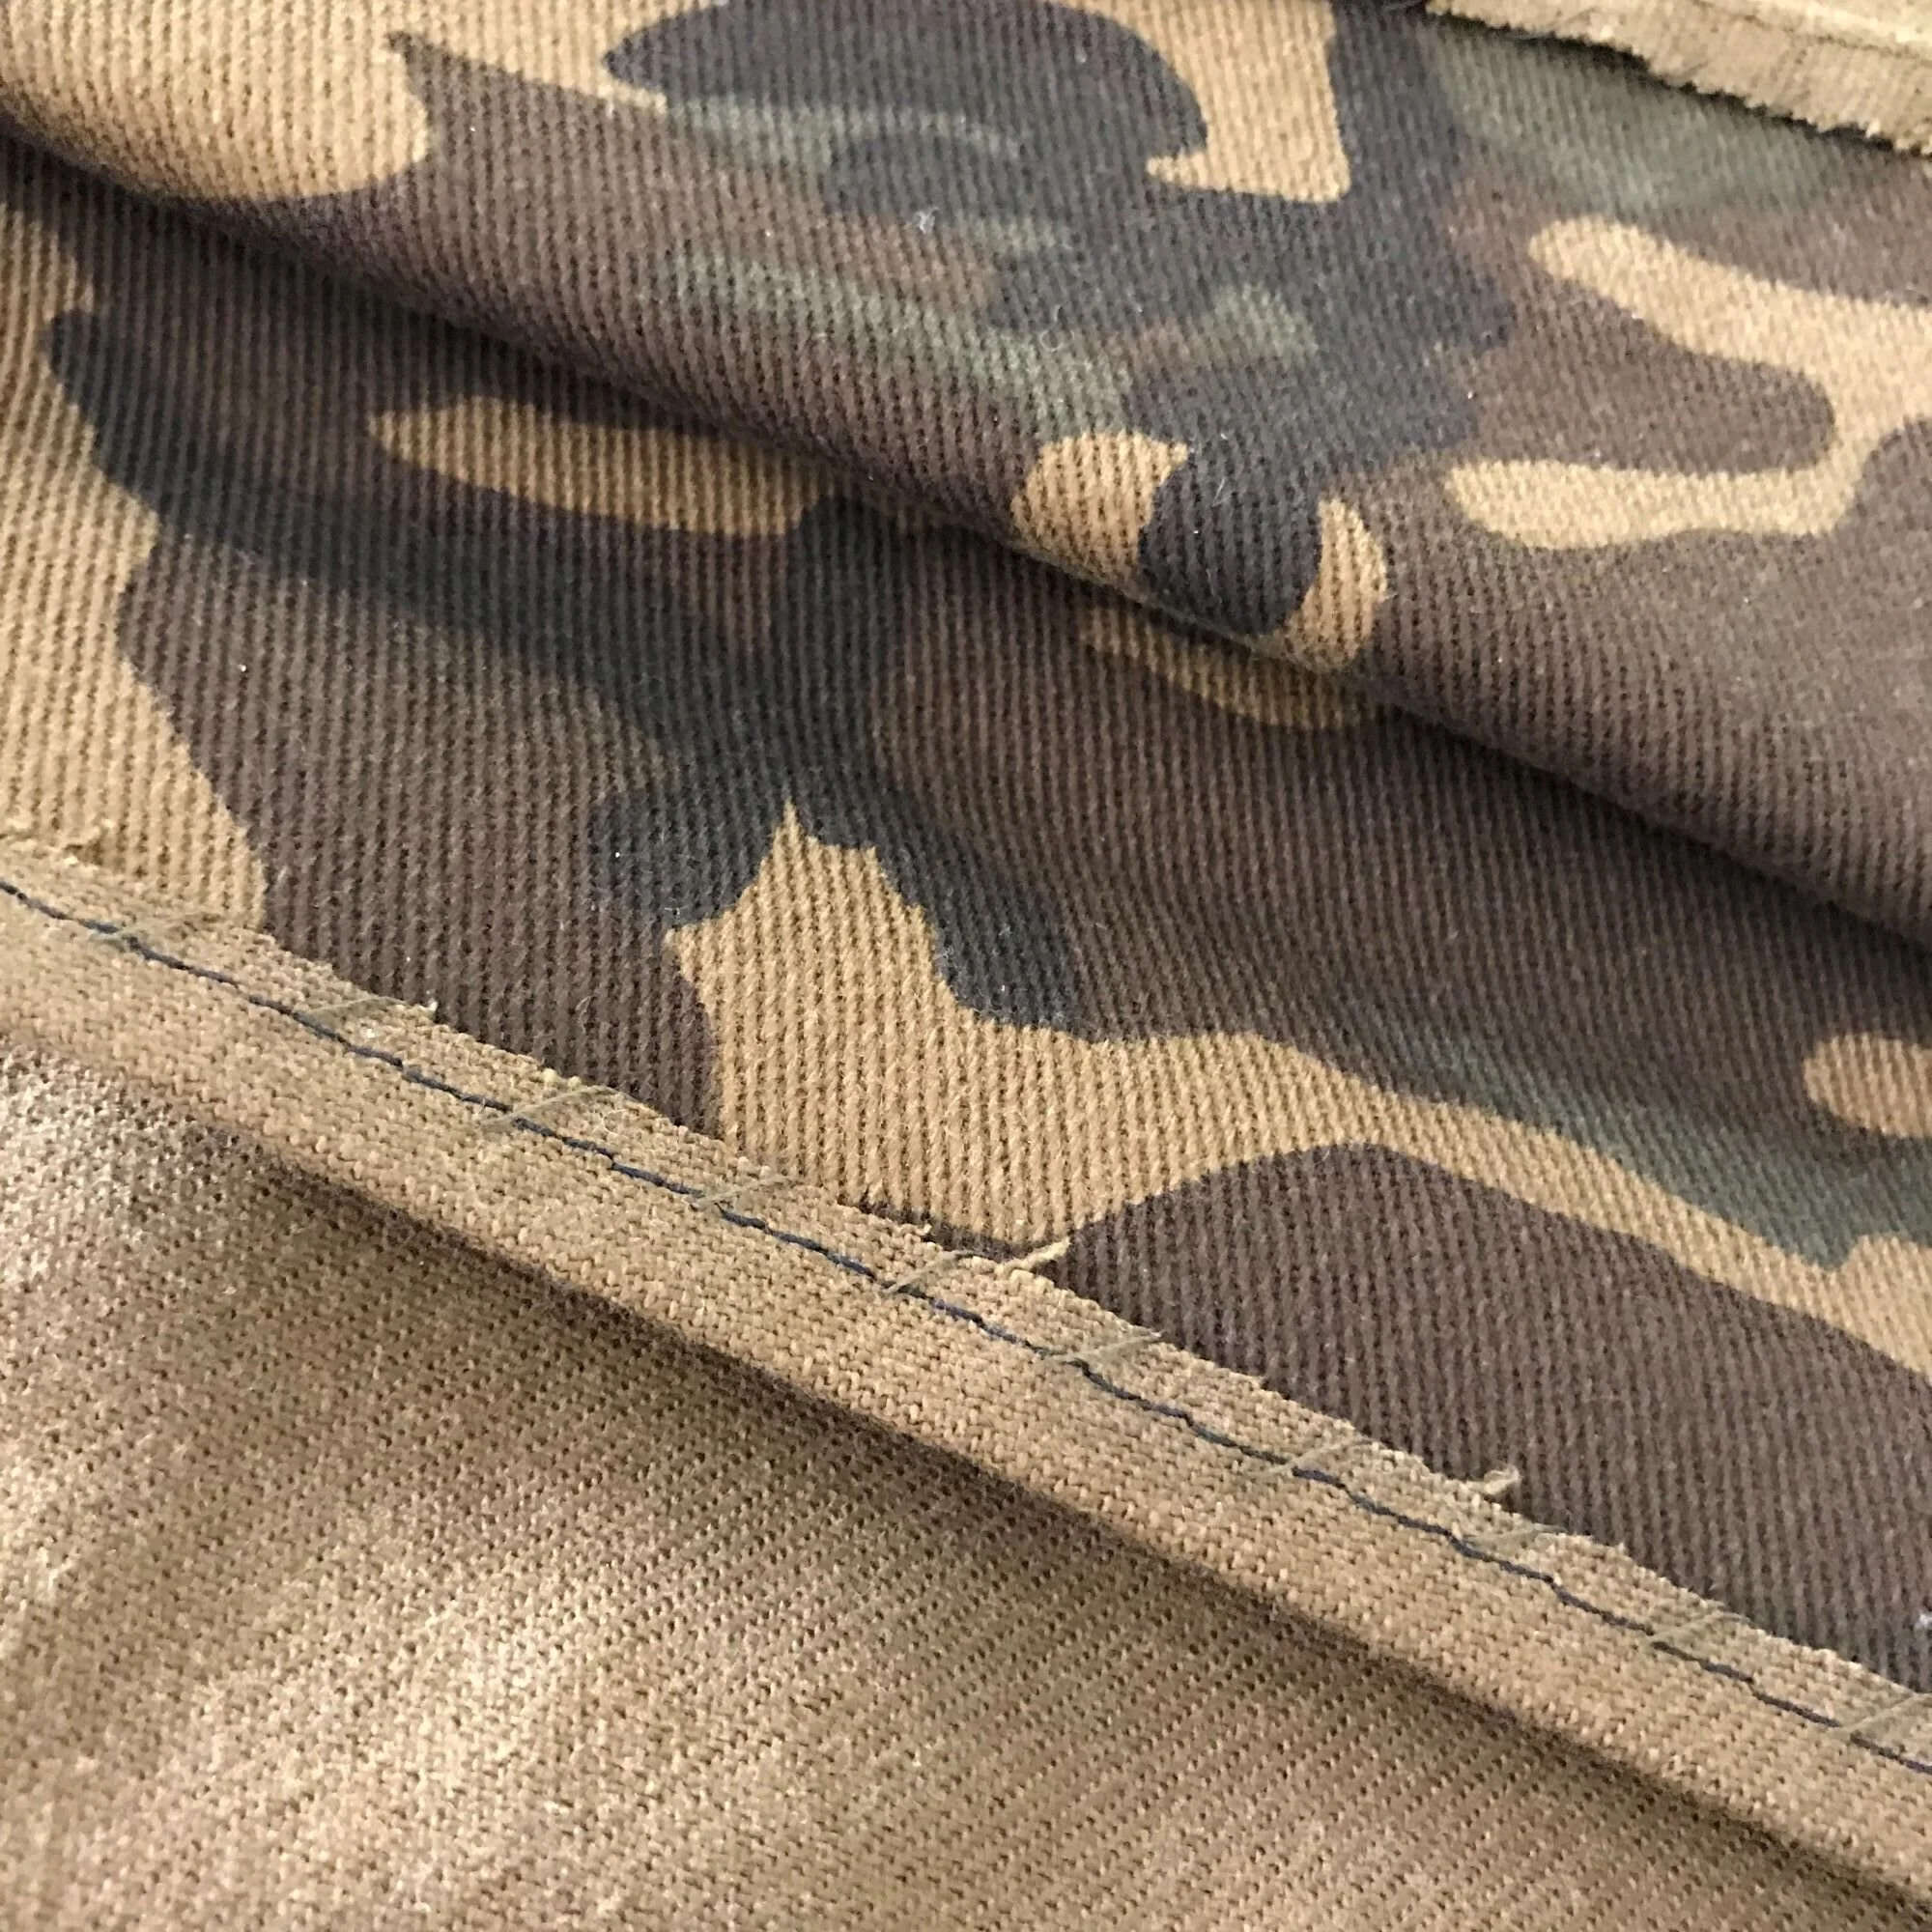
The hem is finished via a straight stich about 5mm in from the edge which I then
Fray Stopper-ed all the way around
rotary trimmed nice & neat
pressed it up to just past the stitch line &
hand blind stitch all around.
The overlay I left at fray stopper + rotary cut. I like the raw edge its a bit more edgy etc
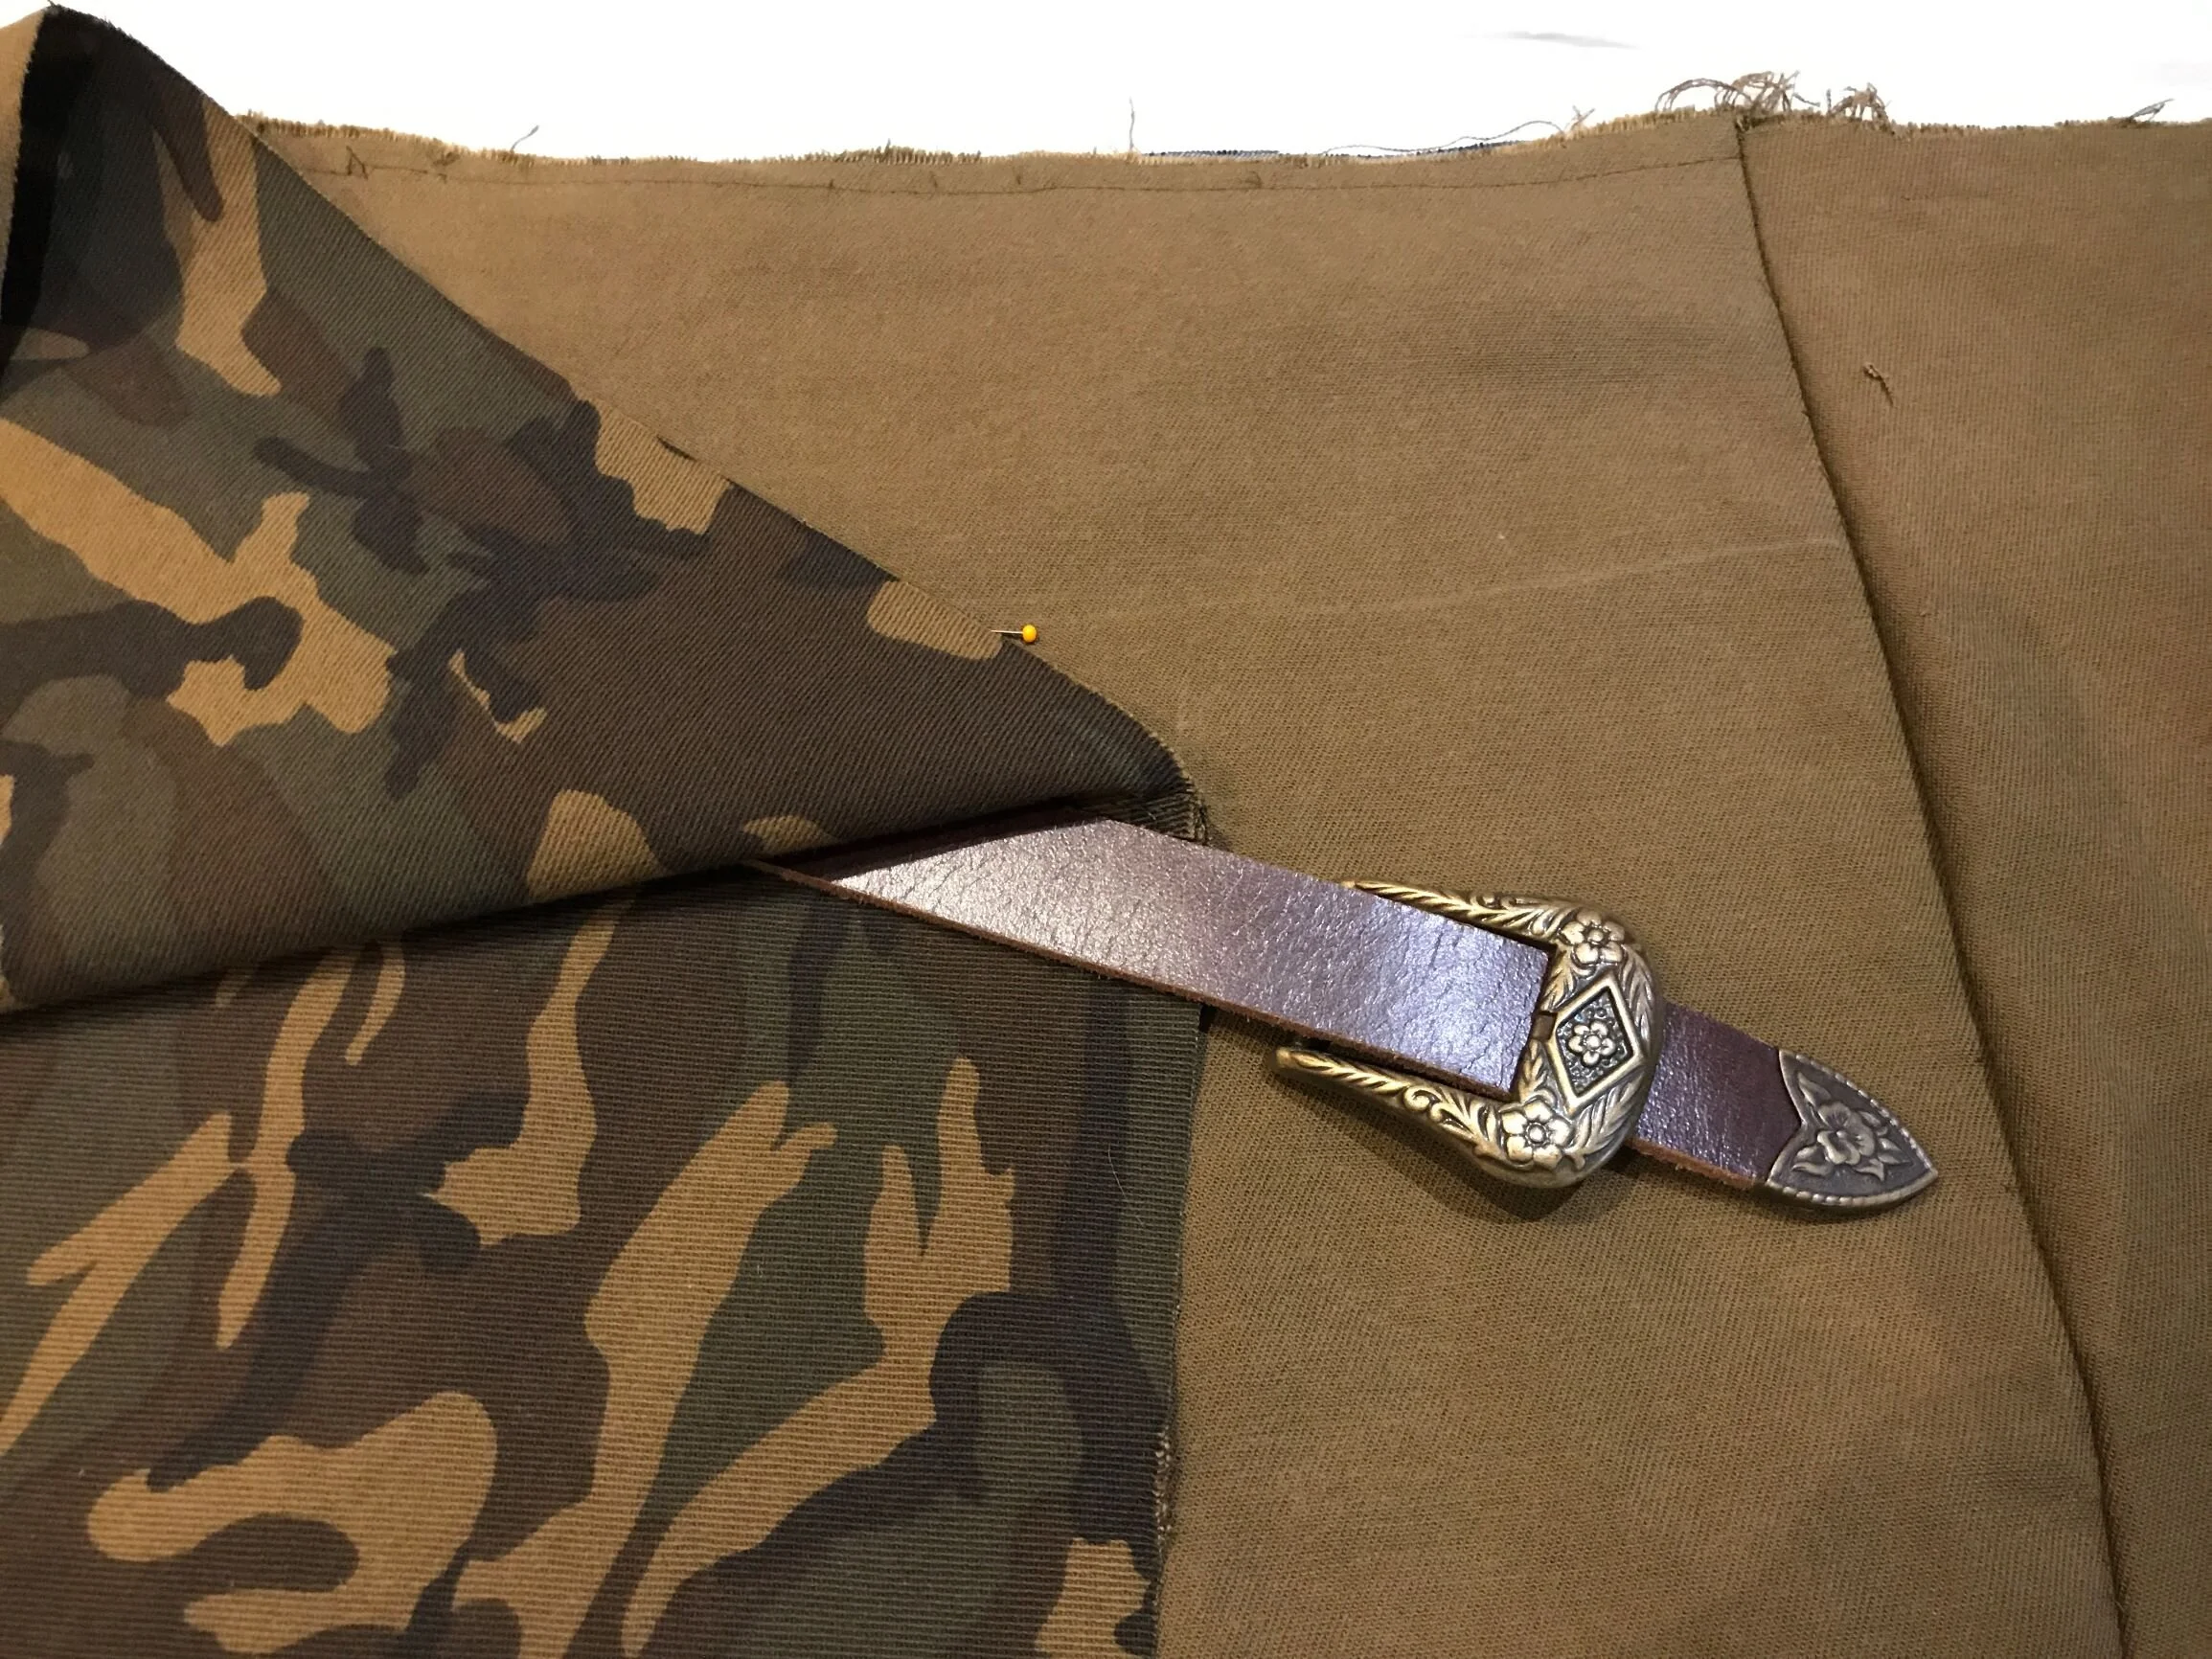
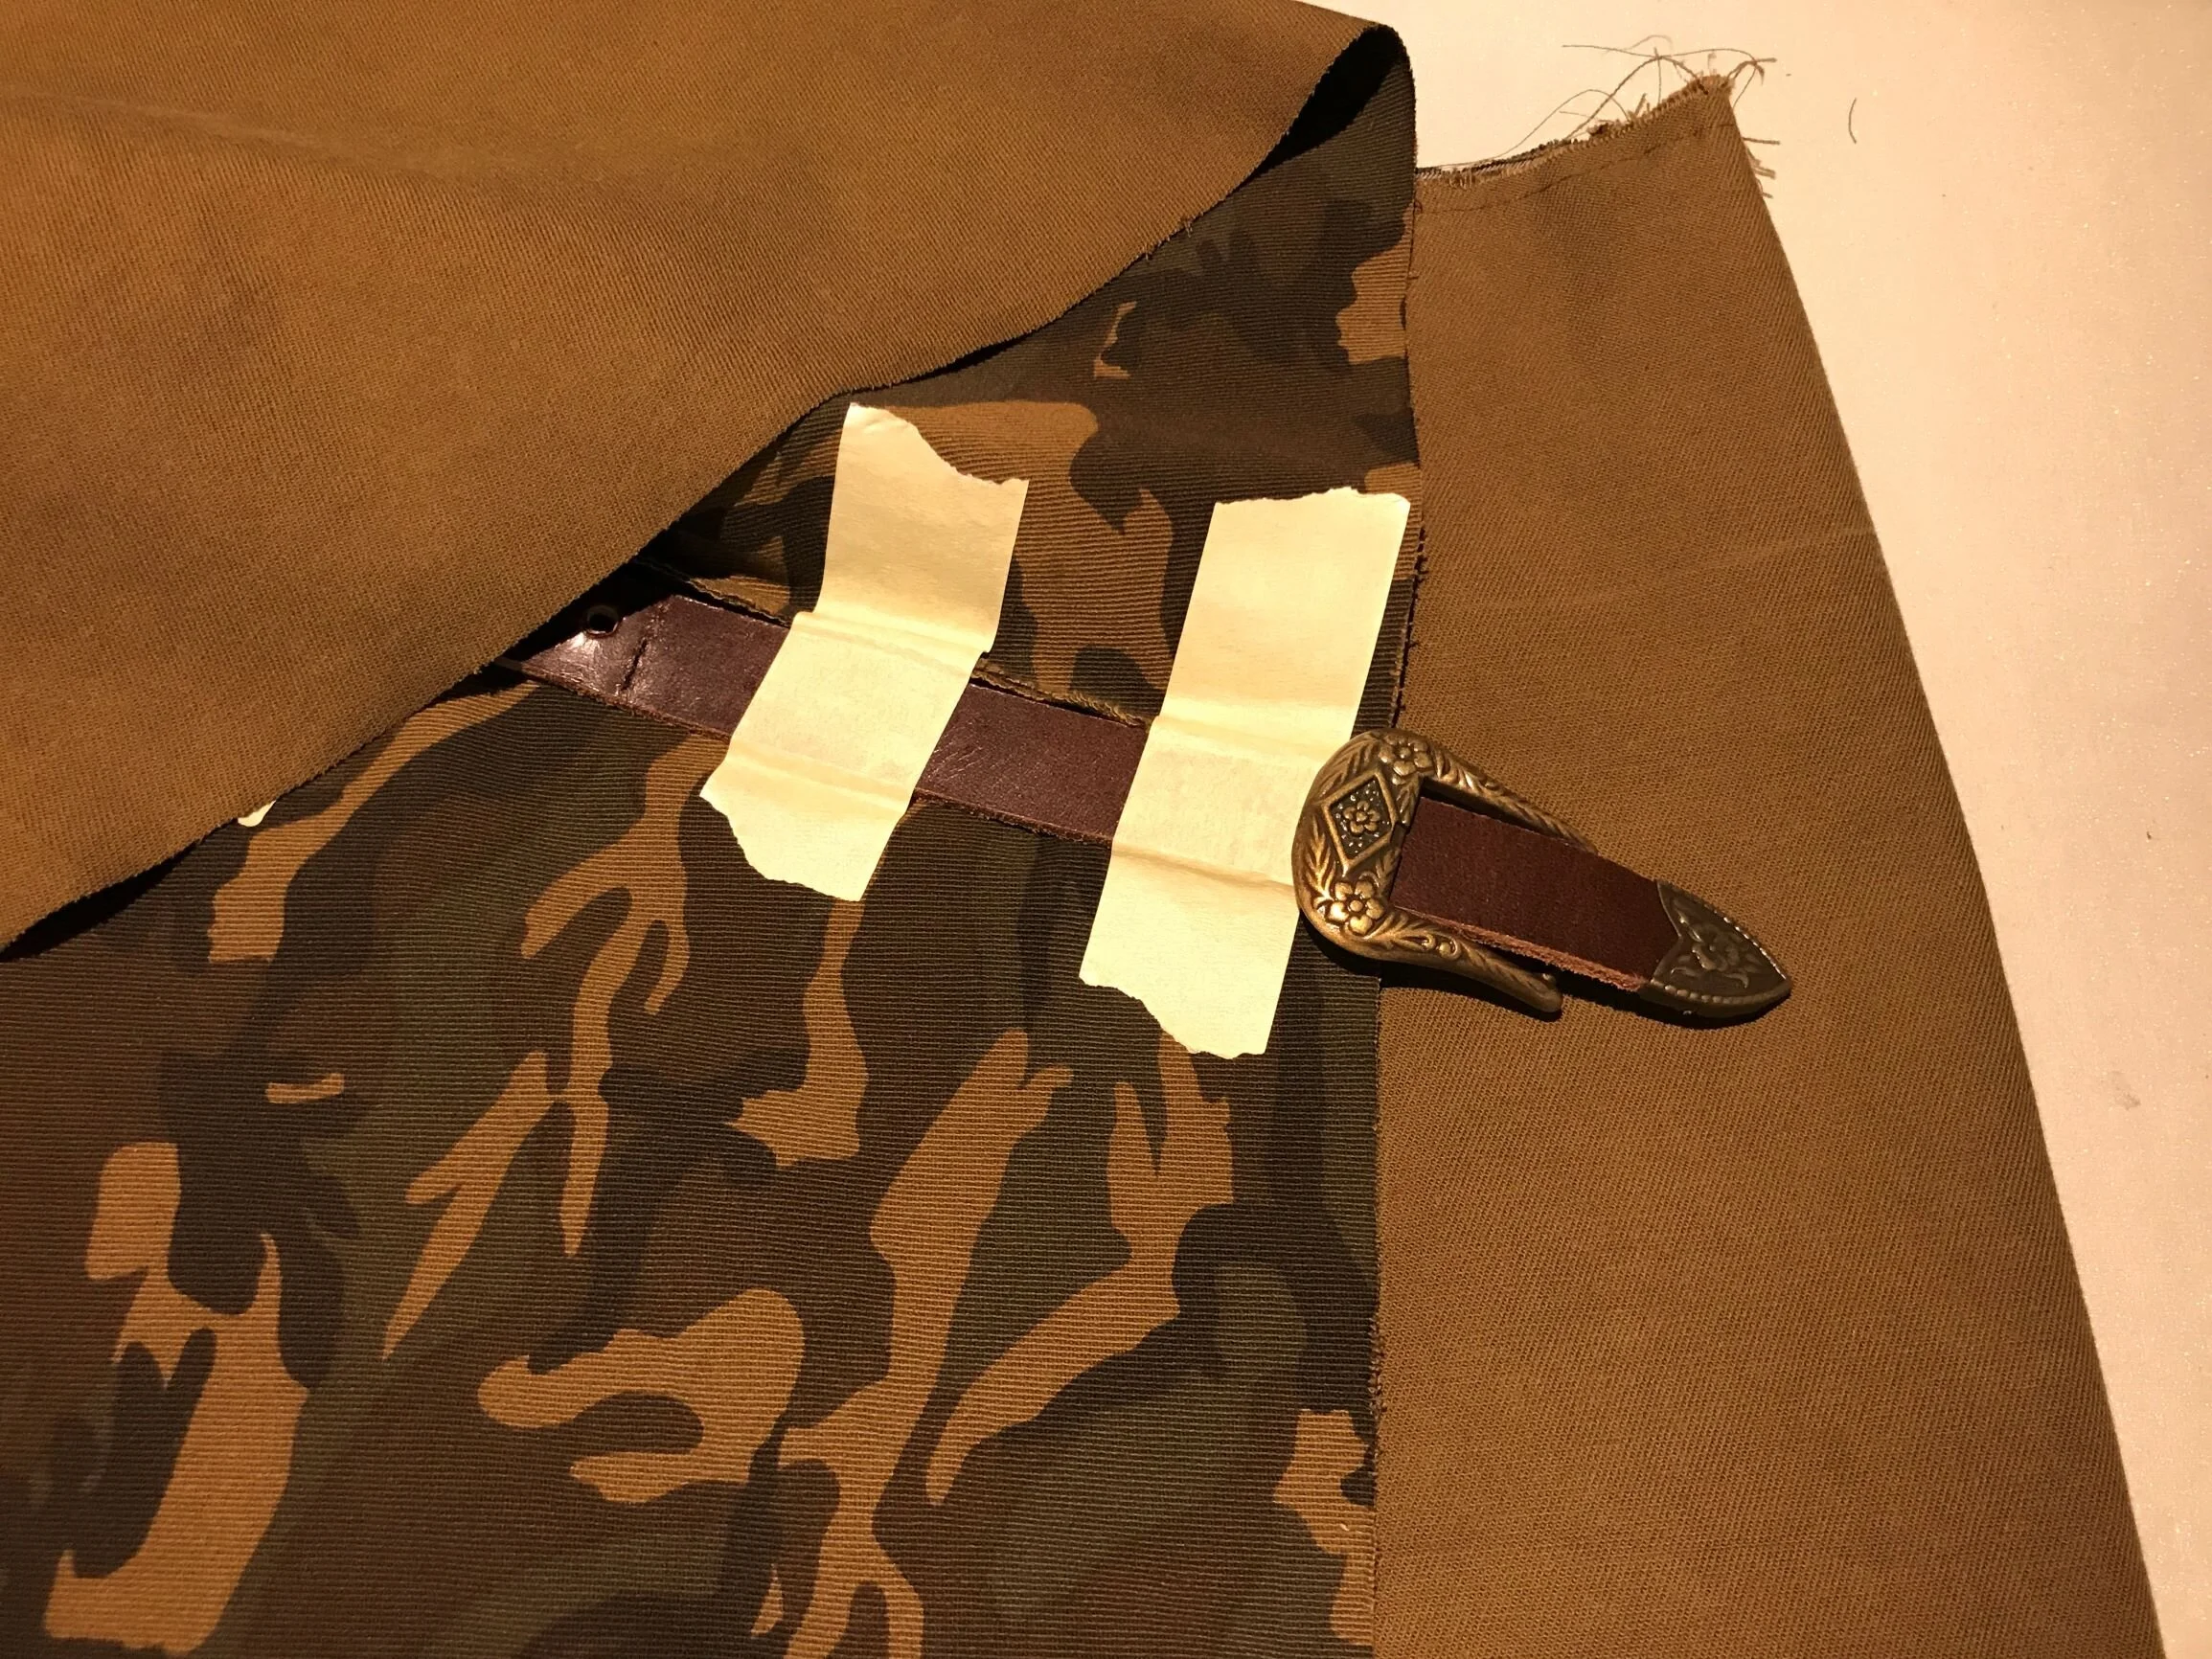
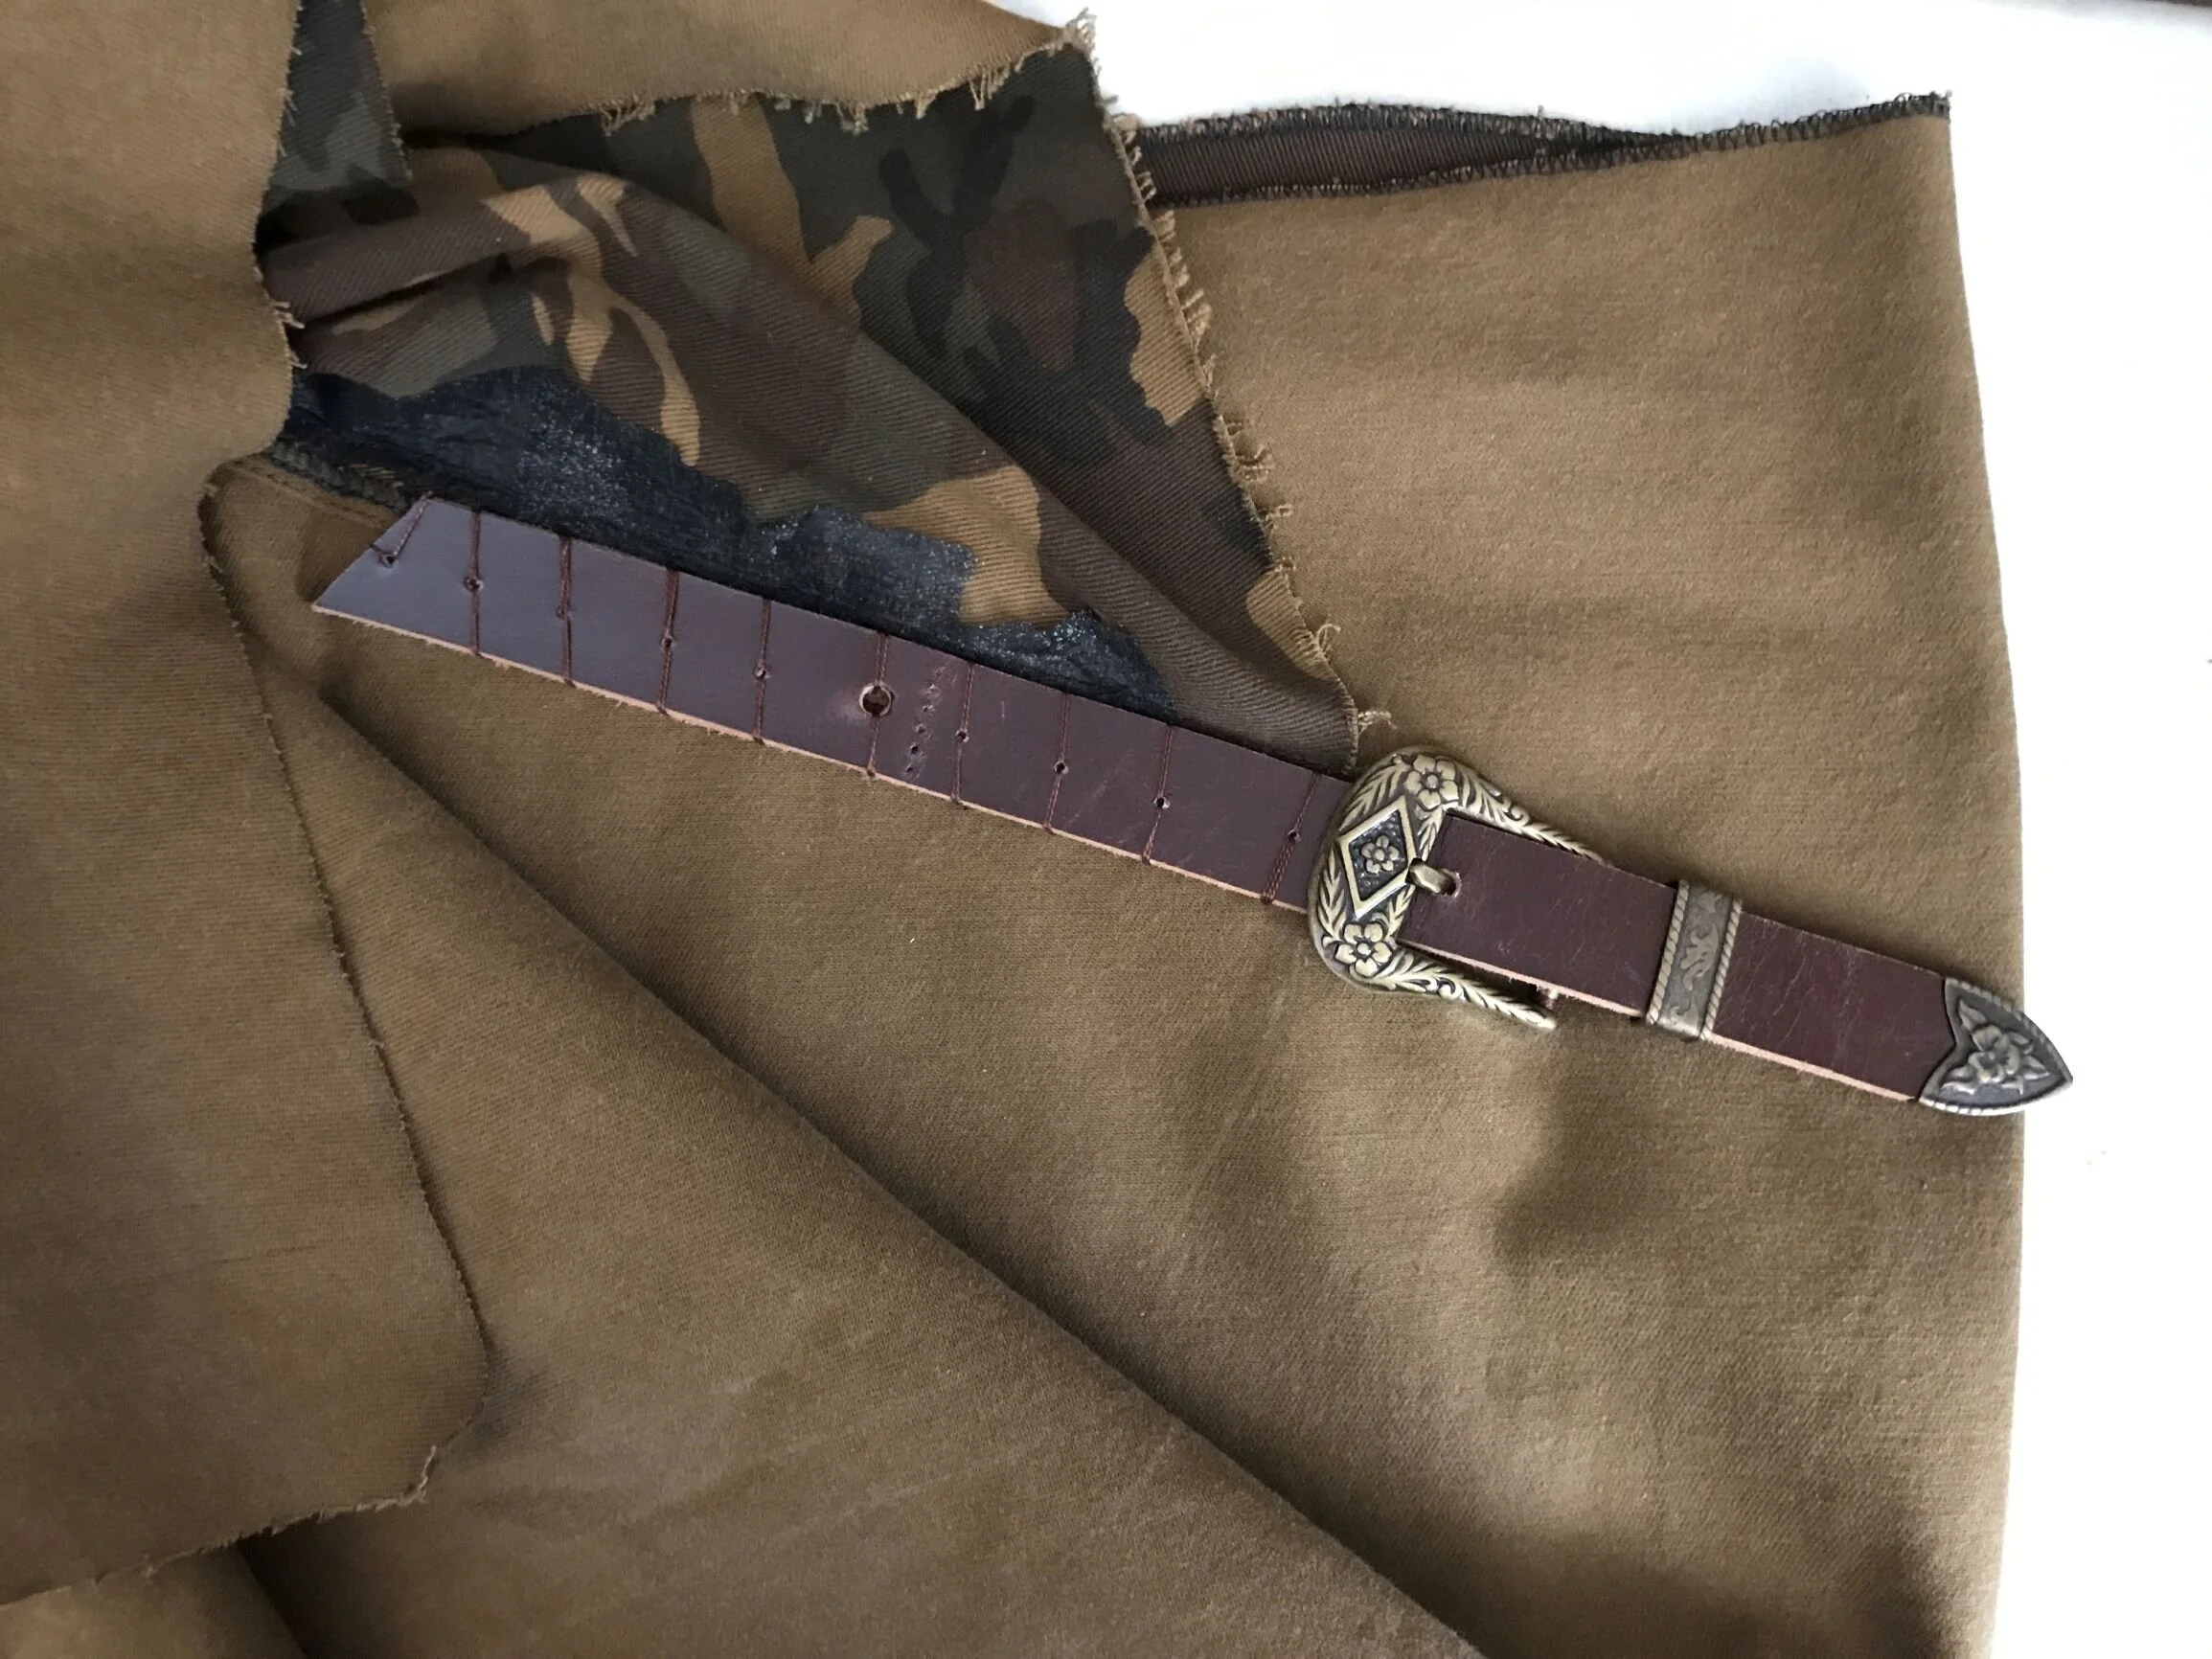
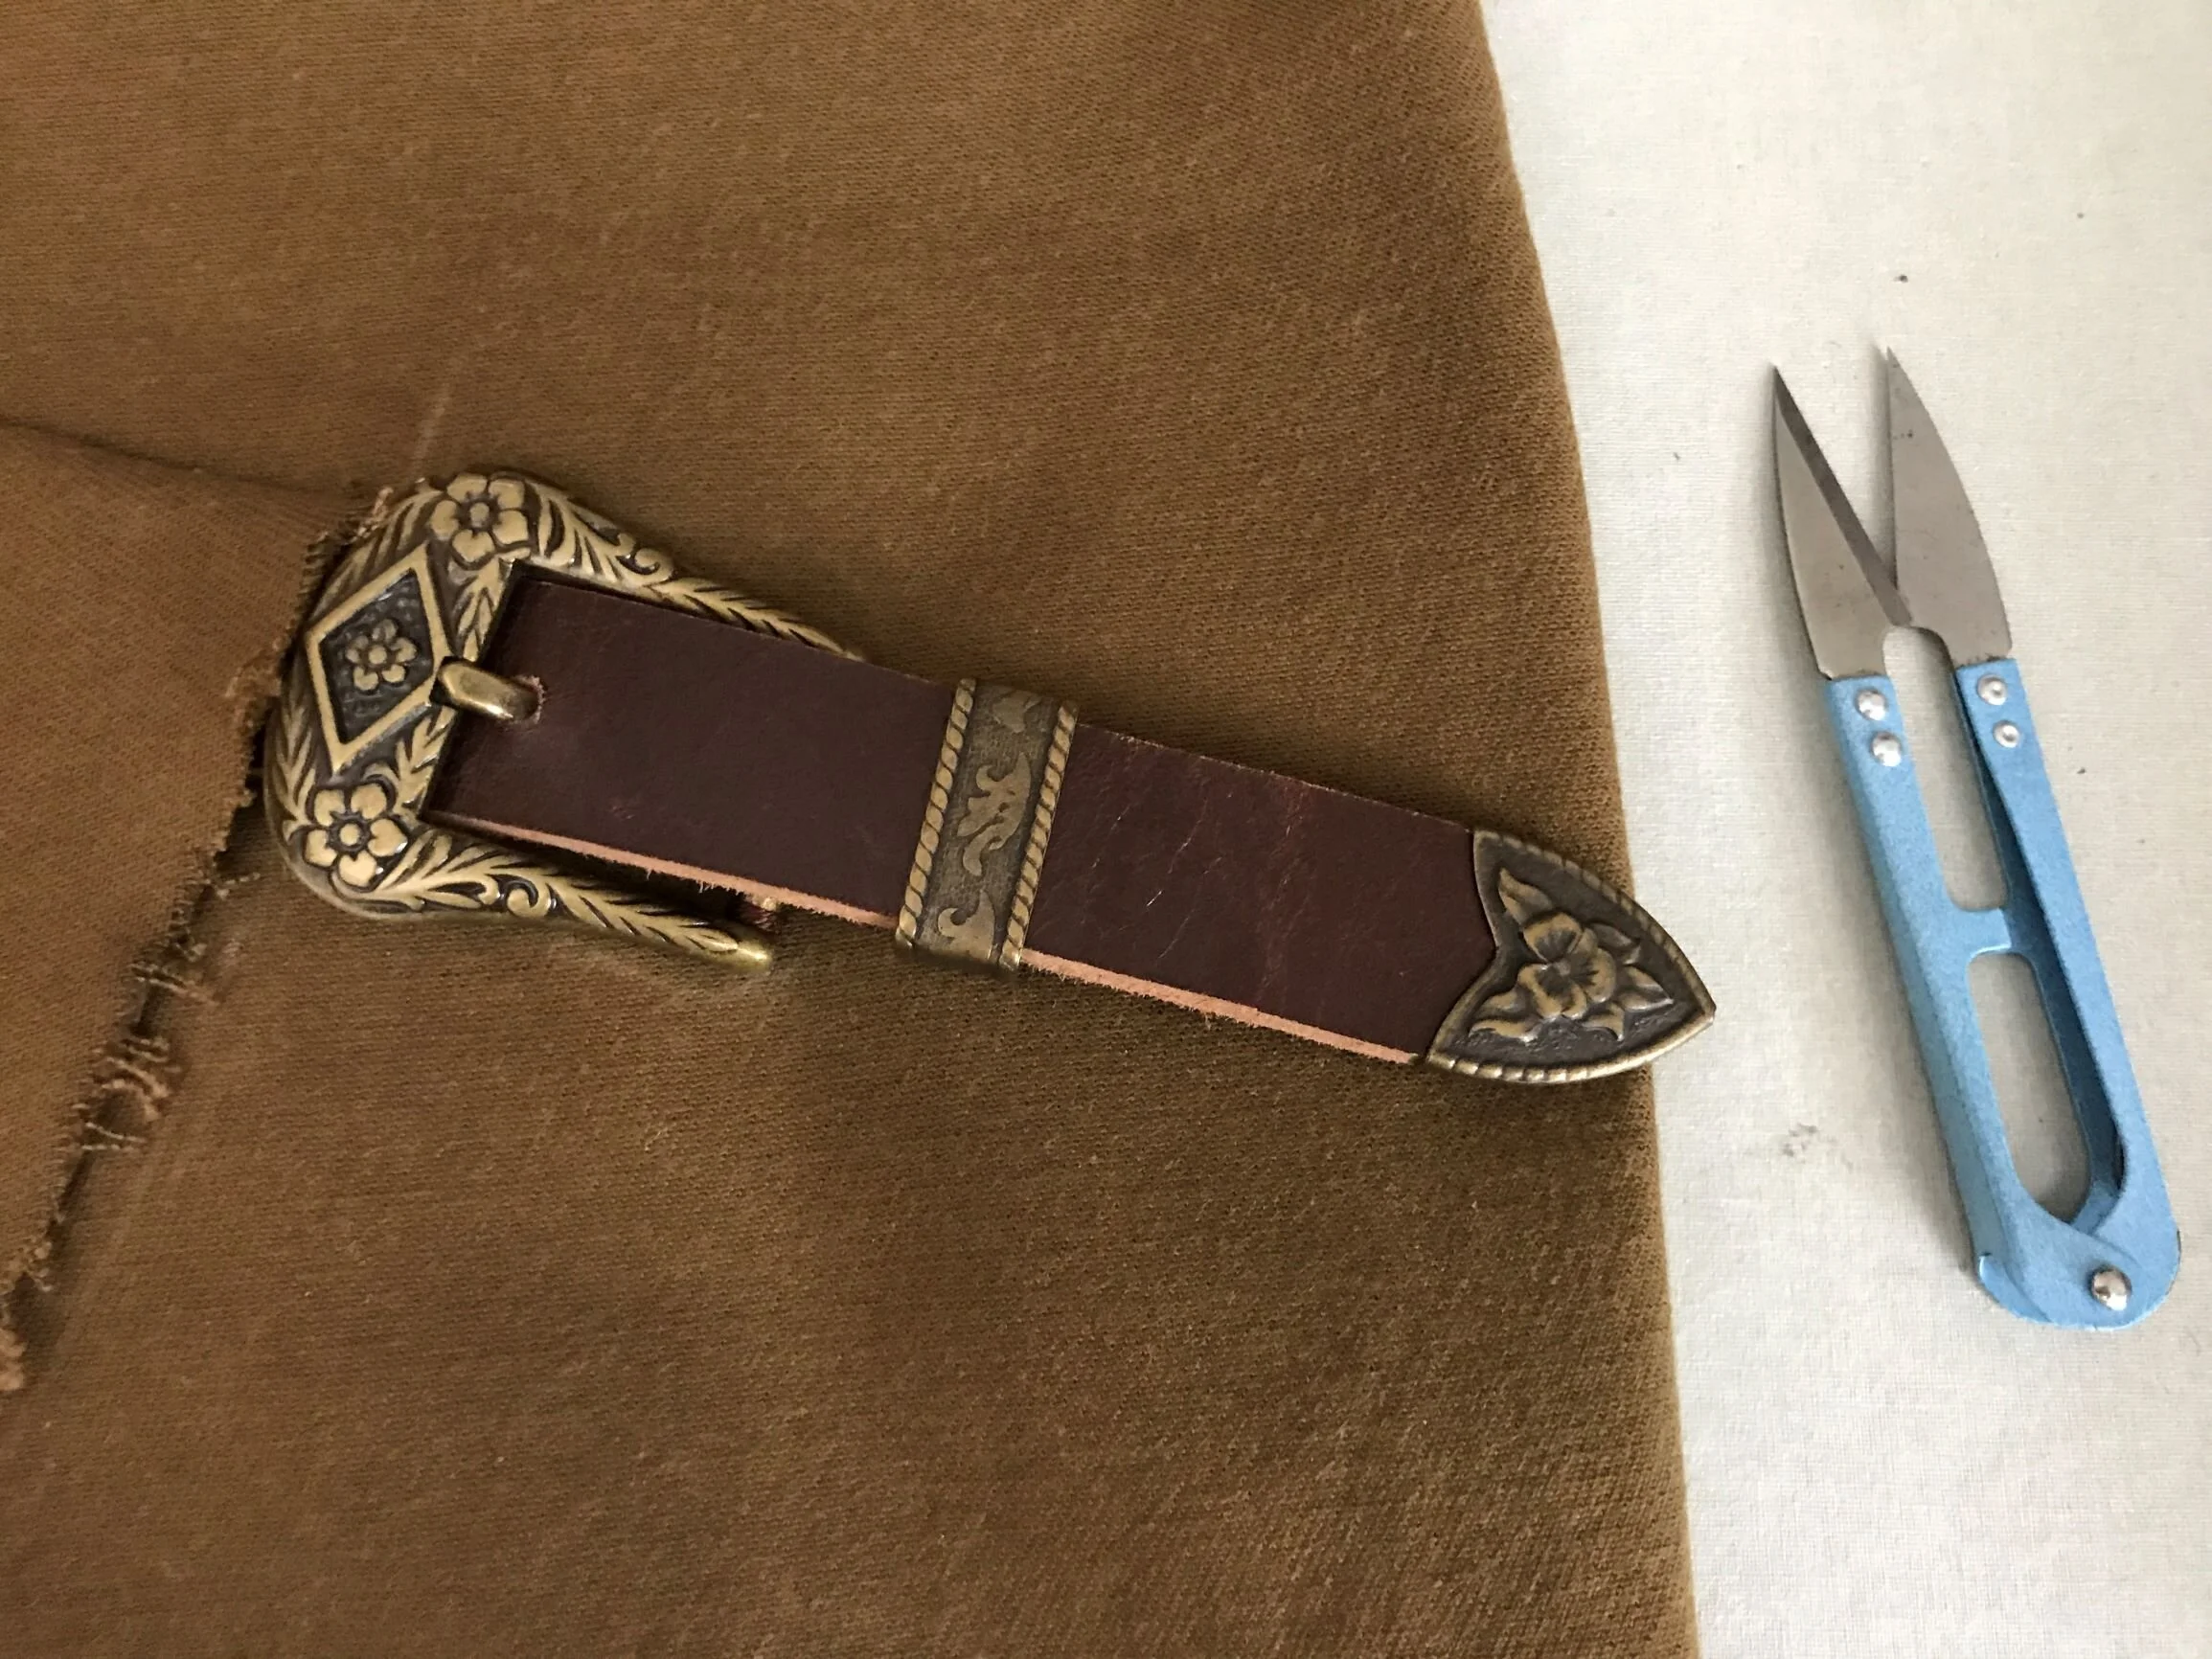
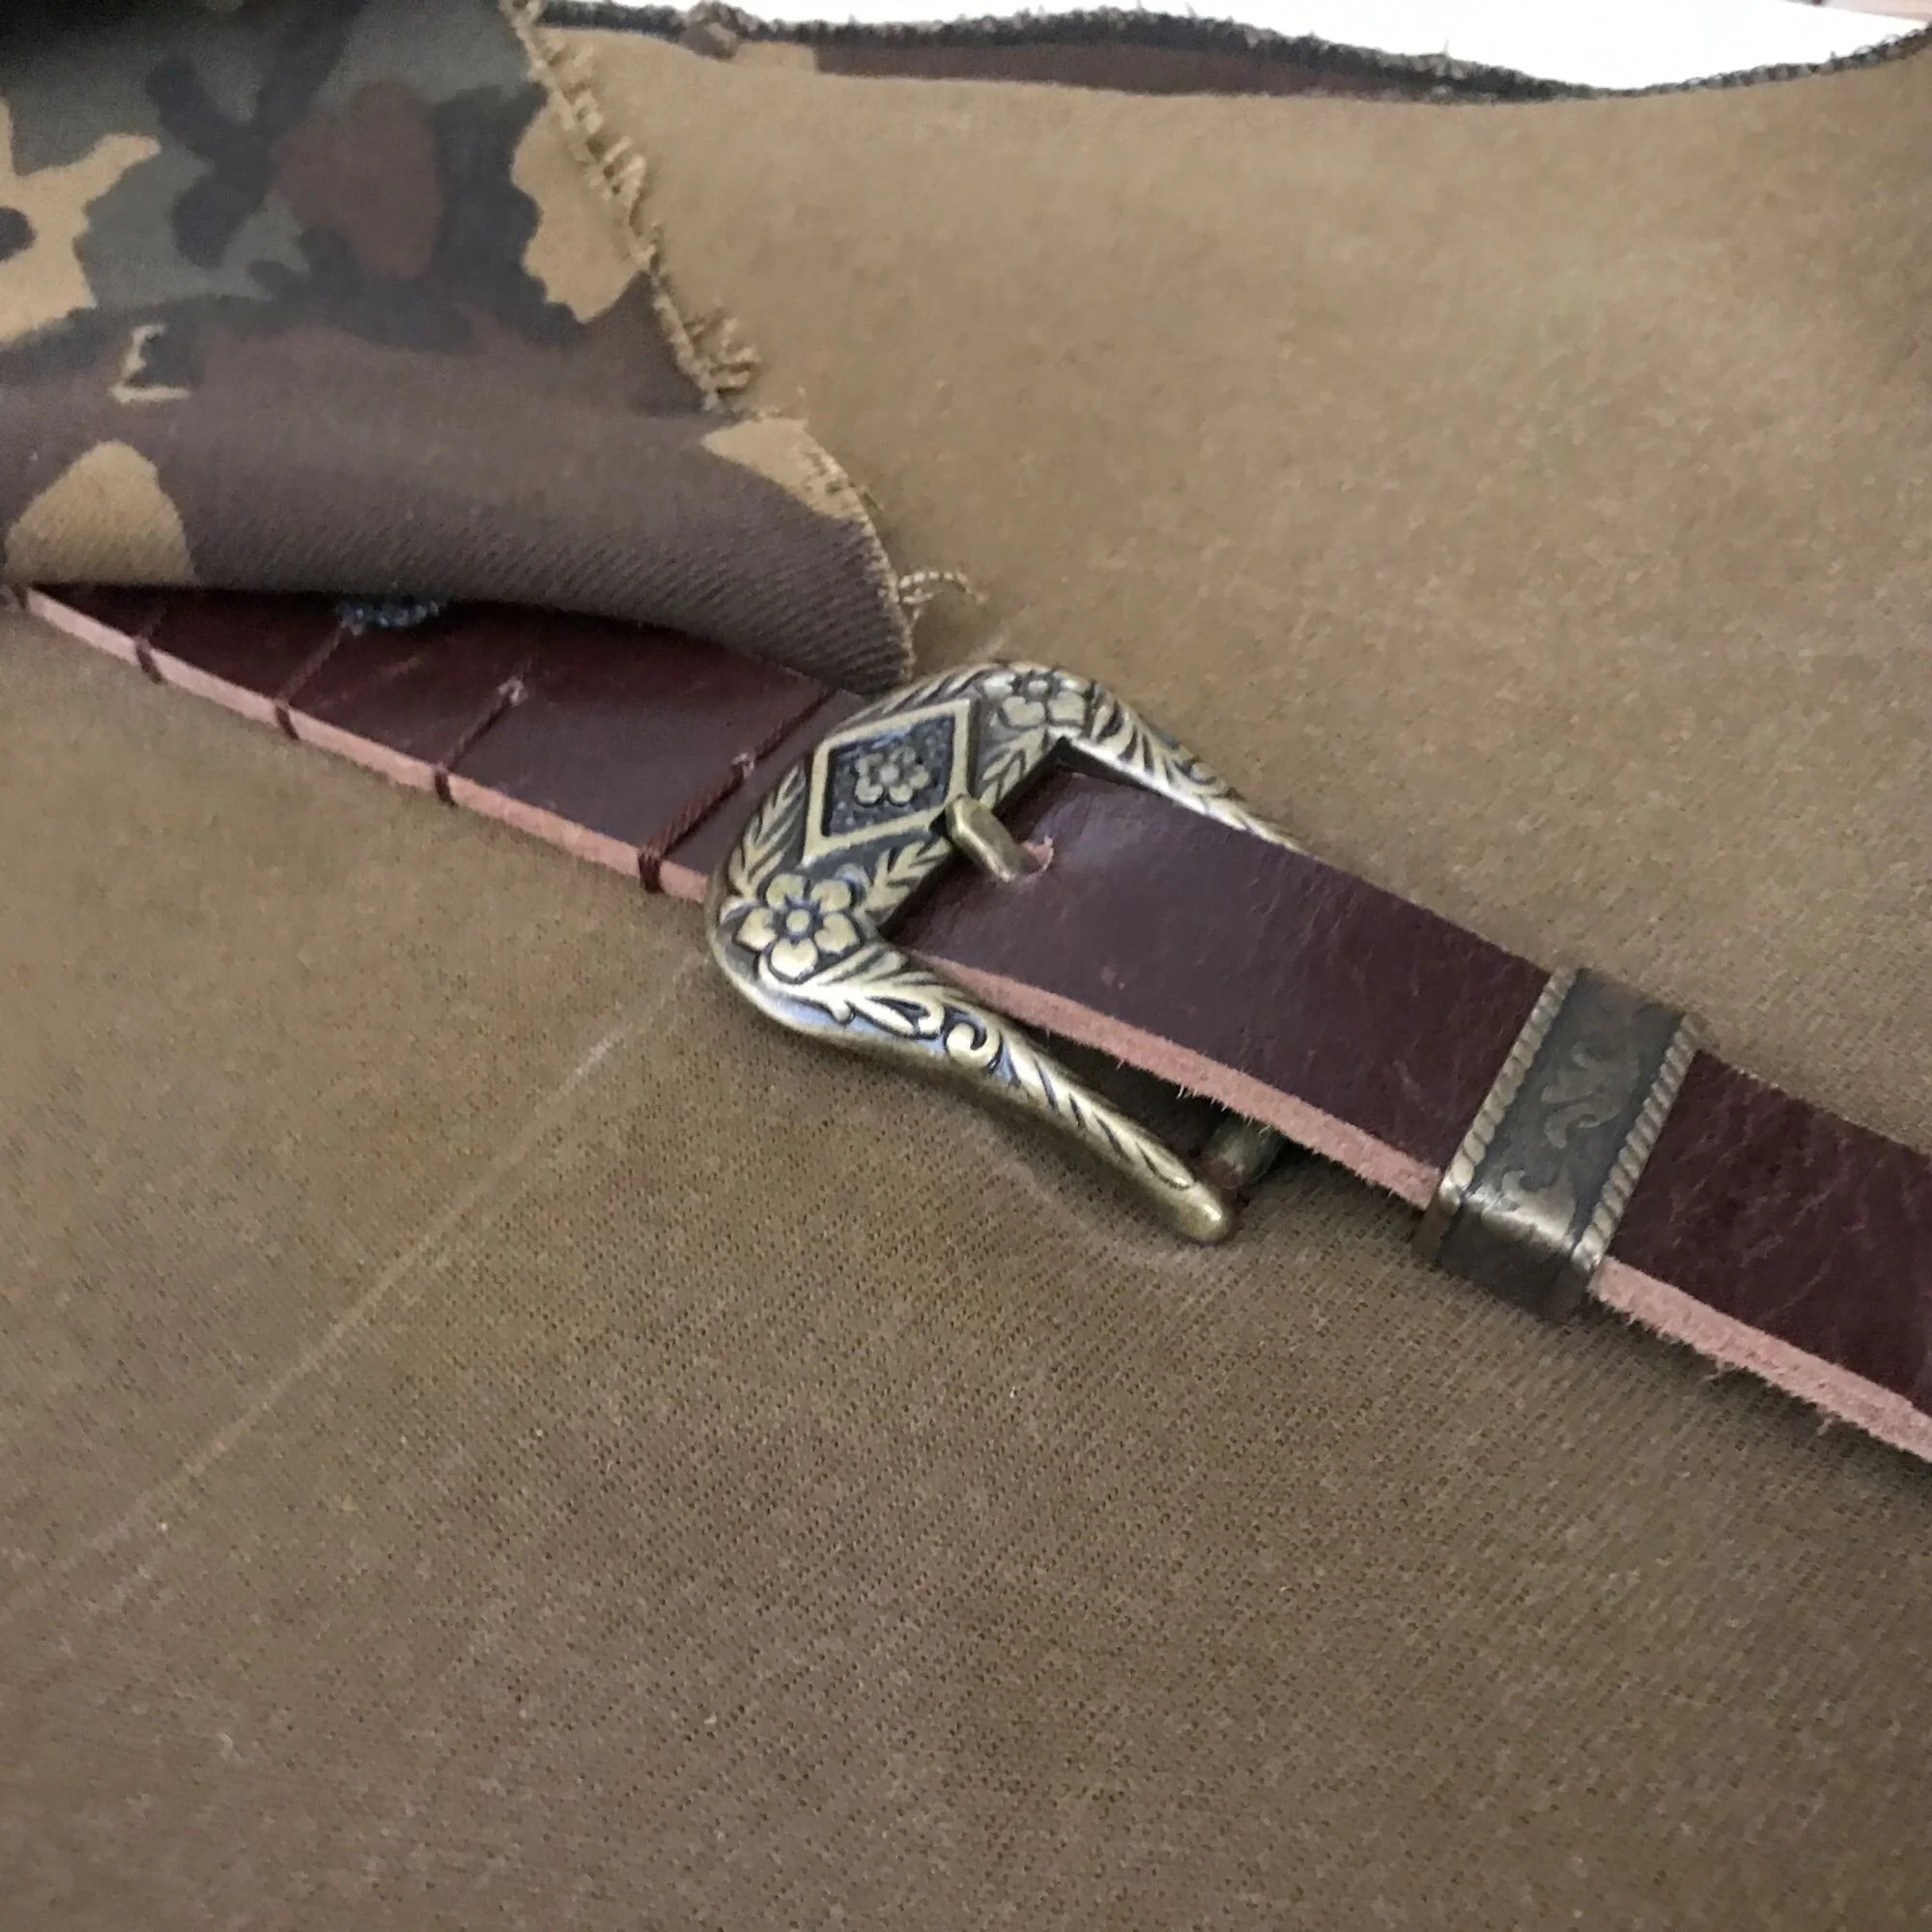
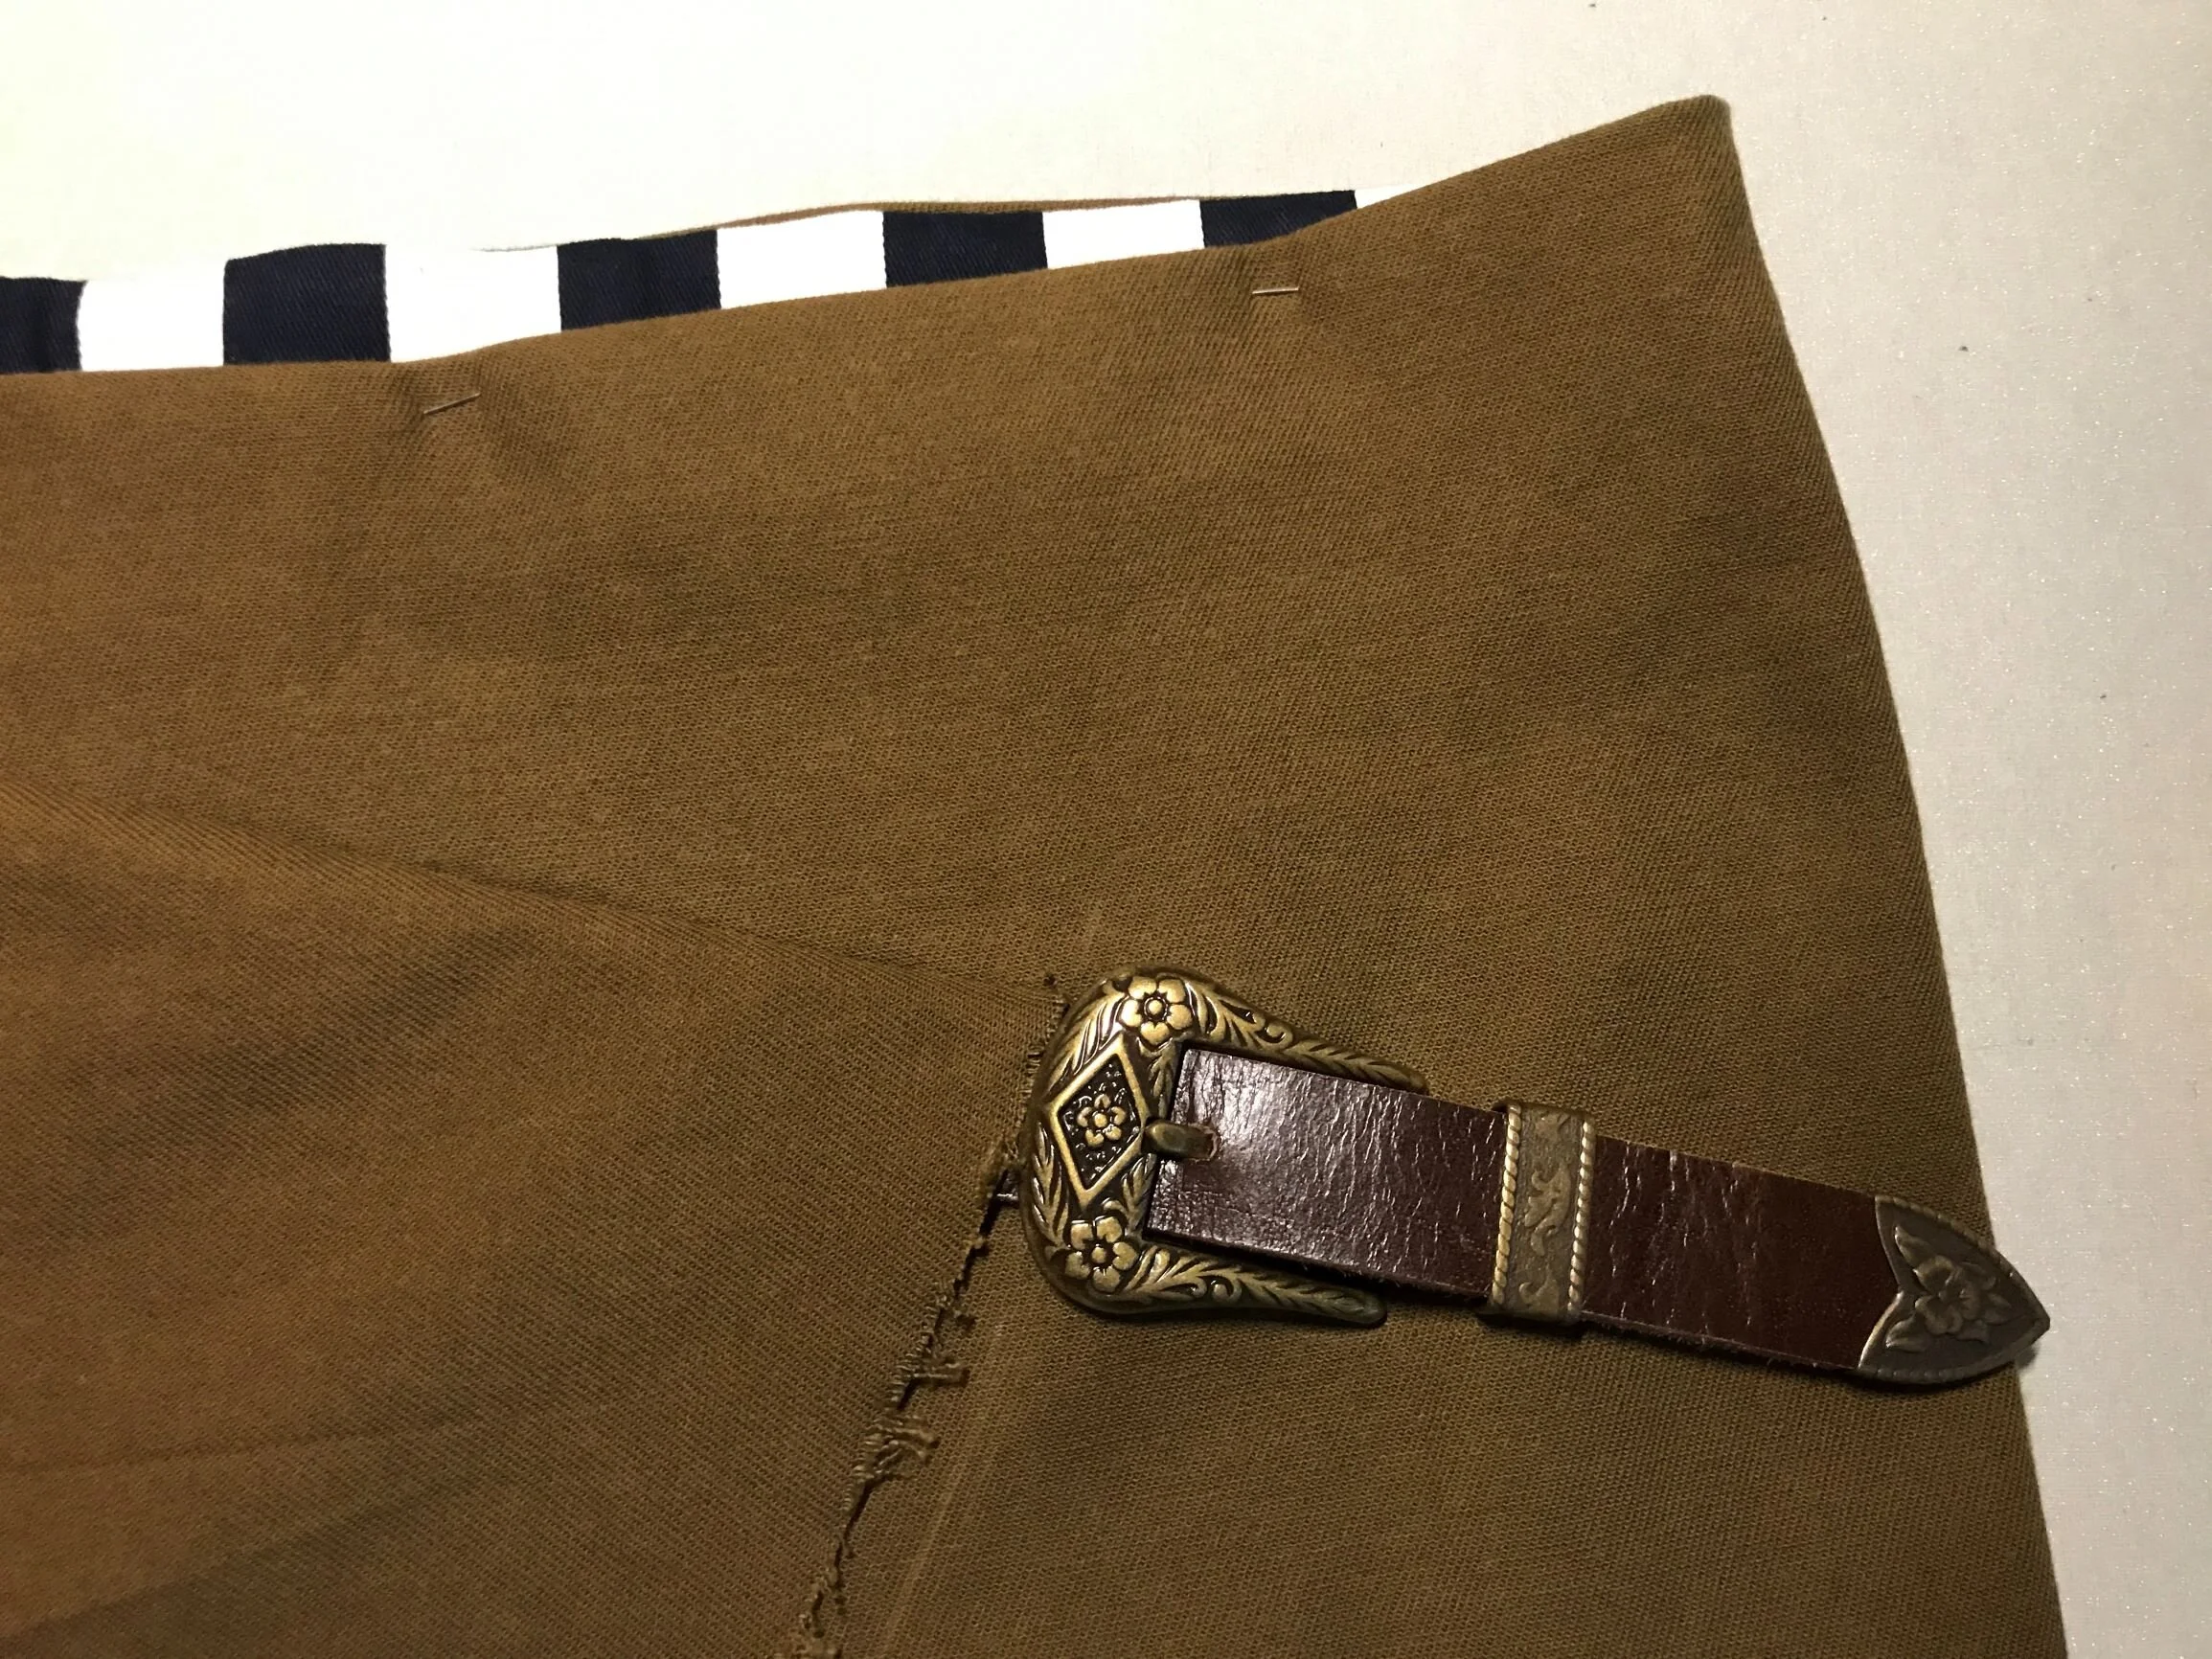
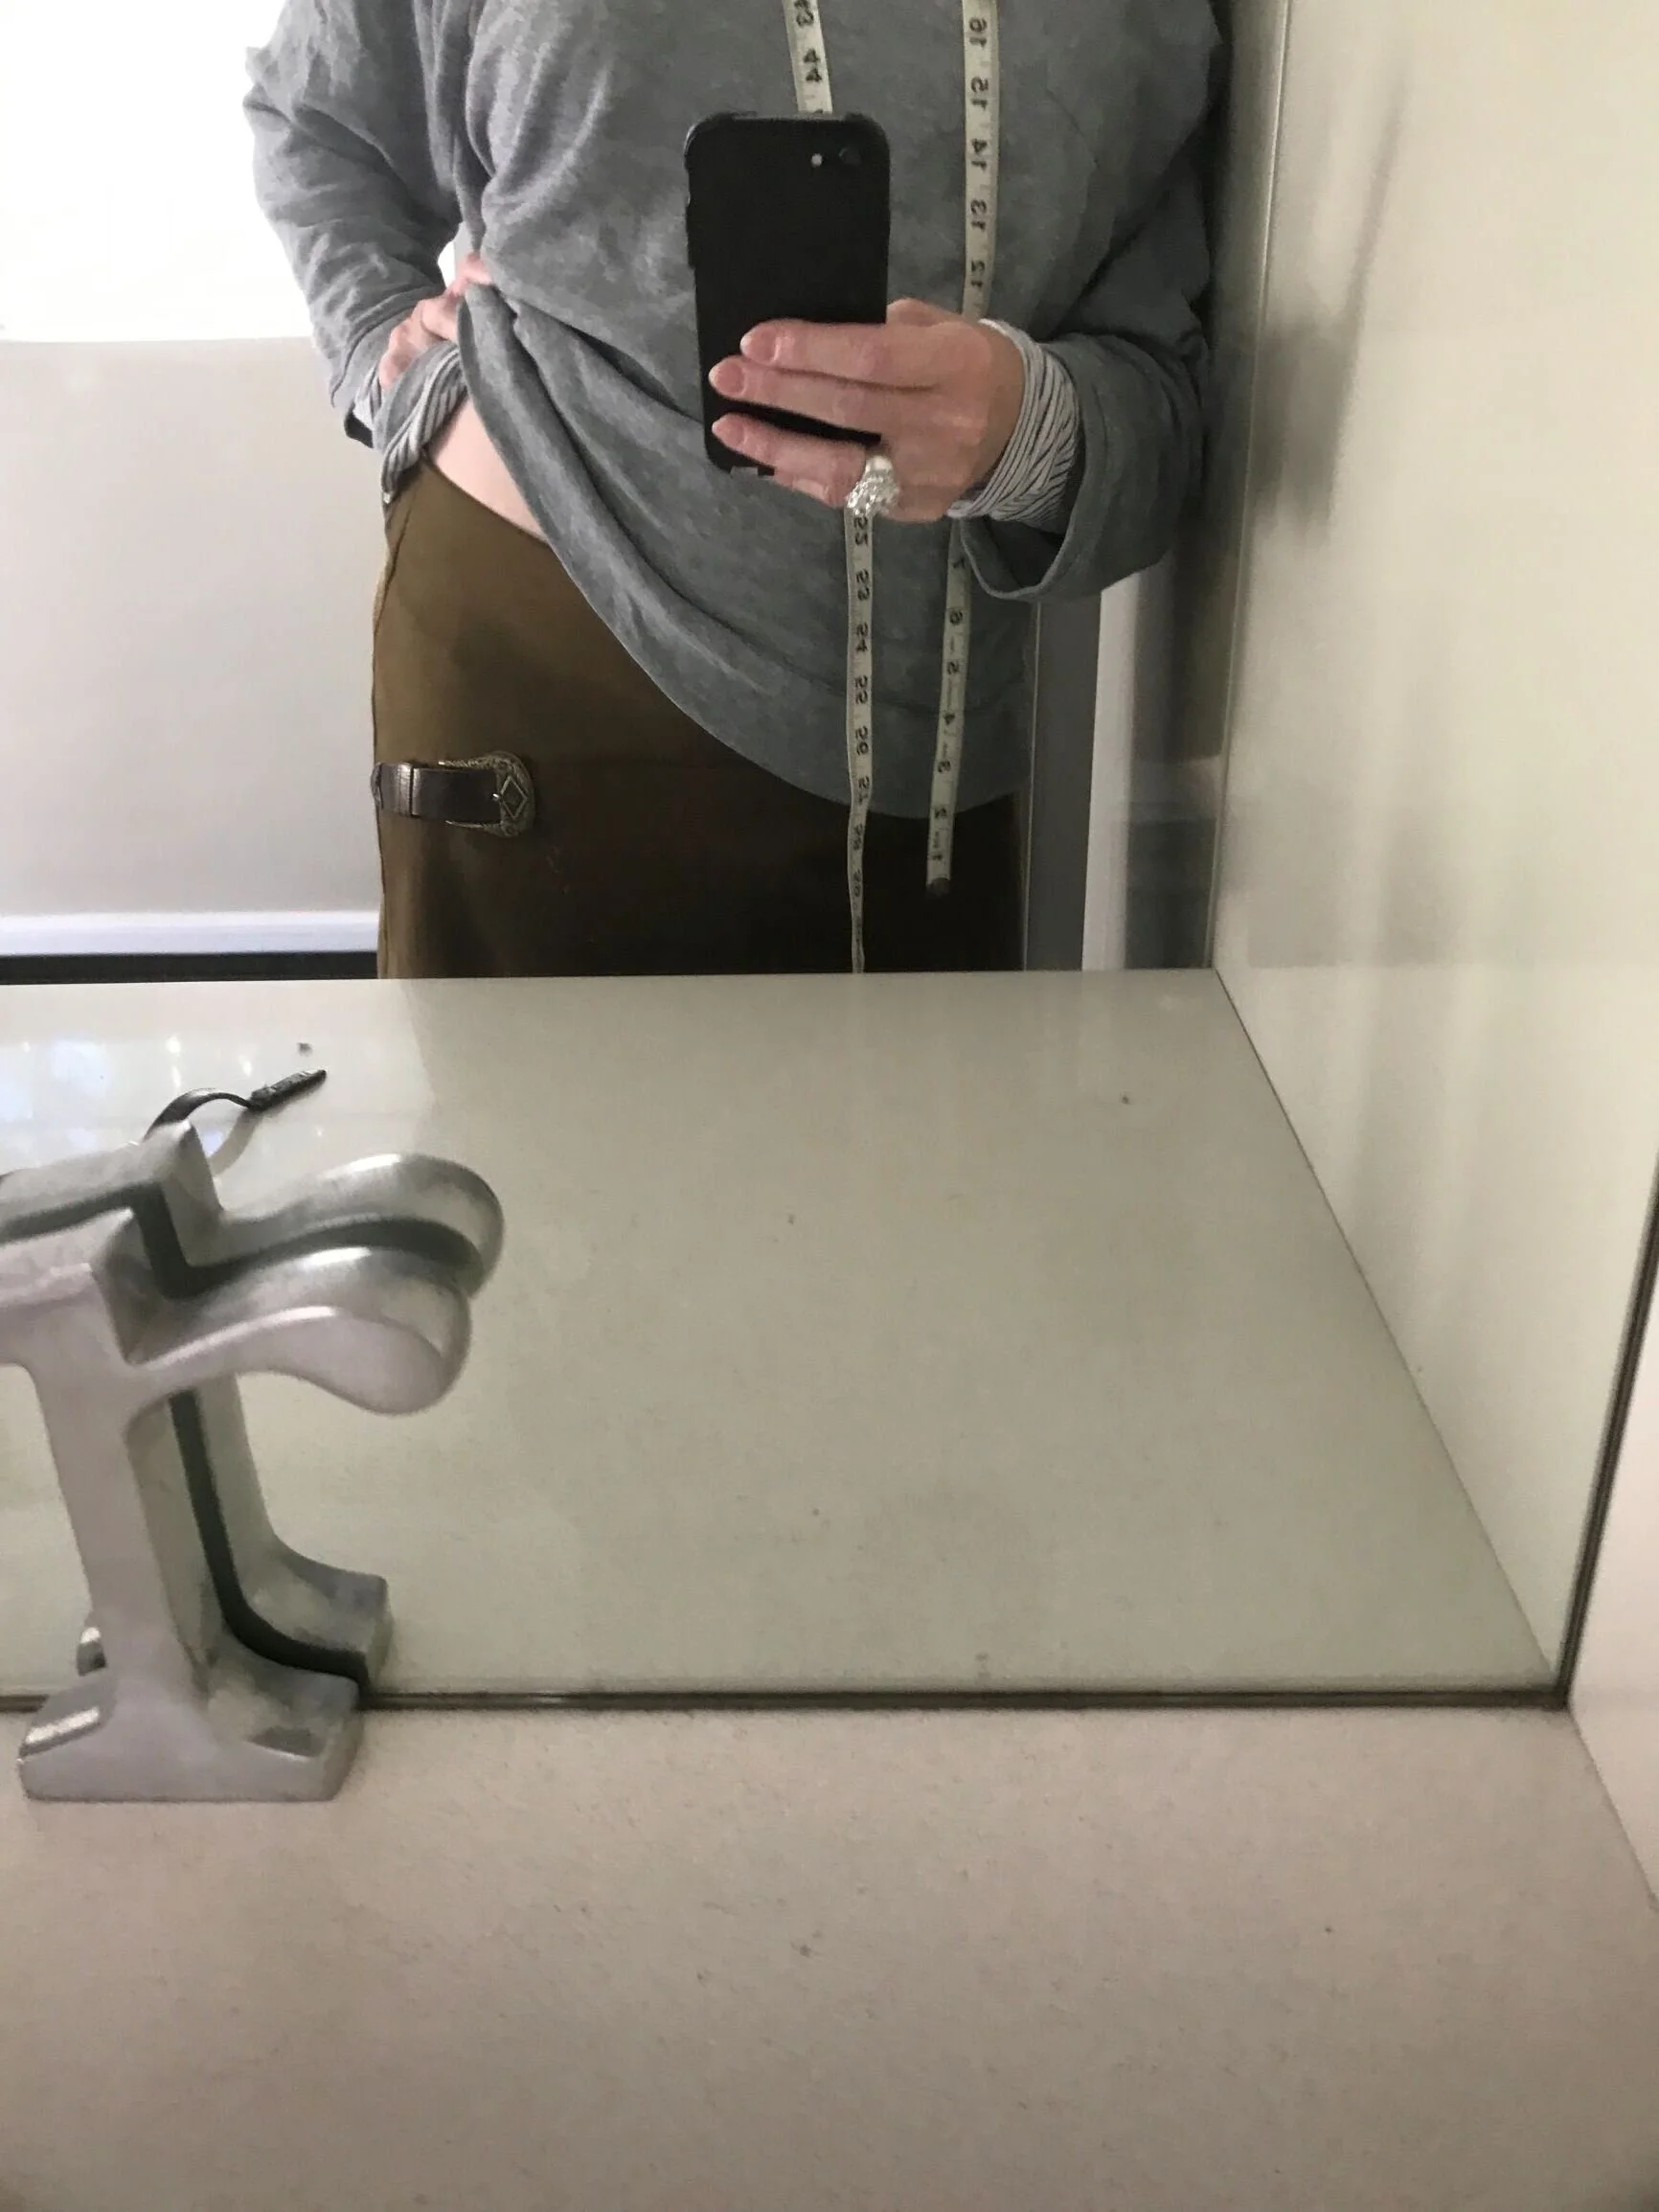
Buckle point is neat
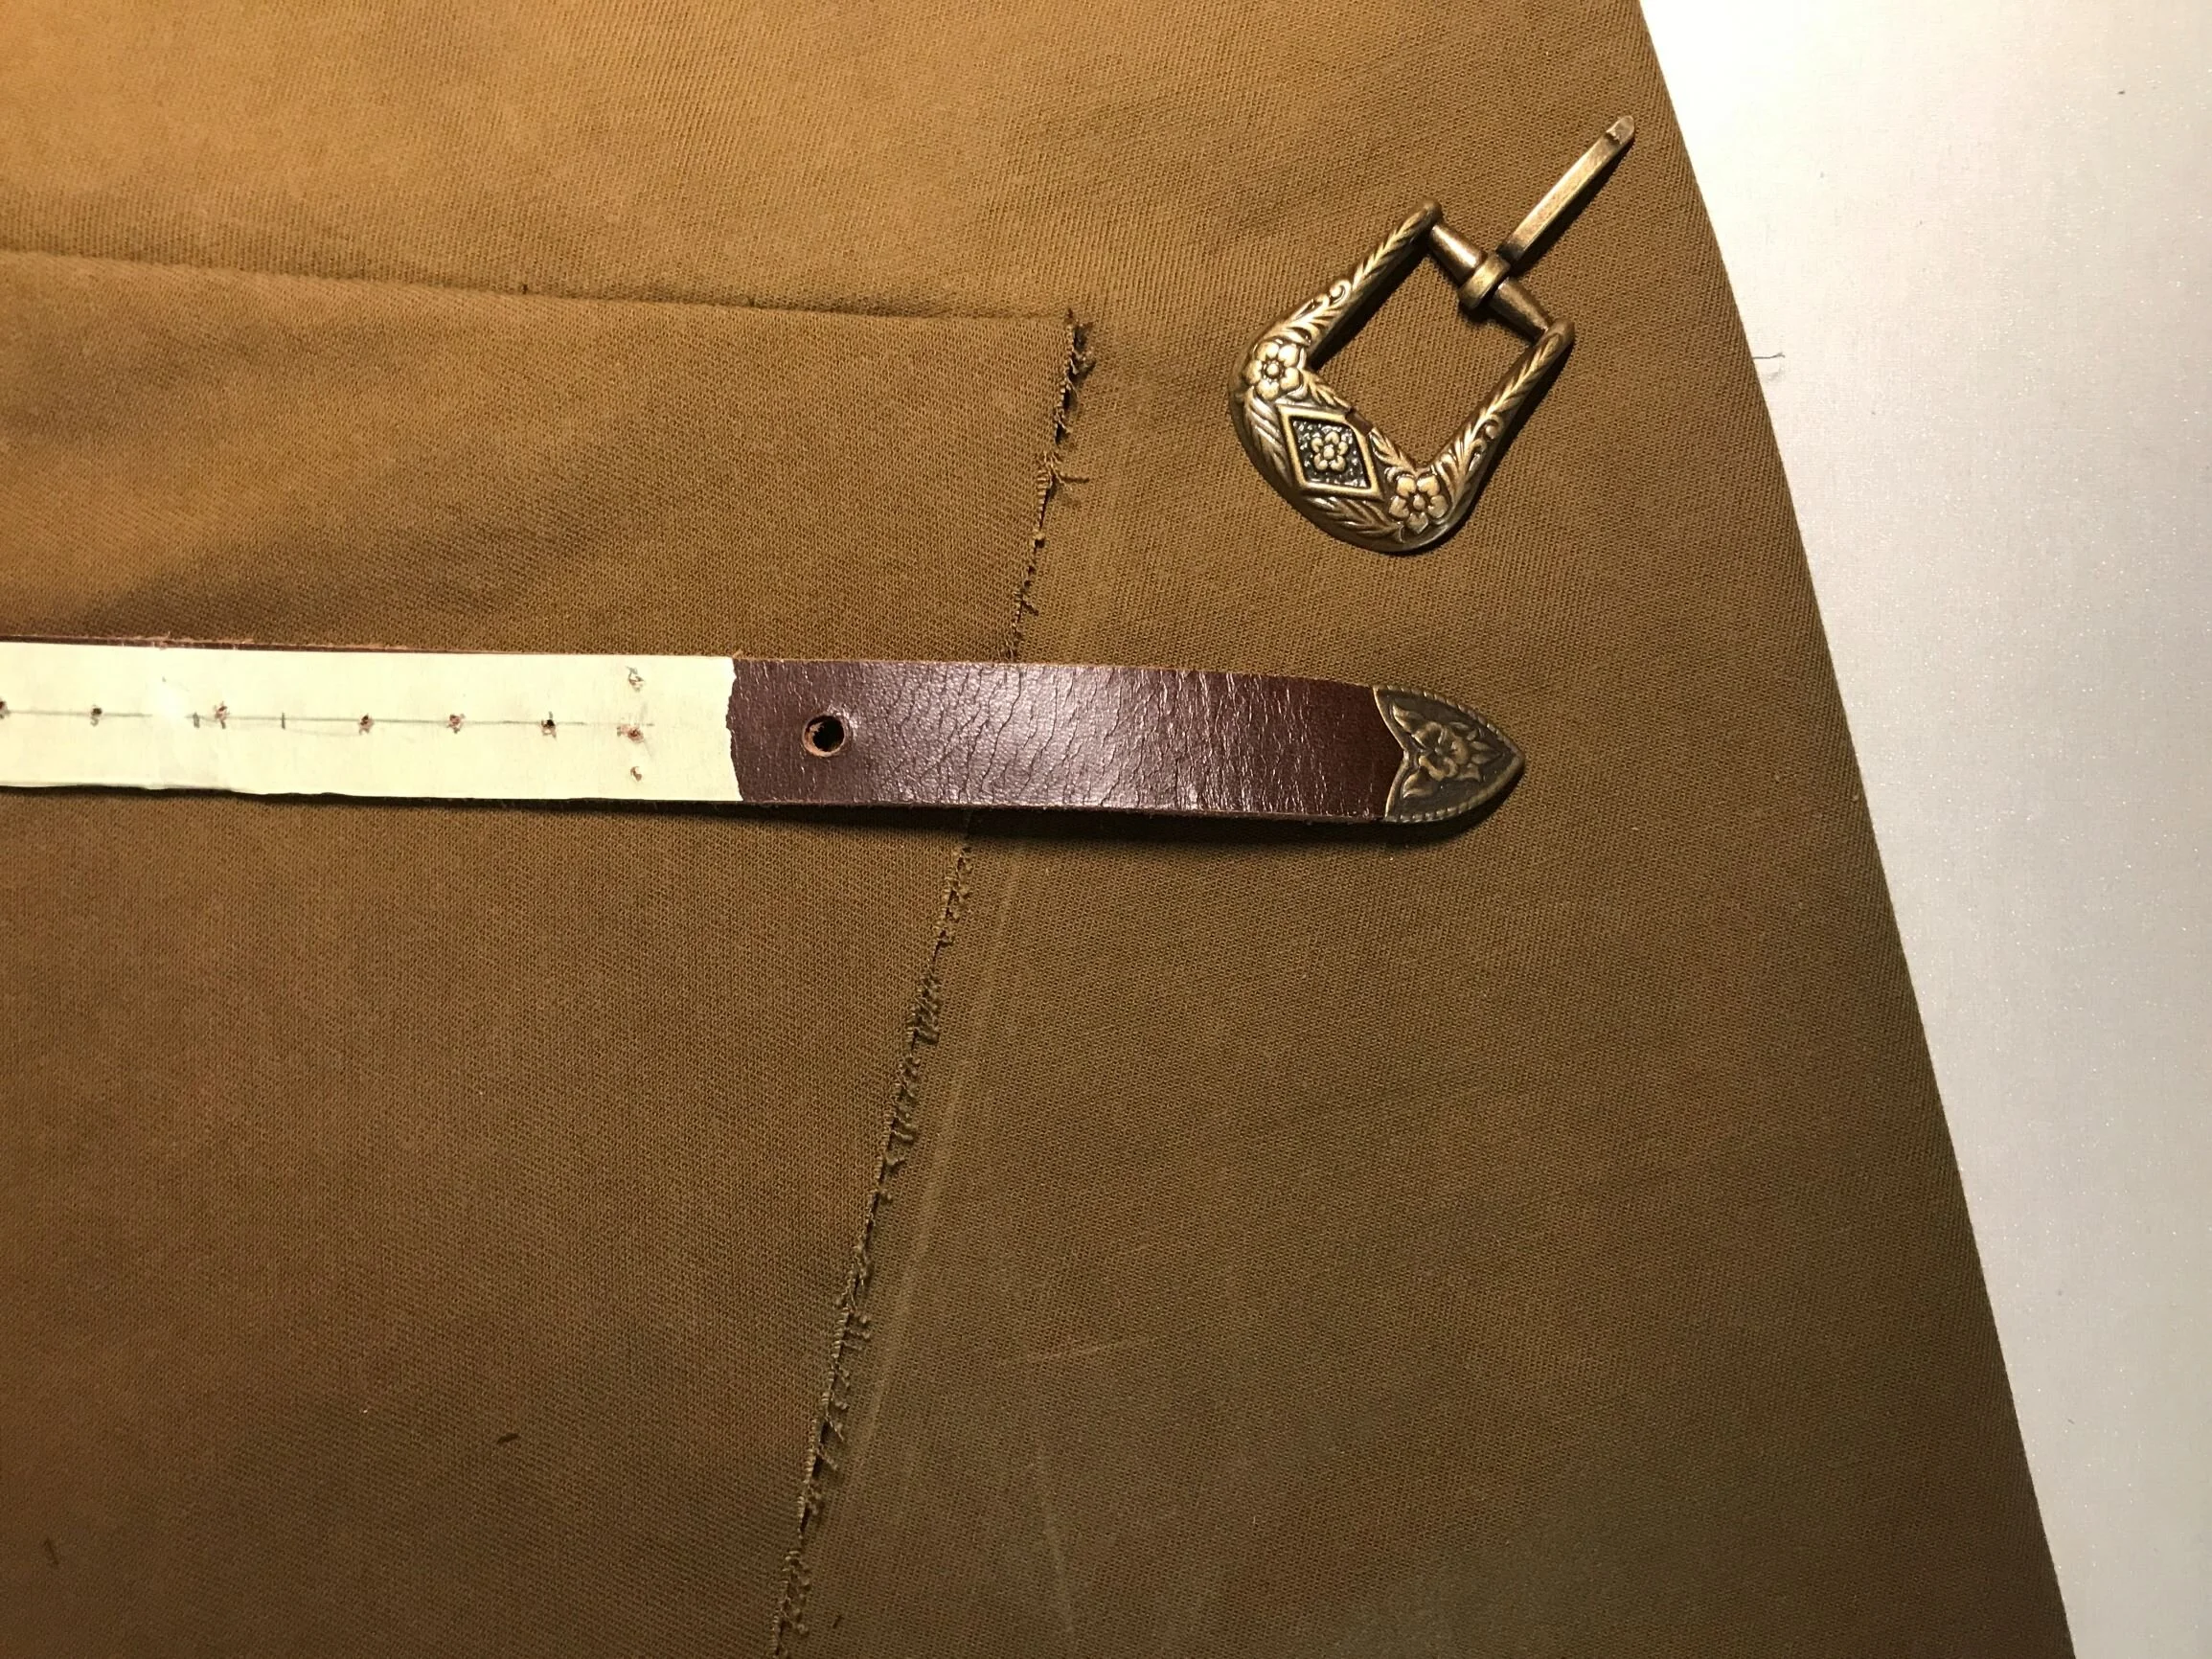
The fancy buckle set is from Adelaide Leather here
Getting closer to the exciting belt bit! The buckle should be positioned up against the edge as if it’s keeping it in place while allowing a nice belt tail left to nearly reach the side seam, with a keeper to be sewn on afterwards.
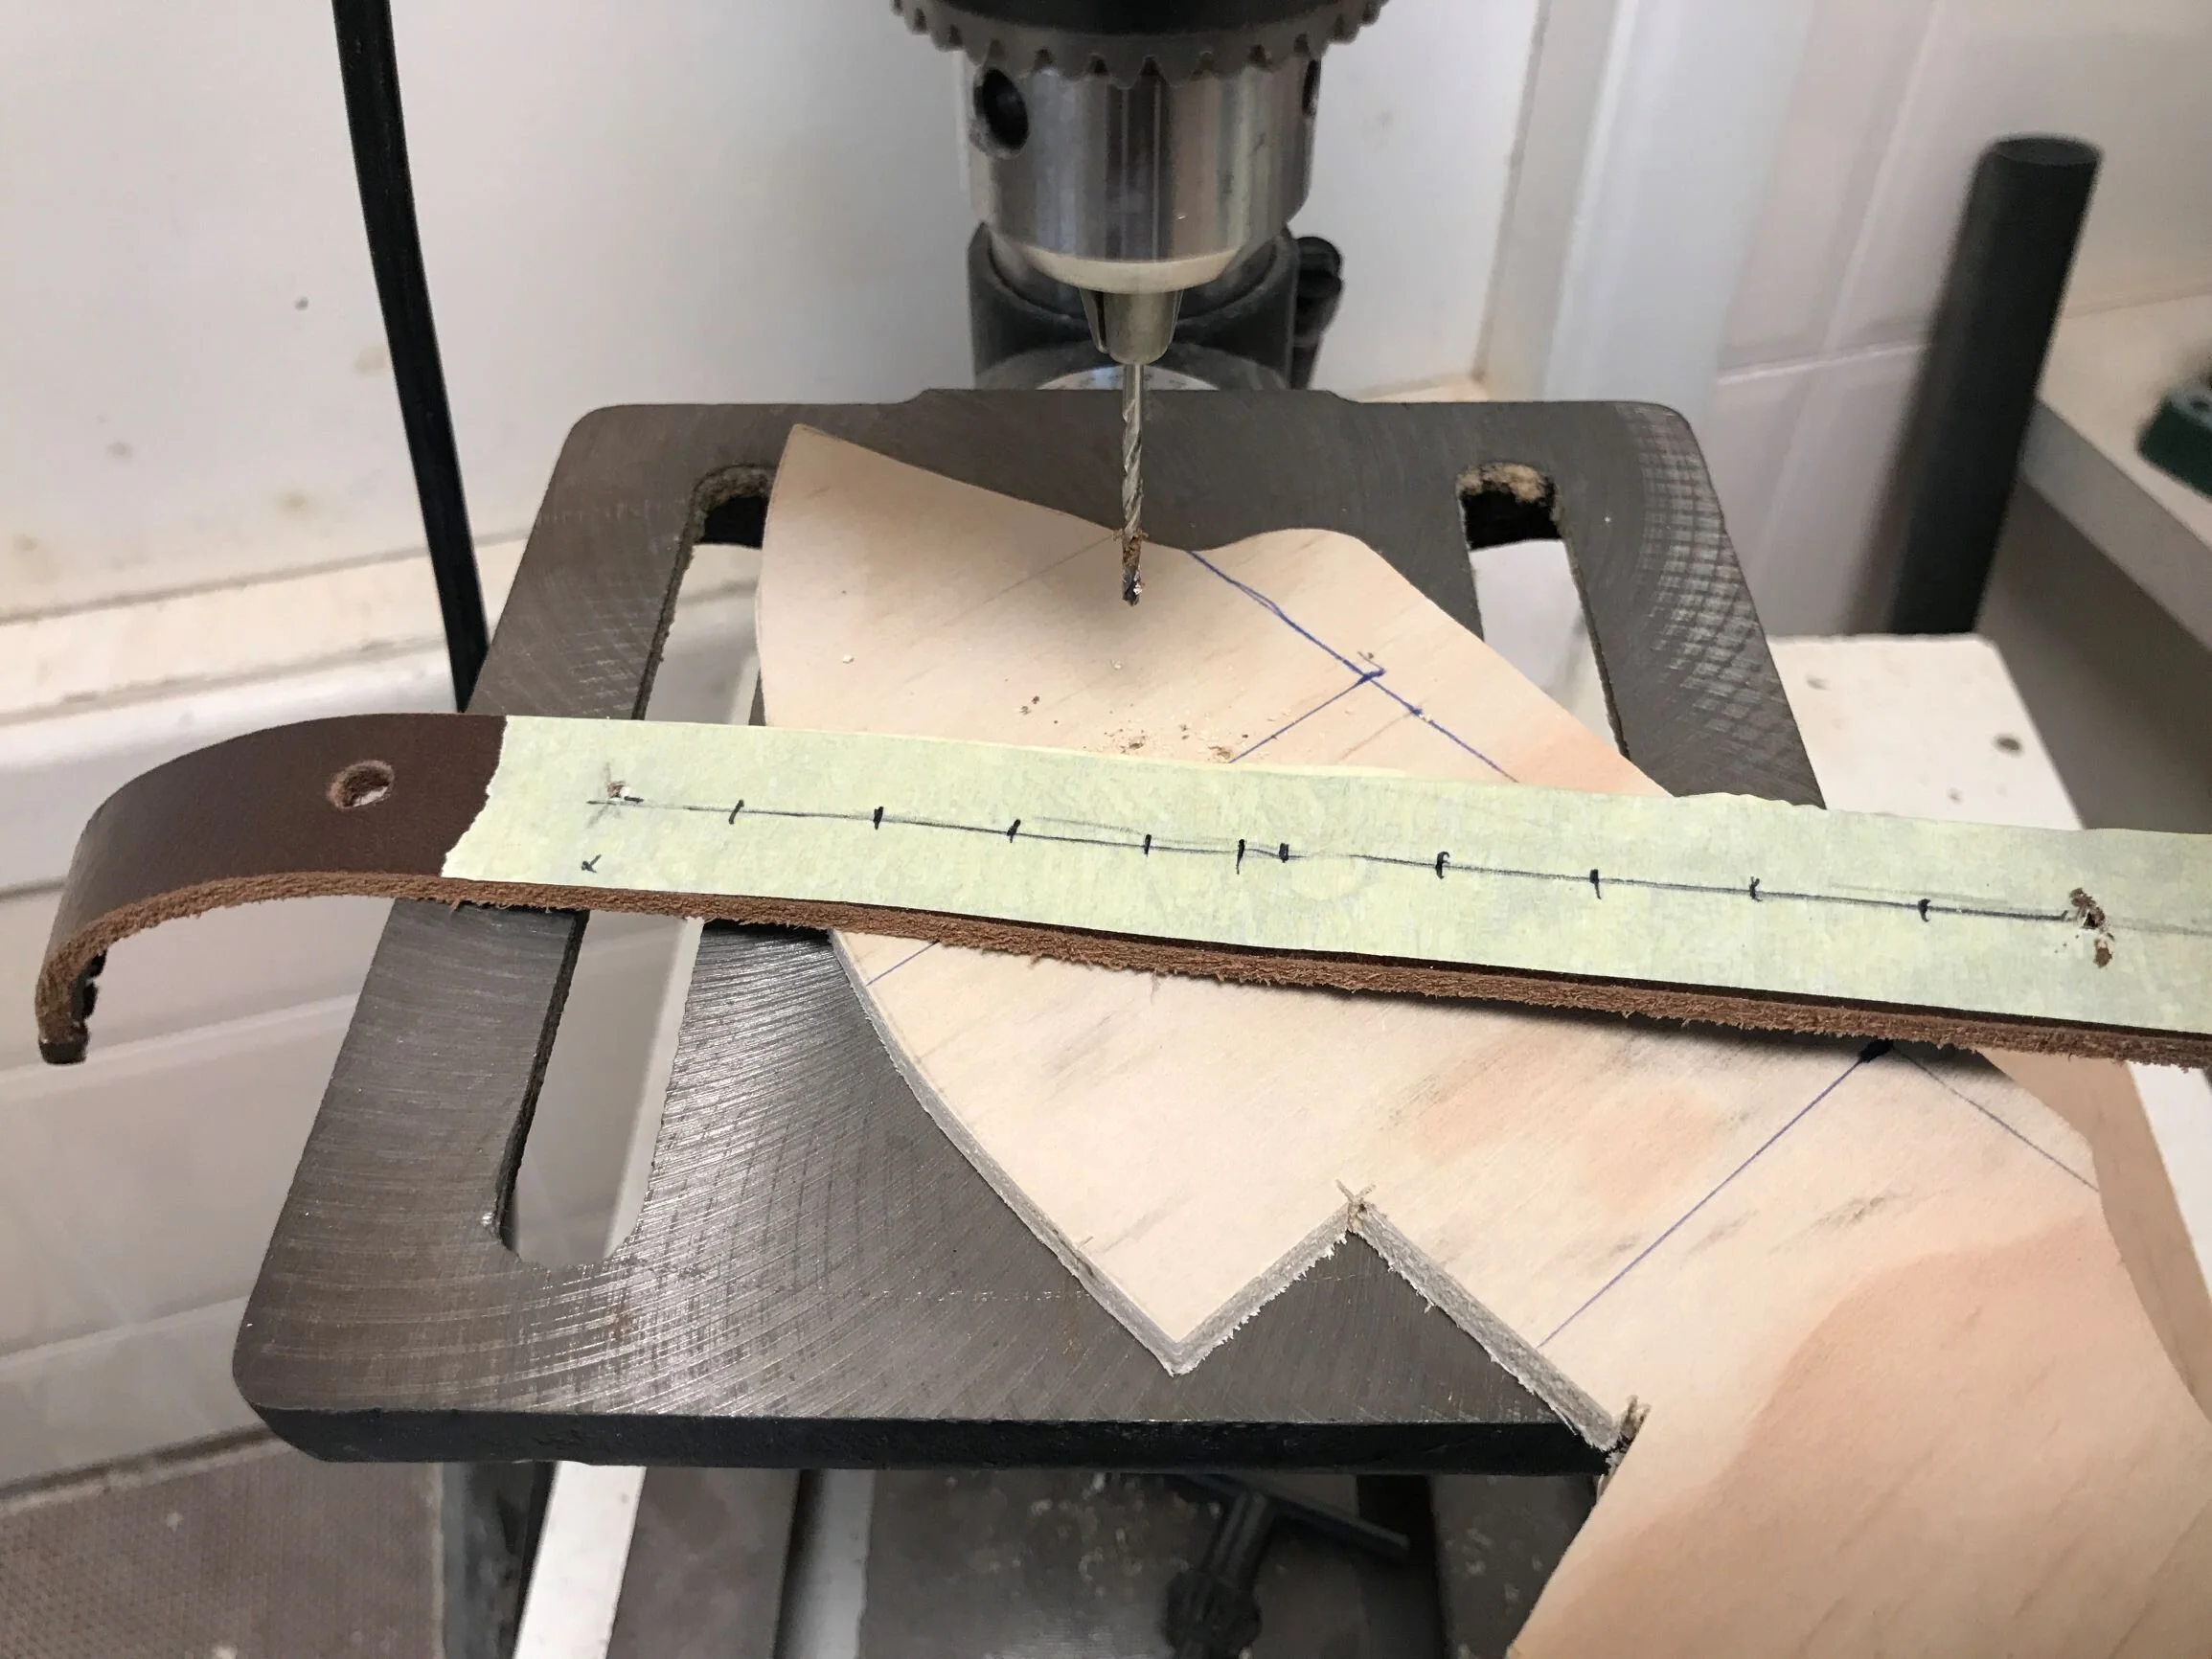
This happened
I dont have a leather punch but I do have a drill press so thats what happened. A big hole for the buckle tongue and little ones all along for hand stitching.
Growing
in character with all the fiddling. This strap grew too characterful so I tossed it aside & used the second one & it also grew in character but fine.
Its fine.
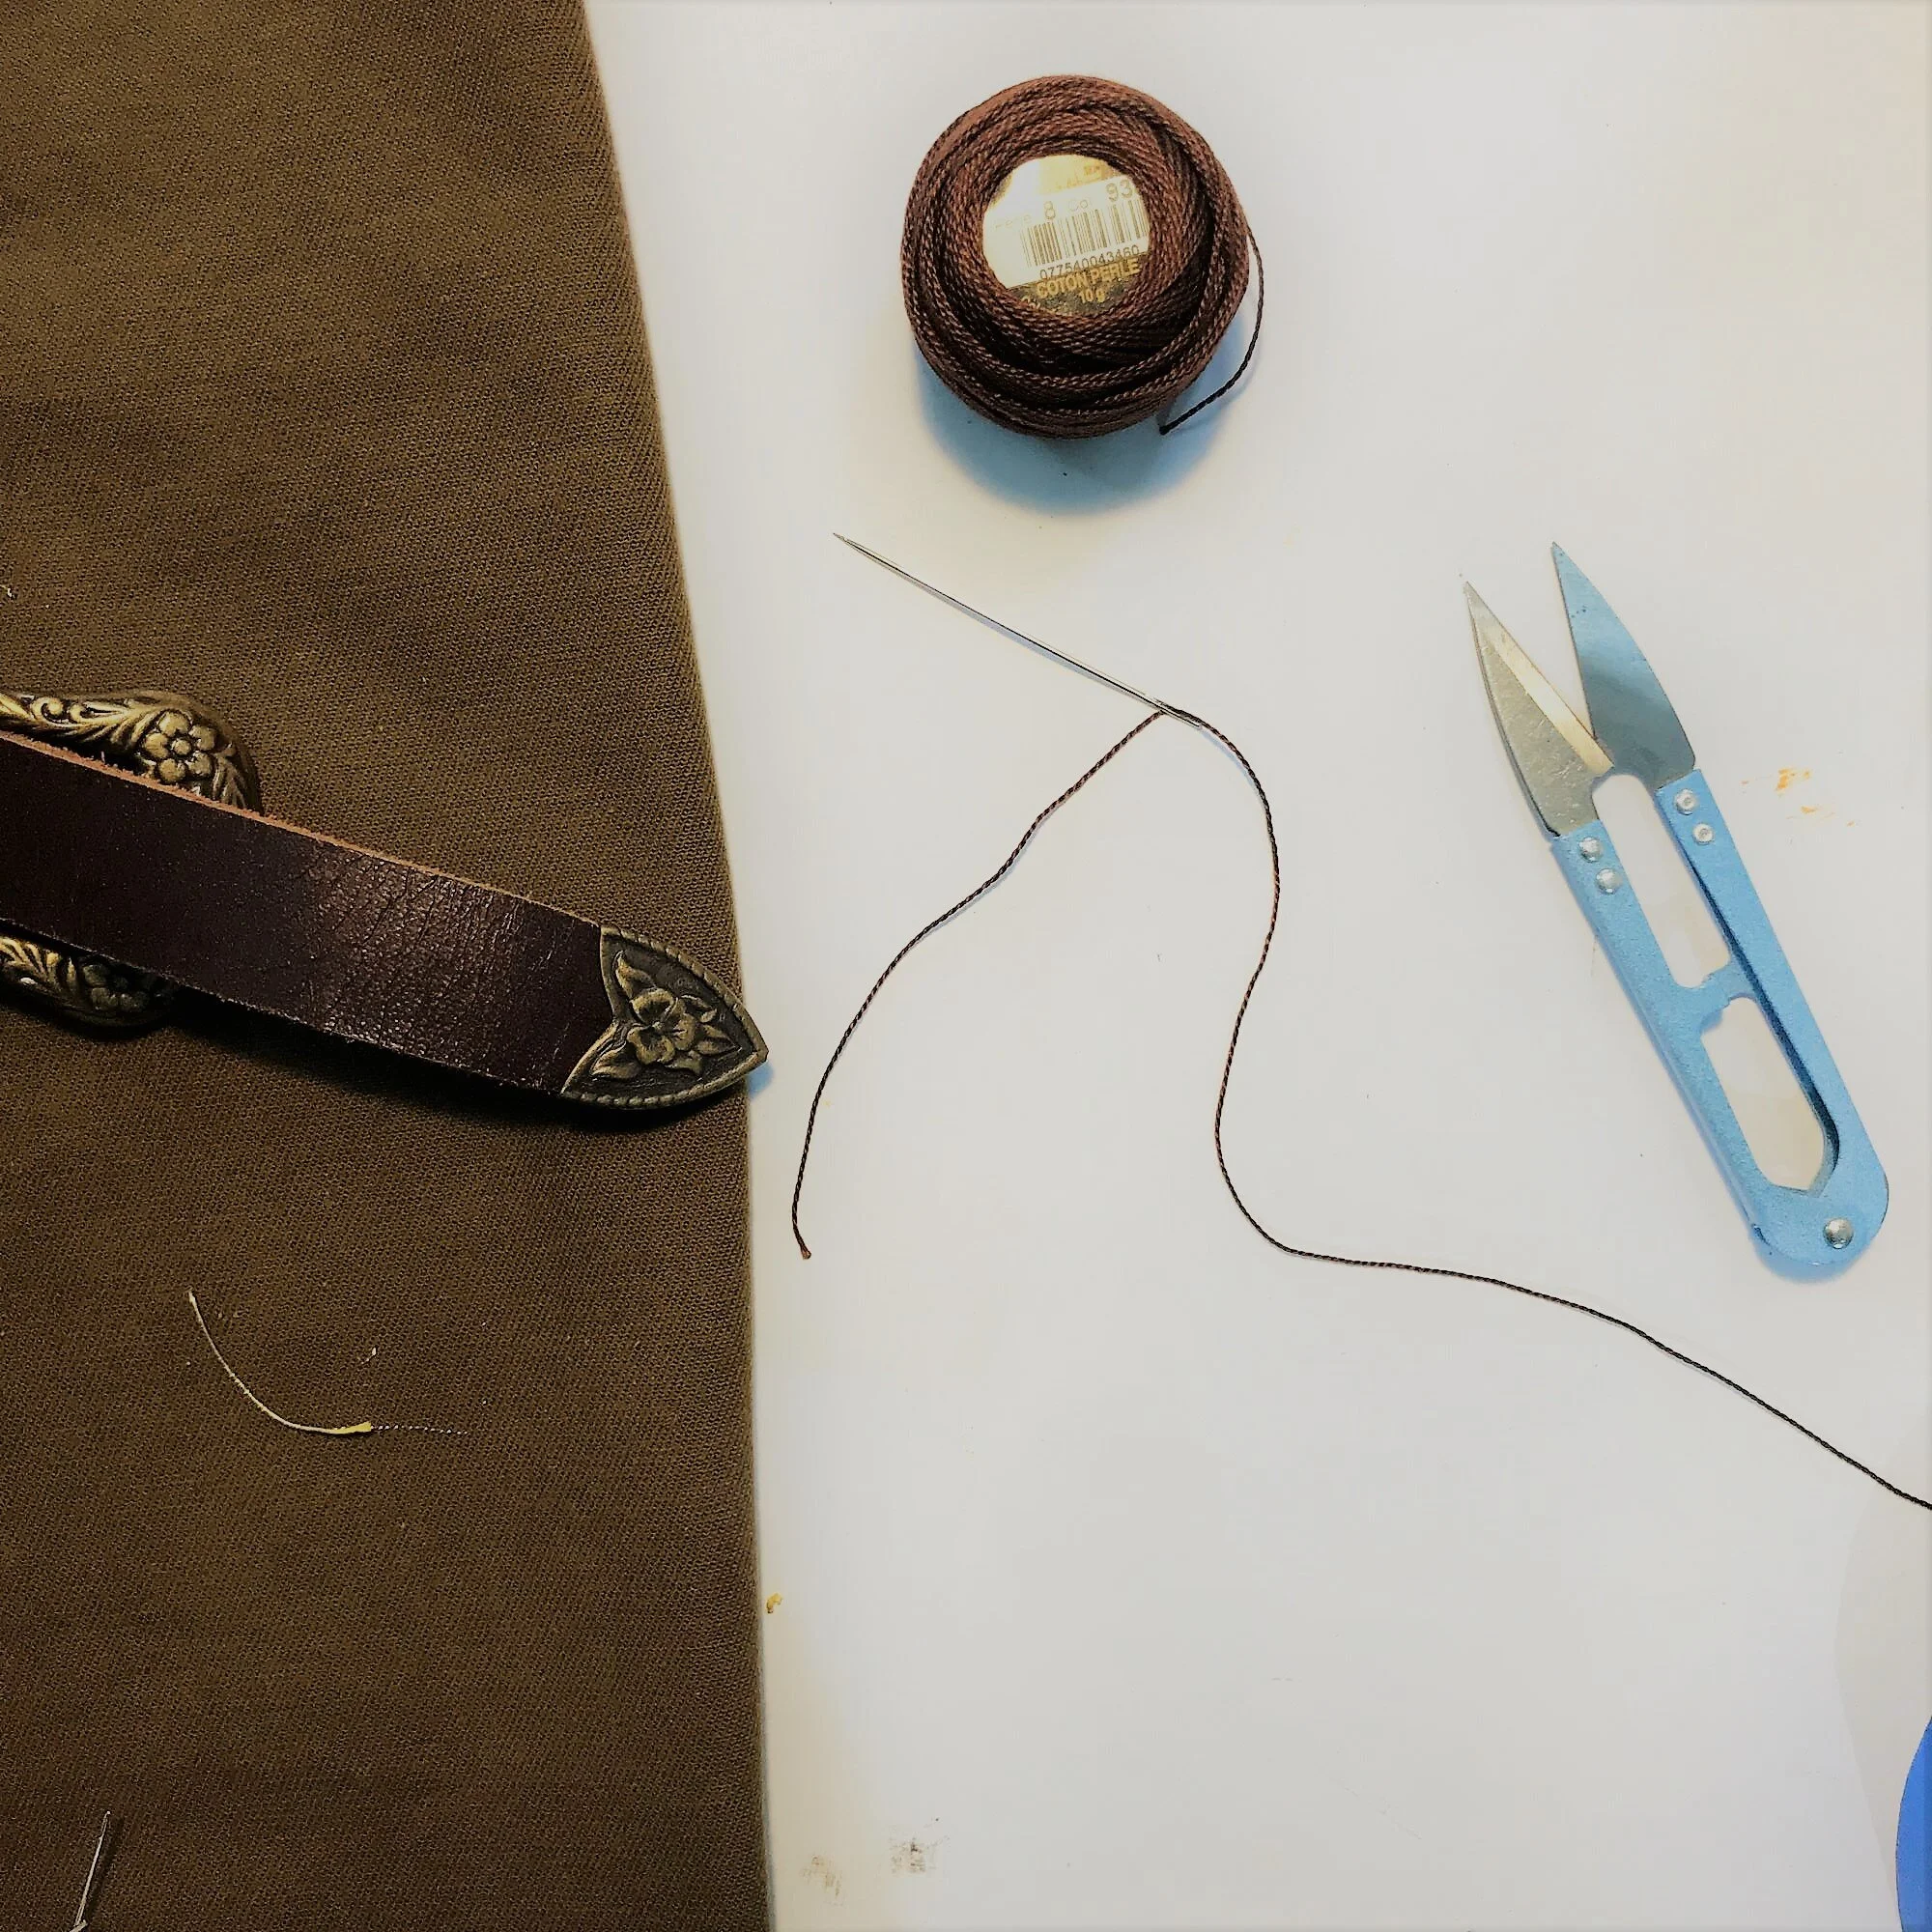
And It’s time!
Buckle o’clock! I found it easiest doing this seated at the table with embroidery twist and a long darner needle with a large eye.
No
The third time I did this I stood with the ironing board for a bench & checked that the strap was hard up and exactly on the fold line as I went, as the previous attempts had failed to comply with this fundamental design expectation. I got it right that third time.
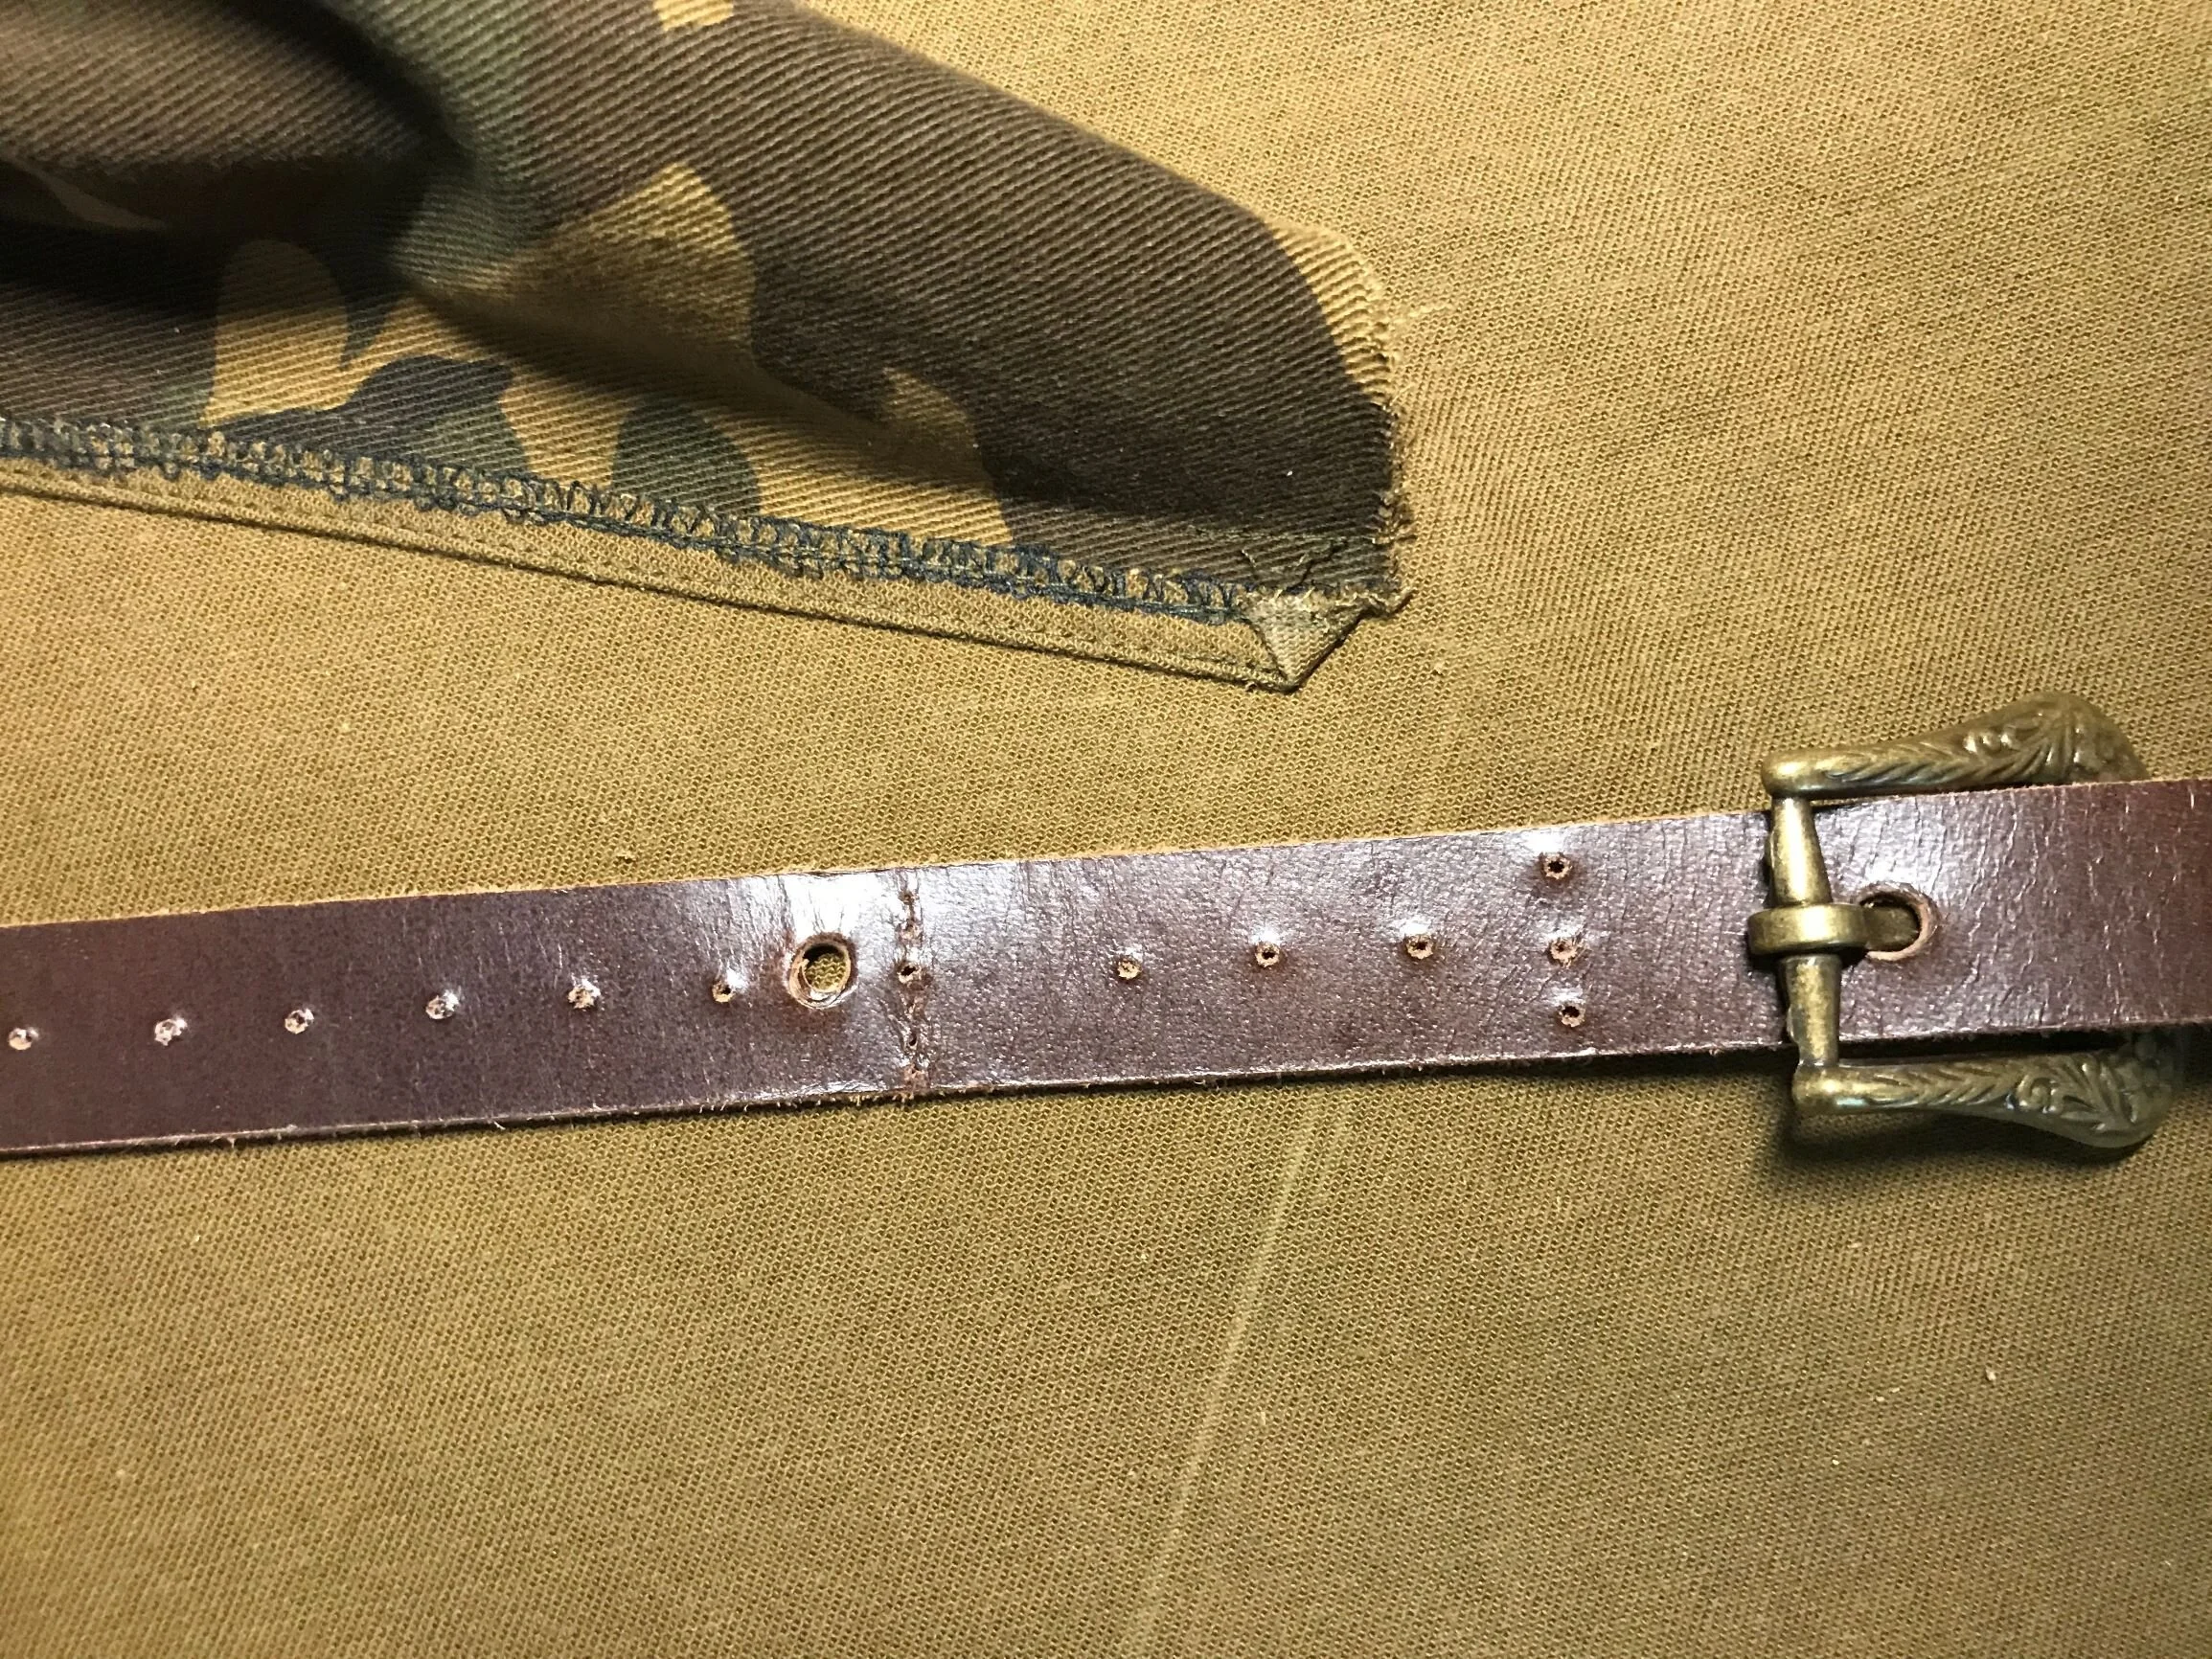
Thats how you do it. The large hole is from it’s previous assignment as a shoulder strap
I had an idea that the stitching should be more vertical to the hang of the skirt than at right angles to the strap, that it might help hold it straight & mitigate it curling around underbelly. We’ll see how that goes over time.
You will observe the scrappy black interfacing peeling off above the belt. I was honestly throwing everything at the front of this skirt to rigidify it, including some whisper weight KNIT INTERFACING. Thus we have it peeling away & being scrappy because it is inadequate to task. Too lightweight & flimsy for what was now a heavy piece of work indeed.
On this, however, I will be actively forbidding anyone from flipping the flap up to check on my work but then, the only people who would do that would be sewing people & I’d let them do it so we would have a laugh at the bullshit interfacing thing. So you know, its fine.
Invisible stitching!
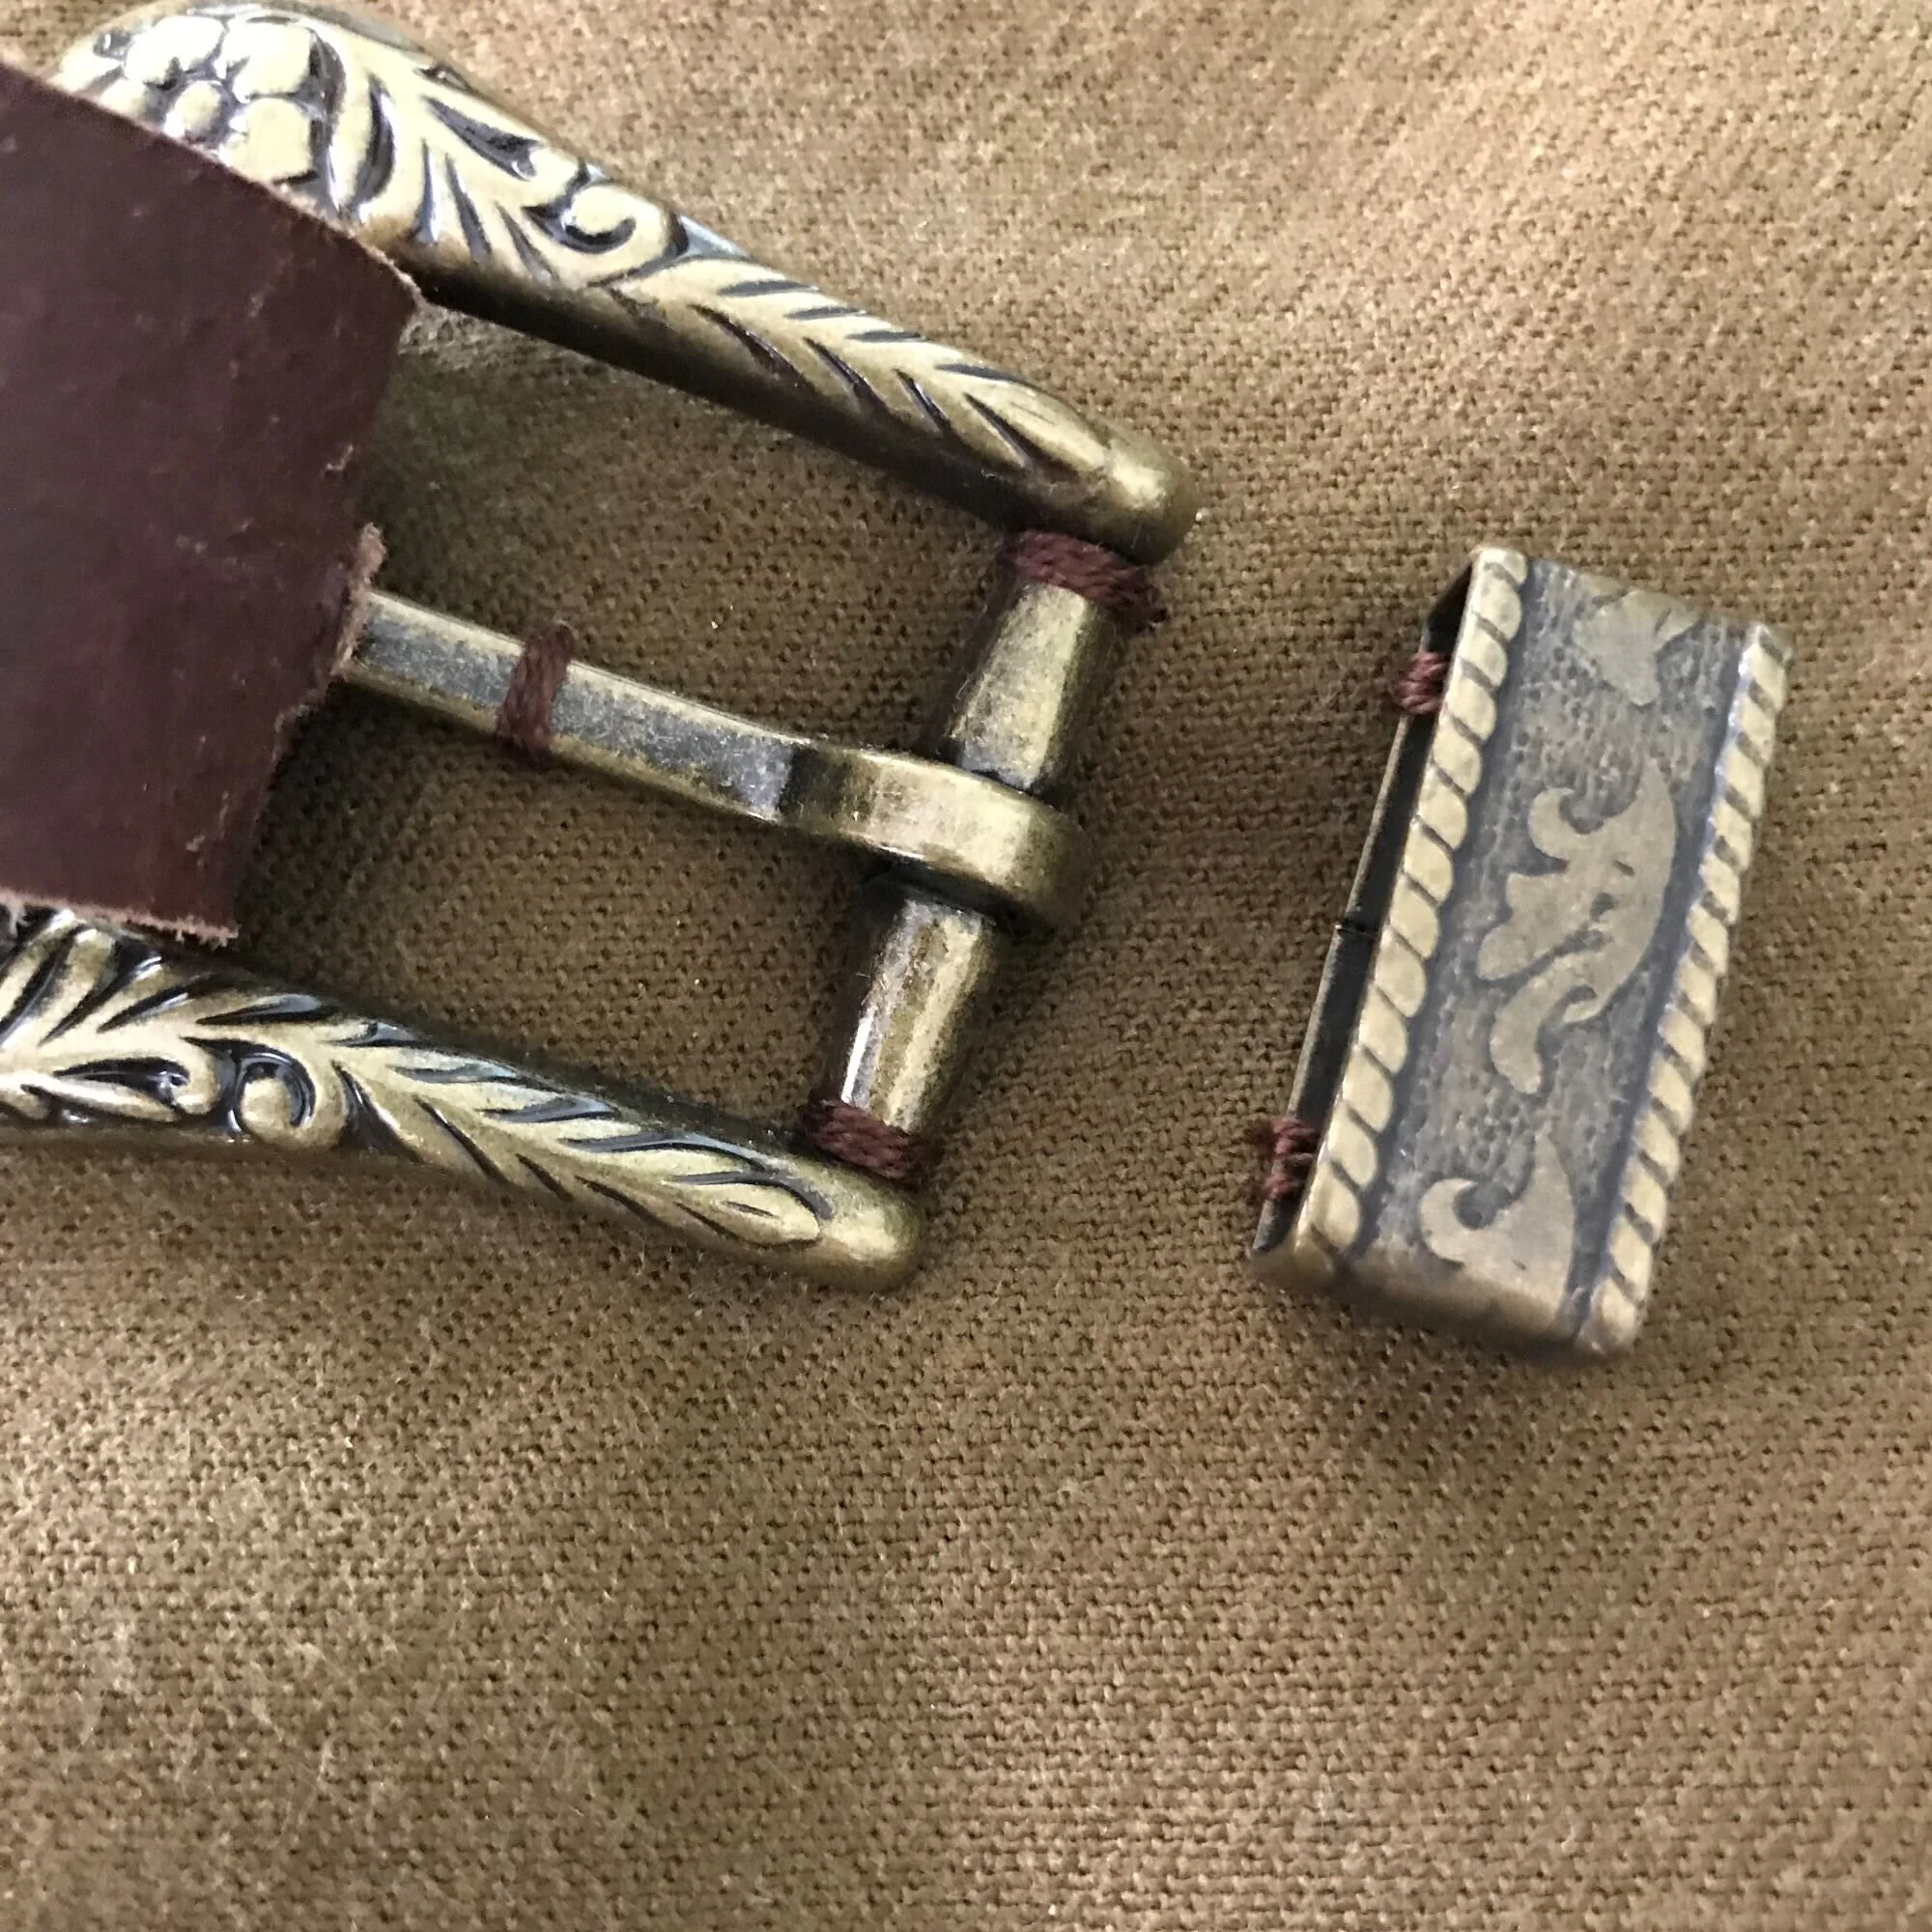
Looks like I got away with this one! The buckle is stitched down in three places & the keeper at top & bottom, all feels very solid.
I cant get all the chalk lines out & they’re bloody everywhere

Time to finish this
I’m making it look bossy here but really I was riding roughshod. The roughshod ride began at the beginning, tbh
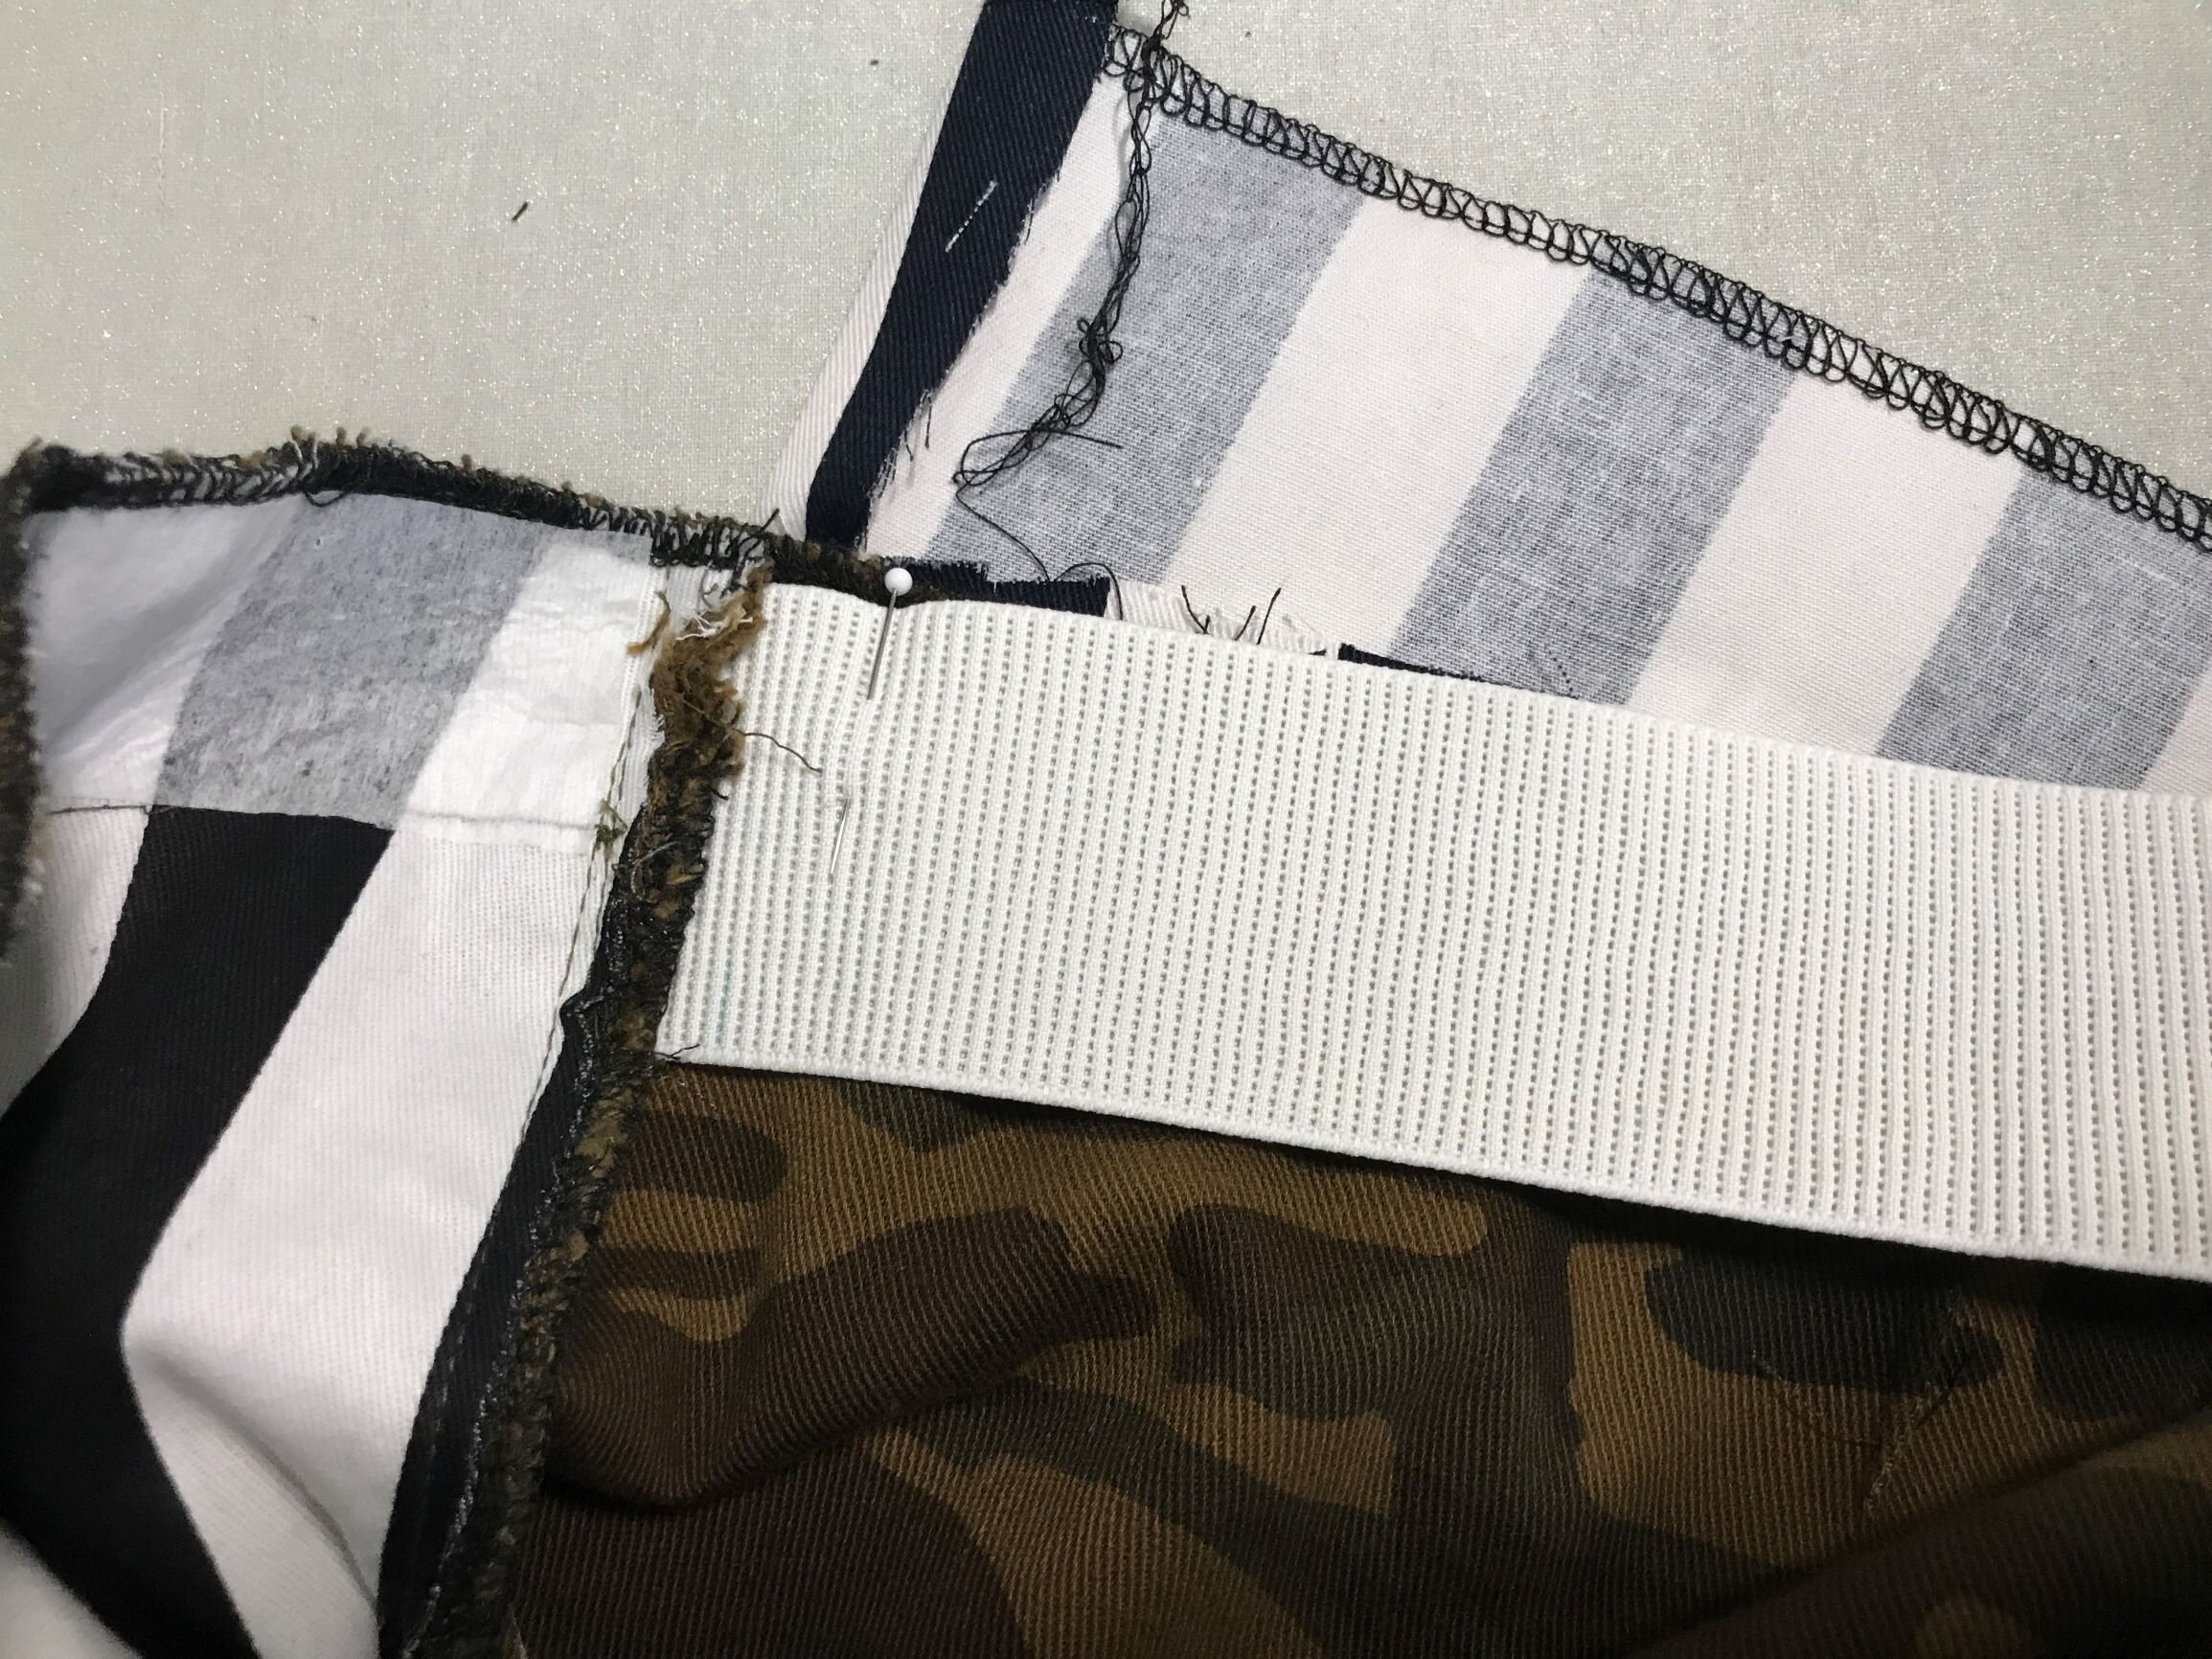

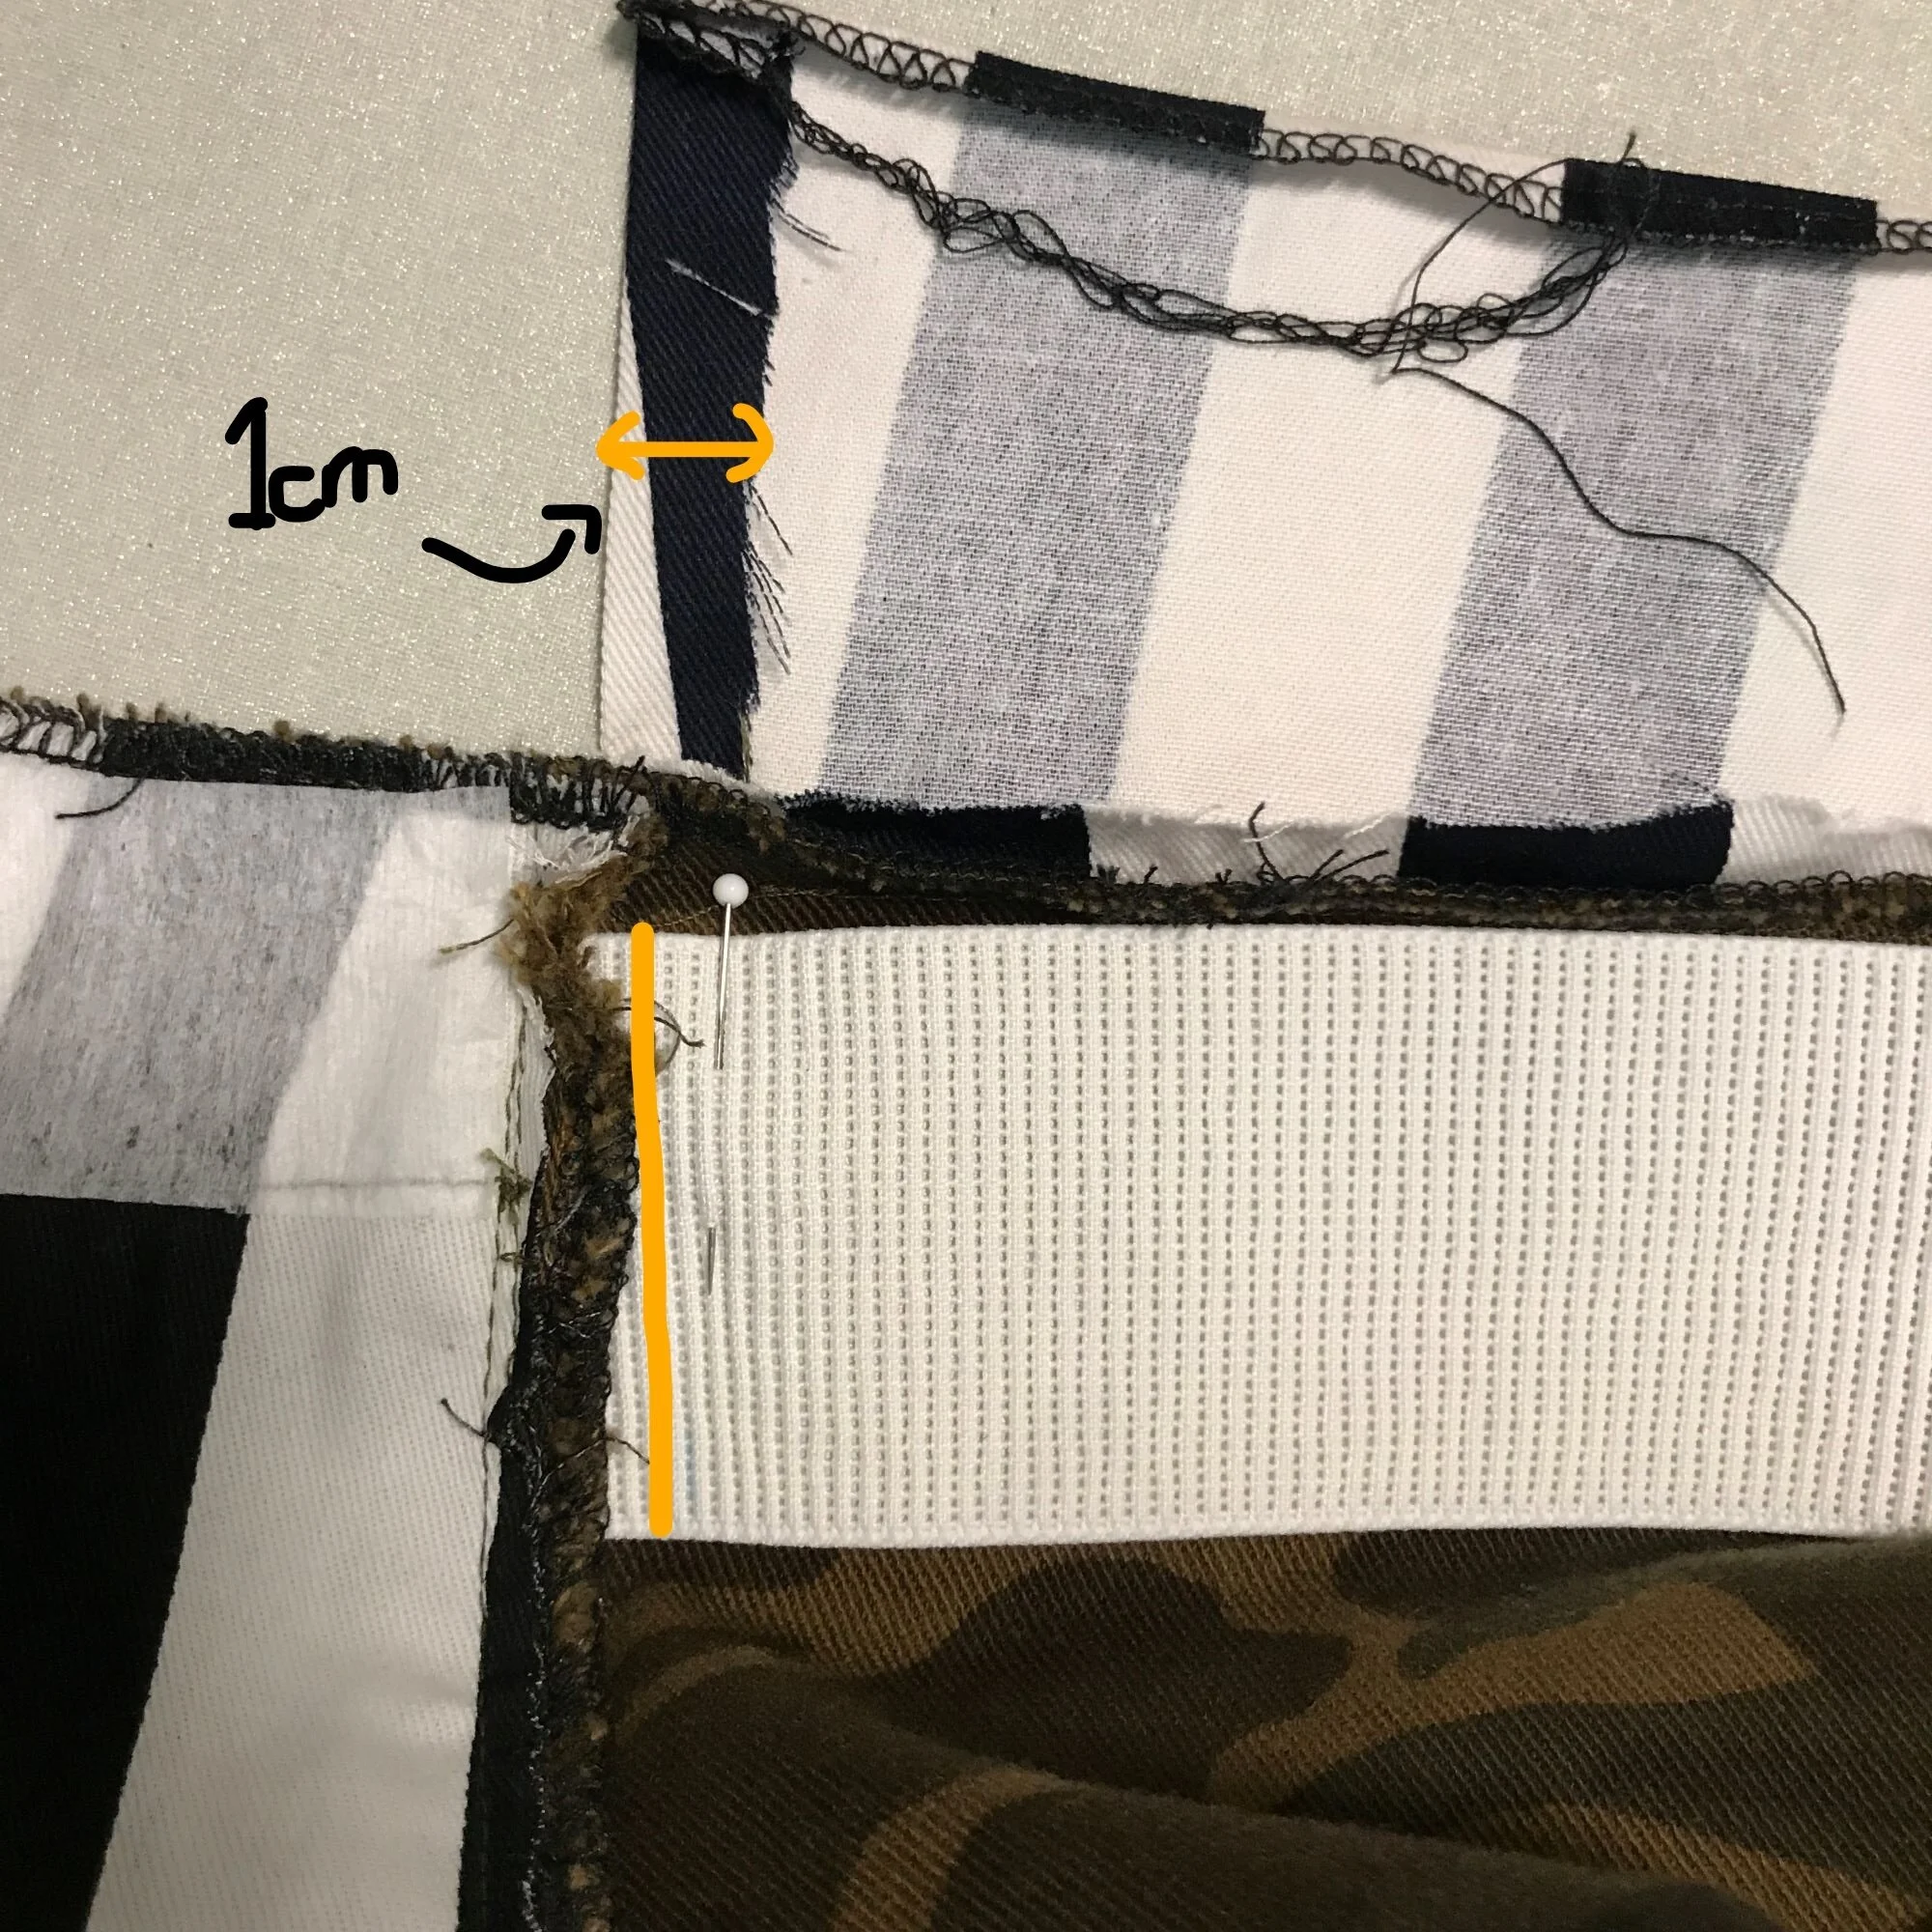
I cut a facing for the back with strip of rigid cotton, deep enough to cover the elastic and wide enough including seam allowances so it would neatly meet the side seams & enclose it all.
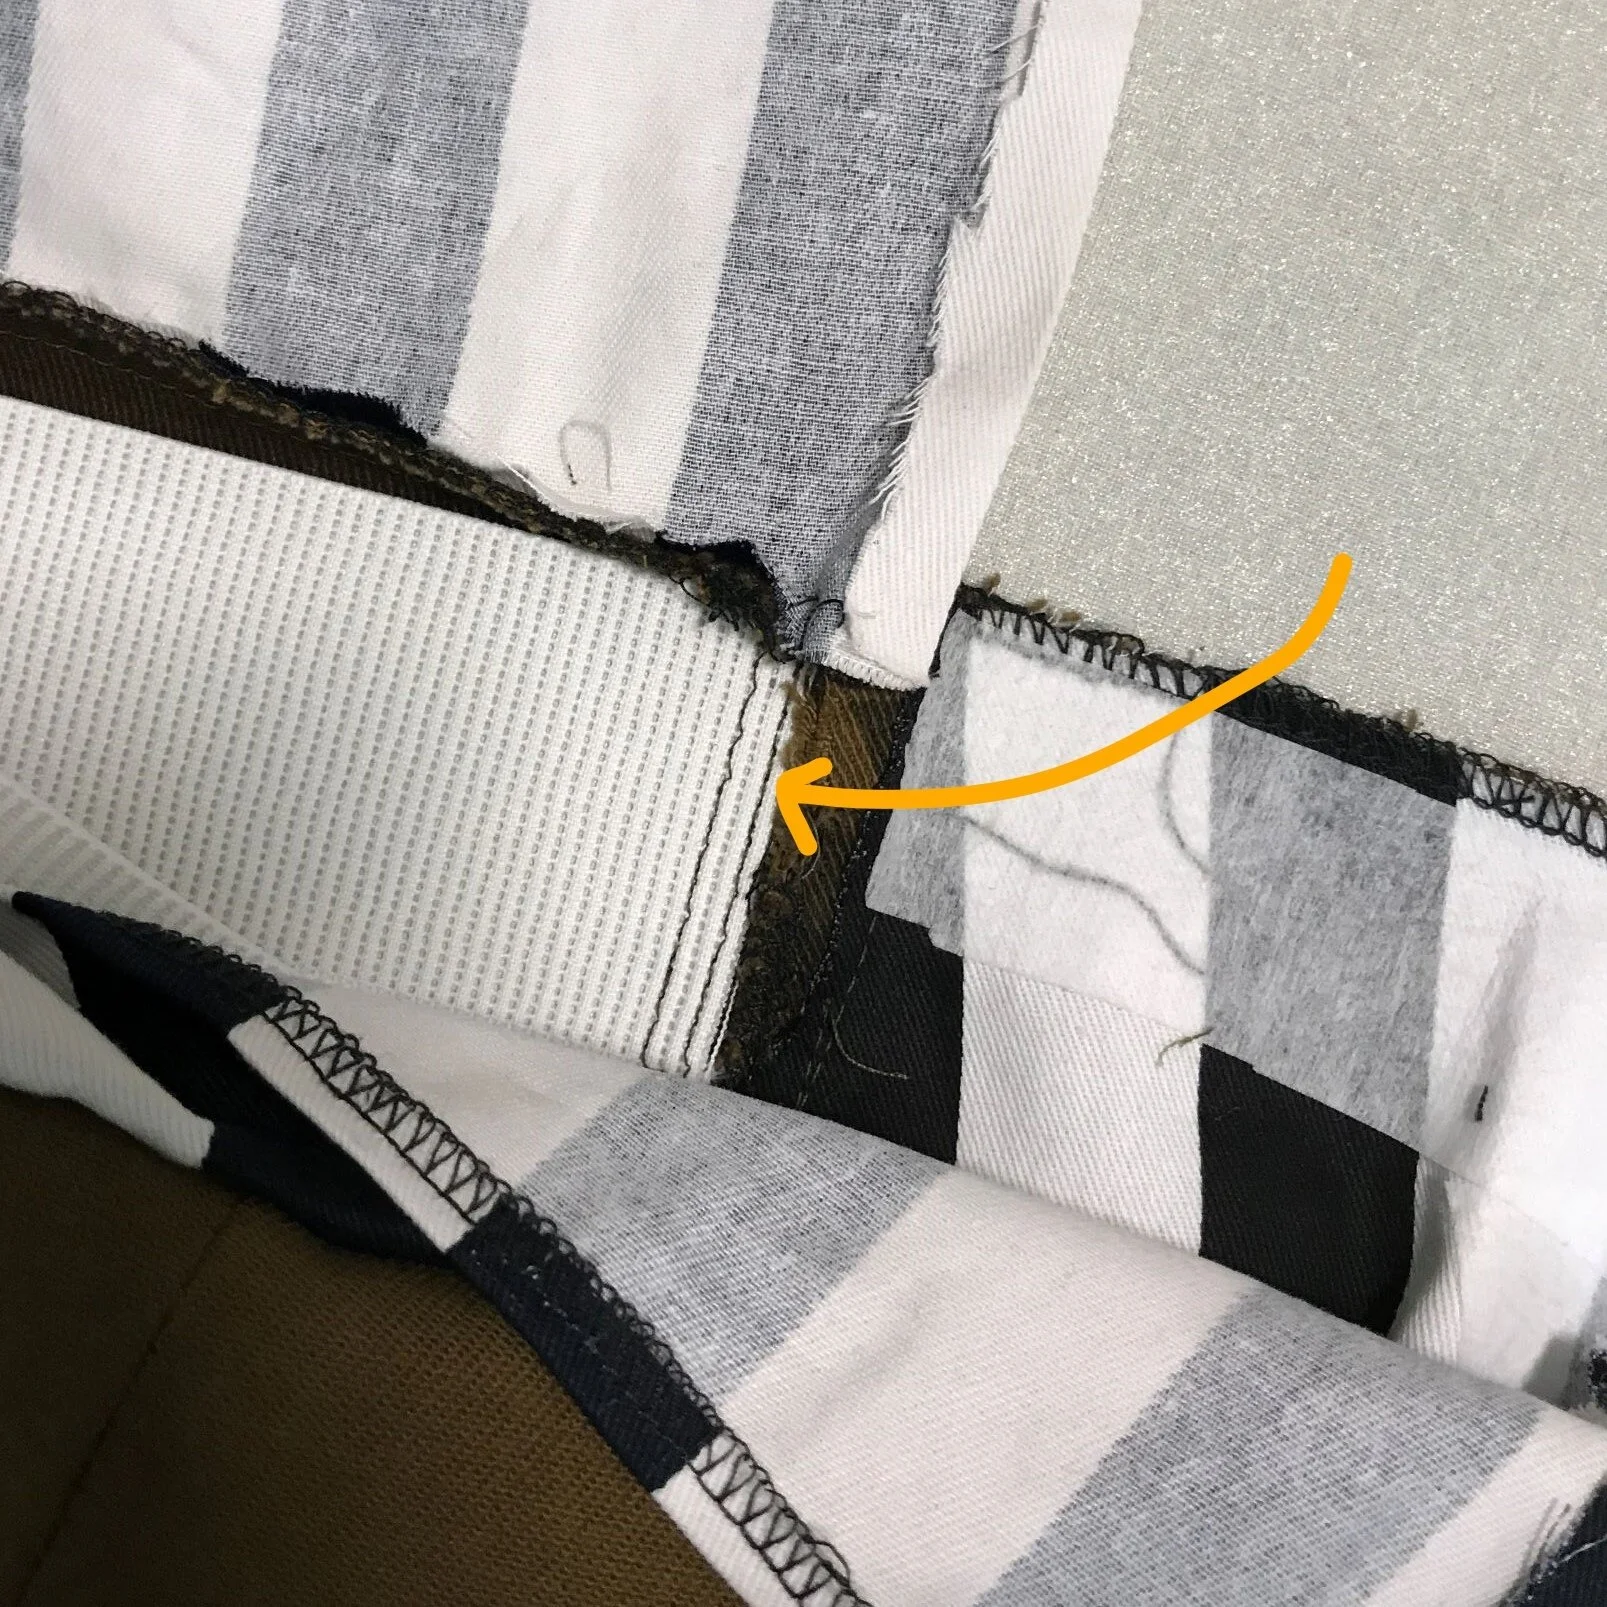
One last try-on revealed that the elastic didnt need to do much tightening so I could easily encase it in the facing without it creating a lot of ruffling/pouchyness in the channel. I stitched it on just outside the side seams to keep the bulkiness down
Hand basting was required when joining the facing to the side seams to make sure I’d be stitching it exactly in the ditch

And would you believe it. It worked. It worked!

Front waist will be finished with a single turn of the overlocked edge & hand stitched down
Neat
I am so pleased
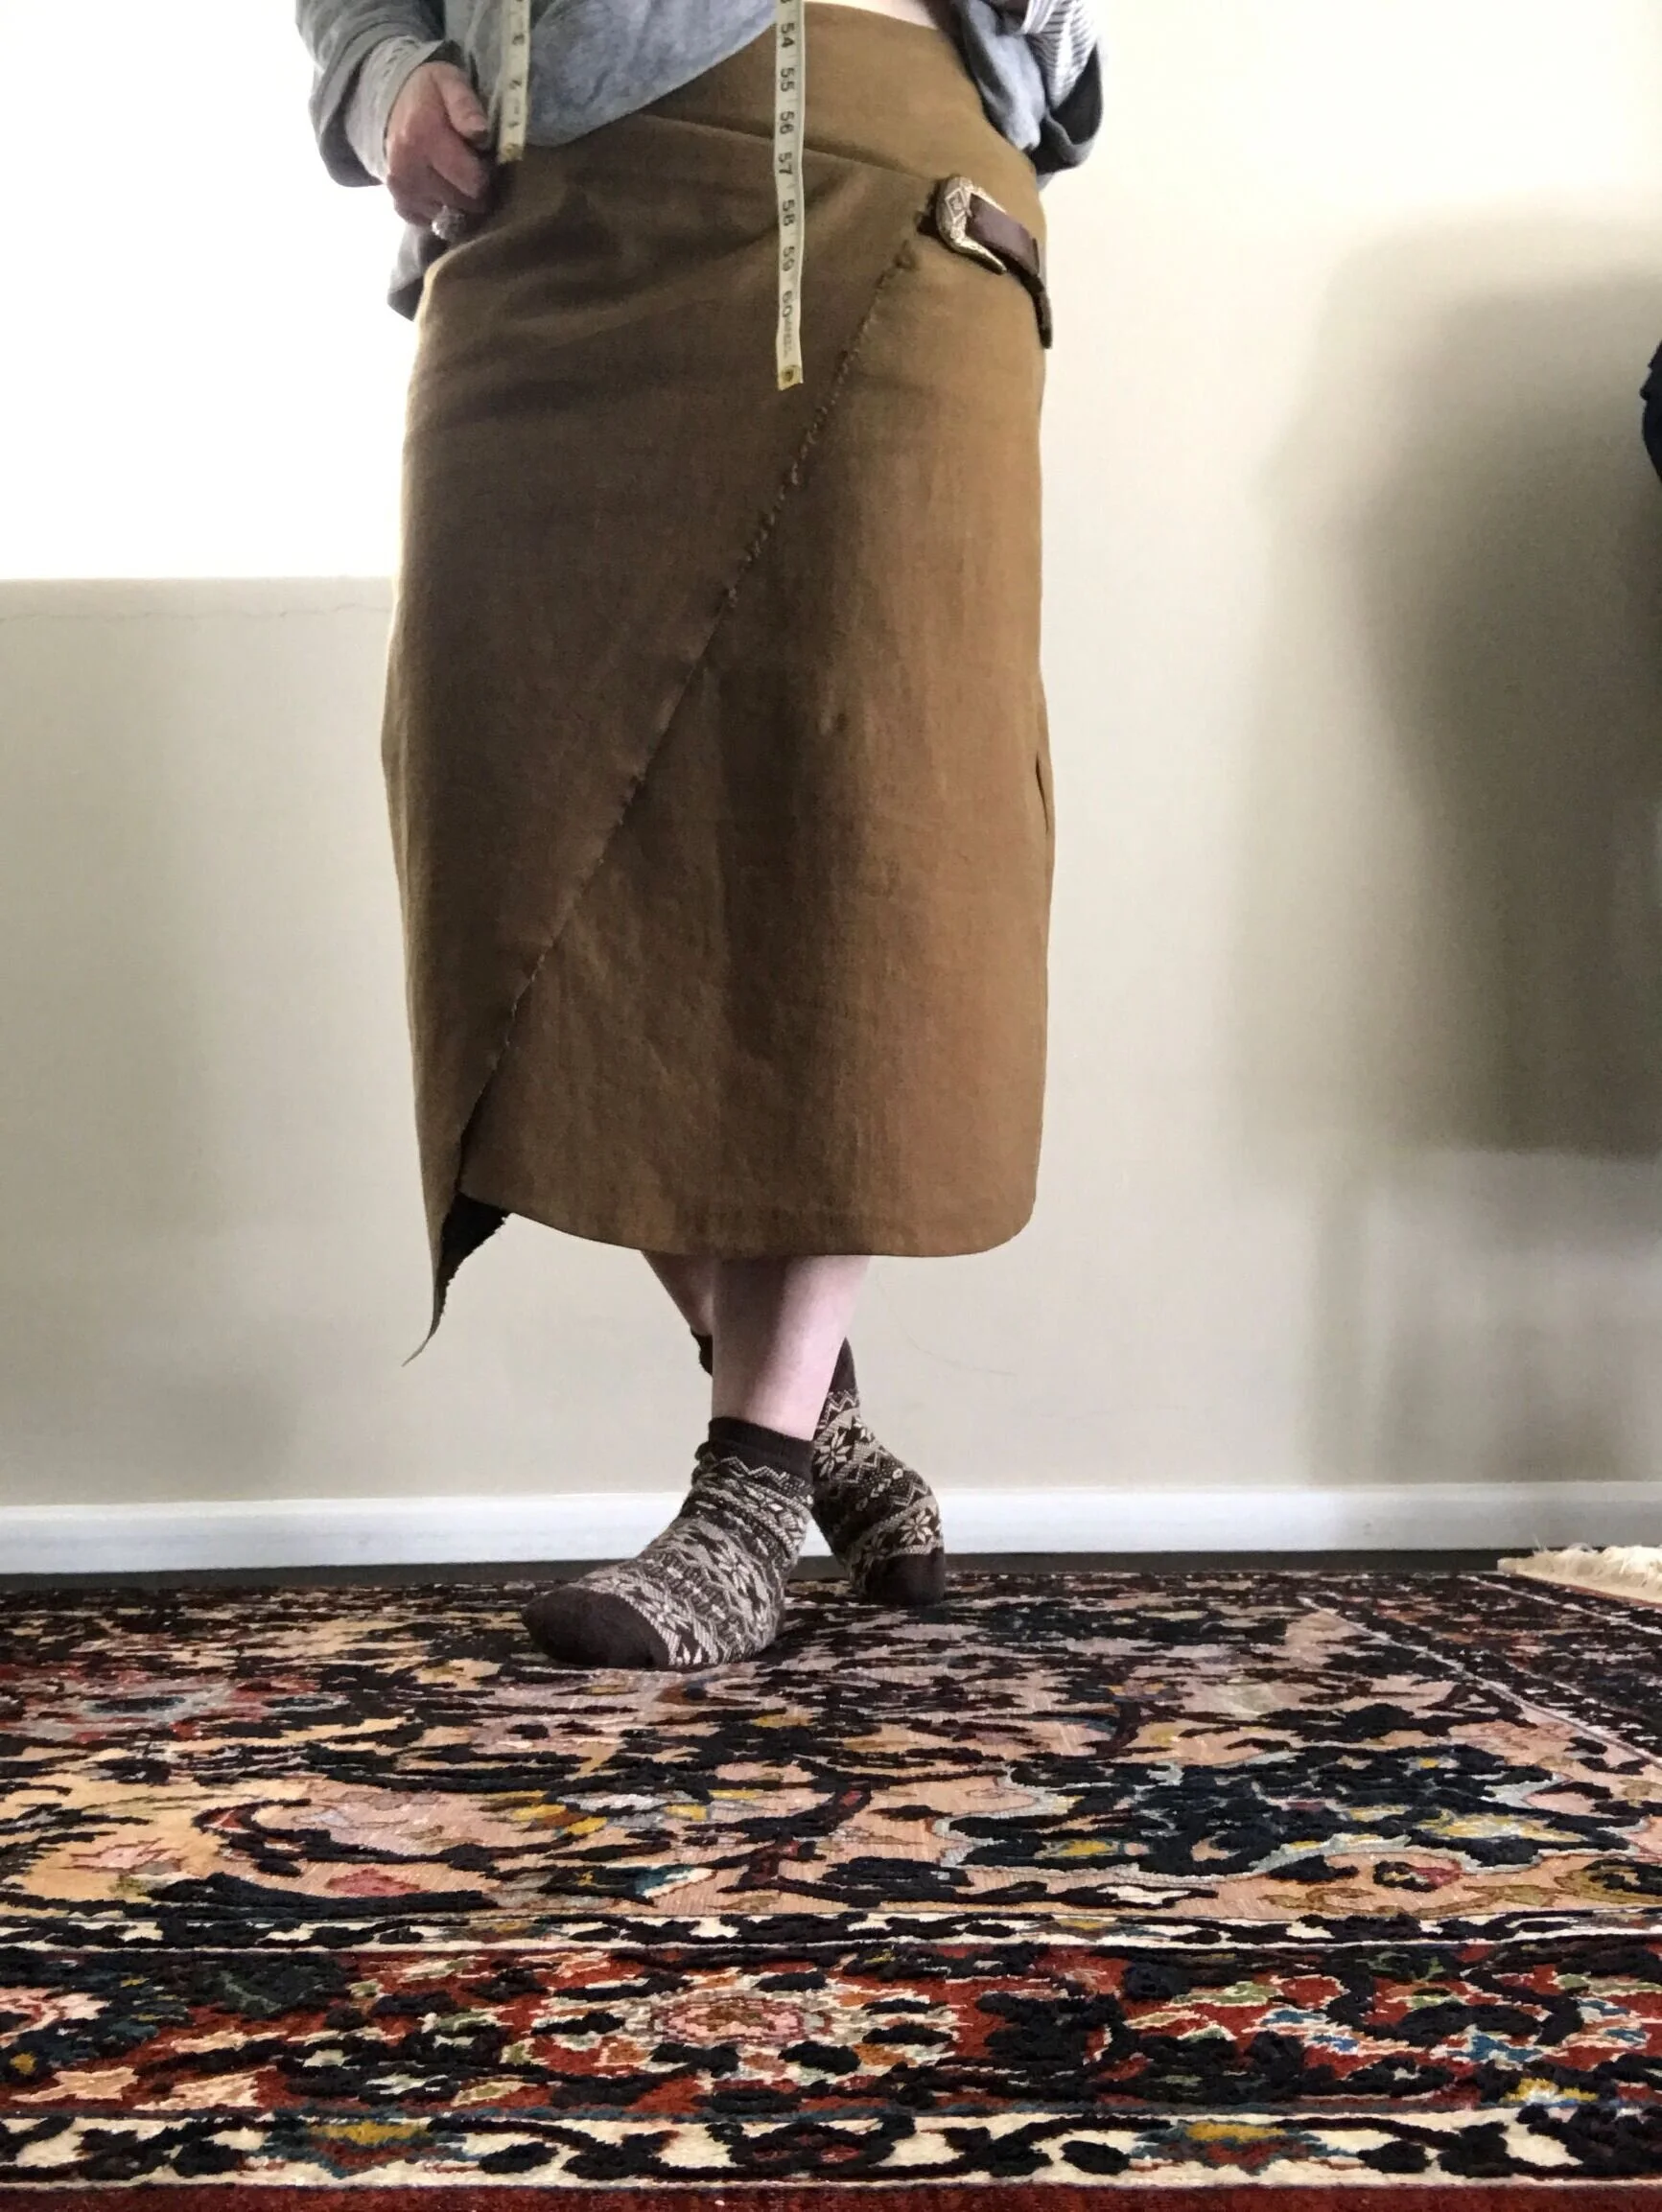
Love these Nordic Socks
And it is done.
The funny thing is, the elastic isnt tight enough & it sliding down with the weight of the buckle!! haha! …I think its from when I sewed the elastic beside the side seam, not on it, as it would’ve been when I tried it on. So its over 2 cm bigger than it should be and that will do the damage. Yes it will. Just that bit too loose for comfort
But I cant bear unpicking it now, I’ll just be vigilant & hoick it up as the need arises & perhaps one day I will either put on weight for it to fit really well or find the strength to alter it. But I’m wearing it now! Because I love it! And will be wearing it often…or so I say now…cant be sure how this will work on a practical level, falling down all the time but theres only one way to find out! Fun!

This buckle…
In the end, I’m calling it a good result & it was fun making it too, in my bungling way.
Its not an envelope skirt but neither am I Dion Lee.
I am Rosie, and this is my skirt.
*Measured it wrong, to the surprise of NO ONE