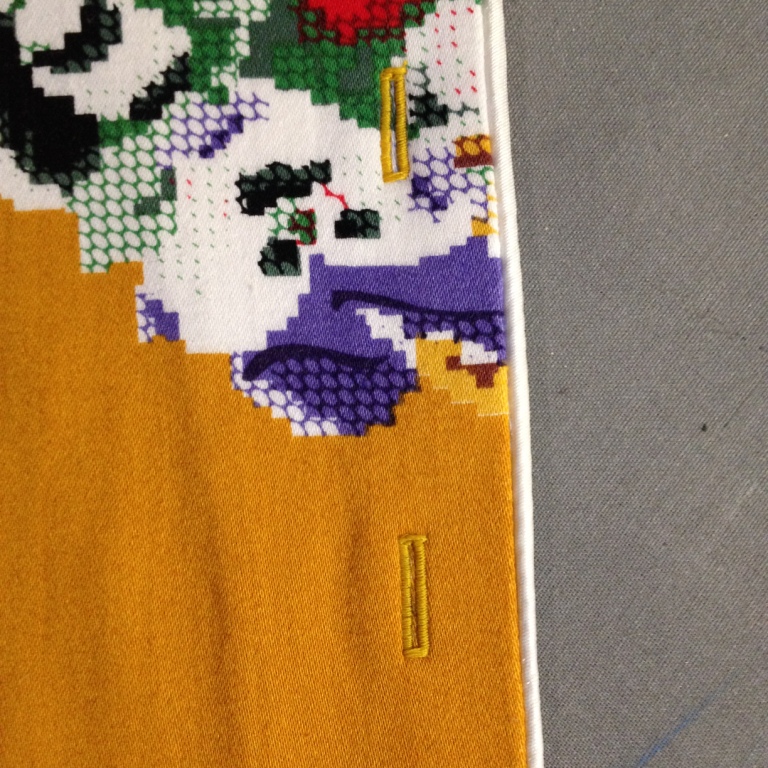
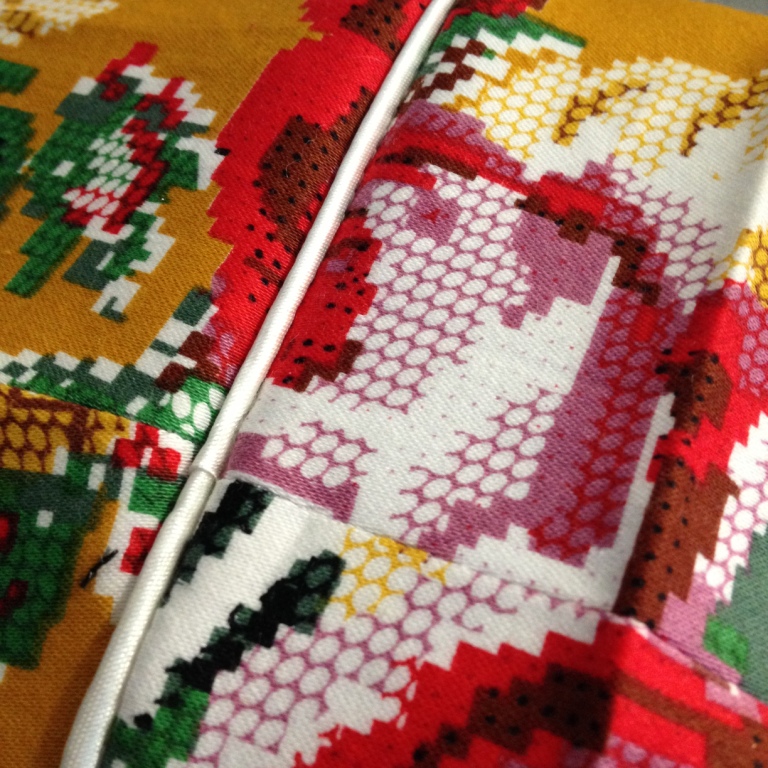
I made a Named Clothing Keana Blouse and the Closet Case Files Carolyn PJ top, back to back, as a thorough introductory embrace of all that is piping. I wanted to compare two differing construction methods of sewing a piped shirt as well as the qualities of self-made versus store-bought piping. Its science.
Piping victory! And my first time! Piping is The Business.
Plus bonus points for making own piping; this is full immersion sewing.
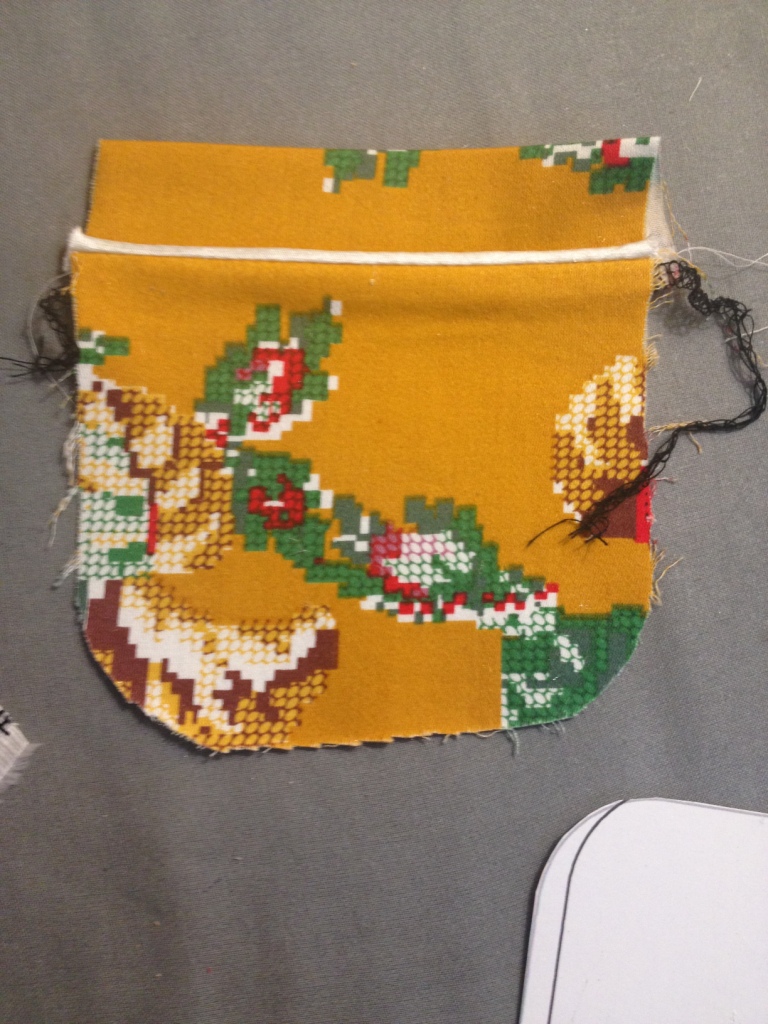
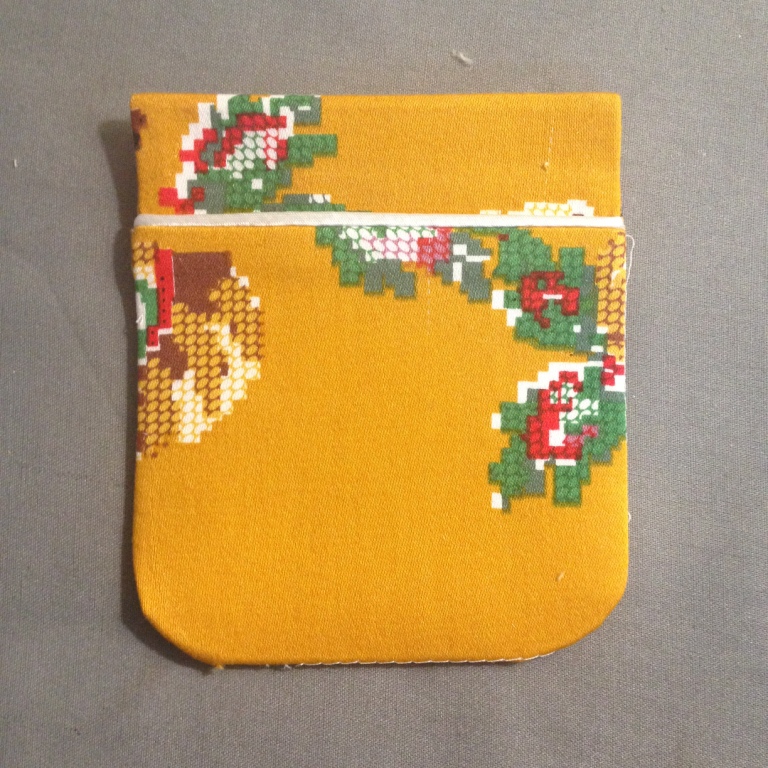
Above, my first attempt and thence subsequent Totally Owning the Pipe on the pocket detail.
Cant take enough photos of it. Big love.
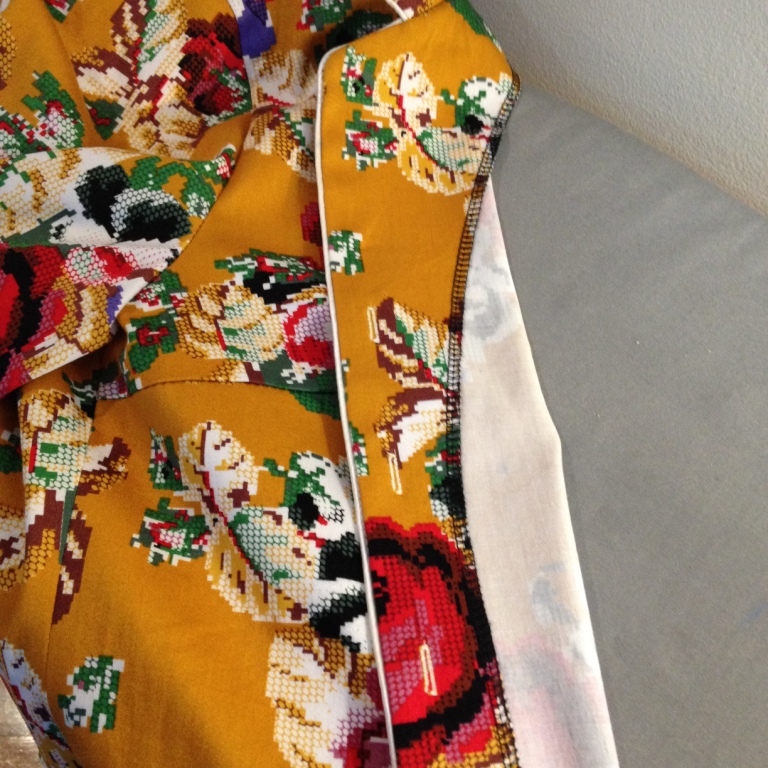
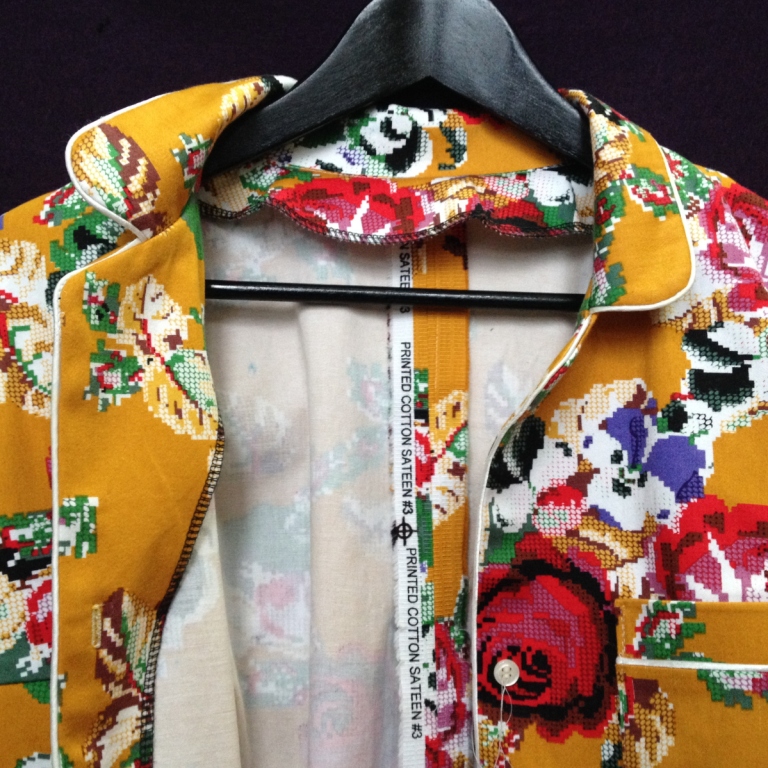
This, is the Named Keana blouse and I love it. The stylish, boxy, well finished tailoredness and three quarter sleeves are a standout. And I love this fabric! Spotlight's cotton sateen game has been strong this year, real strong. Due to this big love, I went with self made piping for this top, making it really special with ivory satin to go with that sateen glowy sheen.
It's presented as a "casual but detailed, loose-fitting shirt" and it sewed up that way too. I felt quite relaxed & unhurried when making this blouse, curiously so, because usually, when I have a burning desire to make something specific, I just go at it hard & intense. I can be very...focused. So maybe this learning-of-the-piping process took the pressure off having to produce perfection. Like it was ok if it all didnt look fabulous because hey I've never sewn piped-anything before, so I just kept happily waddling my way through over a week or so. And I enjoyed it. I mean, who's pressuring me anyway?? Idiot.
Damn fine!
Time to sew:
Making own piping was pretty straightforward but time consuming, cutting the bias tape and then sewing in the piping cord before any garment sewing came into things. But I did go out of my way to buy a piping foot which helped and whilst I was at it, I bought a bias binding foot too, so expect some terribly self satisfied binding all the things sewing coming soon.
The piping foot has channels in it to guide the cord which is great when sewing in the cord to the bias tape, but isn't much good around curves, it took quite a bit of doing to get these sitting as tight to the edge as it is on the straight section. And this collar is all curve.
For making piping I highly recommend Heather Lou's outstanding DIY tutorial, beautifully factual hand holding through every step. Named do give some (slightly differing) instructions regarding piping but Heather Lou's was a the technique that made sense to me.
I really loved sewing something way out of the very basic & simplistic confines that my sewing has lapsed into; the Keana Blouse looked really special, so I thought it needed to be hard to make, so I put it off. Wassup with that? I can do it!
Named have launched a whole new collection since I bought this pattern and next item in my crosshairs is the Lexi A line dress; back to plain & simple now, for as you will see further on, I went stupid with the print on print on print & have now reached peak clashing prints,
Well look who didnt take the trouble to change the overlocker thread color, slacker
This pattern is so cleverly designed & the construction is so spot on that again, it was a joy and a pleasure putting it together; everything just went right. Like there's some really nifty techniques, such as the front facing is shorter than the blouse length, so the hem folds up to meet it in the cleanest finish. This is new to me and...I totally respect this pattern.
Respekt
Another first: machine sewing the buttons on! Sticky tape epiphany! I even did several practices of my buttonholing and all this paid off; news flash: taking your time & paying attention yields results! Who knew? Now regret not having changed the overlocker thread colour. But, I hand stitched the sleeve cuffs and hem so maybe that will redeem my grubby sewing soul.
Machine button sewing does leave the thread tails on the right side, which then need to be threaded onto a needle & taken through to the wrong side and this step, along with hand stitching the hem, eluded my interest for, ummm, a long time. Weeks, actually. Not the first time I've procrastinated the finishing steps of sewing and it won't be the last. Why that too? Sewing can be an emotional beast. Maybe its my general cowardice in the face of confrontation coupled with my overlocker thread-colour-changing-slackerness combining to hijack my will to fully complete a project. Or that those bits are the least interesting parts of the process and everybody dislikes them and can put them off for weeks. If not months, years...decades anyone? So many mysteries, so much Netflix.
Busy fabric print so I declined pattern matching because it would've made me cry, but I did organise a nice flow of the print across the front.
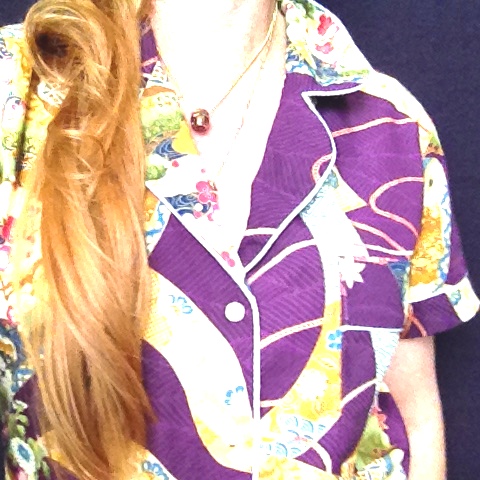
Now, my Carolyn. I love my Carolyn top second to my Keana, because this time I wanted to try ready made piping to see the difference in look & handling and can confirm that self made is nicer. But being a fan of progress as I am, the ready made gear cuts out significant time factors in sewing production & one day I will need to do it without as much love so there we go. Comparison made, judged and found wanting. But boxes ticked & skills acquired, all for the sake of science & the advancement of human endeavour.
Store bought piping is just...meaner, there's no give and the uniformity is a bit stale. This one was a hard looking poly satin, the only one I could find at Spotlight; there may be lots of ready-mades out there that are better quality but for the purposes of this comparison, I vastly prefer my self made pipe. The fabric is a Japanese crafter's print and its also rather stiff, but this is a wardrobe item thats in-it-for-the-long-hall; it'll be worn & worn & washed & washed, so it'll all soften down. Currently I'm favouring wearing it with self made fuschia-ponte-above-knee-skirt and purple/silver Pumas, all matchy & nice. In case you were wondering. Also its handy for sleeping in.
Sewing tip: press pocket towards wrong side using a rectangle of card cut to the finished pocket size as a template for straight sharp edges. Thats not my idea, I came across it somewhere and whaddaya know, it really works. I used cardboard from a cereal box & glued copies of my pattern pieces onto it, then trimmed to size. Worth doing.
The major construction difference between the two makes is the no back collar facing on the Carolyn, in order to avoid an annoying a flappy bit going on around the back of one's neck when sleeping, but I had a bitch of a time with the whole collar bit altogether on this one. It ended up looking just fine, remarkably so in fact so who knows?
I've done my due diligence blogosphere research and no one else has reported this so, it's gotta be something Rosie did wrong here, only Rosie has no idea what that could be. I (needlessly) interfaced the leading edges around both collar & front facing but this shouldn't have messed things up so much. Sadly the collar escapade spoiled the fun in making this, and given the slightly mean look of the white satin piping, my love for the Carolyn has diminished somewhat. But I do love it, it's a great, comfortable shirt & I will def be making more because now I know what to look out for. Next time I'll do classic black & white I think, as seen below, except I scoff in the face of a Gucci PJ suit at $2395 because I CAN DO PIPING. And because of that, I wont prevaricate in the future if a pattern calls for piping: no fear! Wish I'd done that with fly fronts, they terrify me.
Crumpily rumpily I'll wear this for years
The other difference between these two styles is of course the style. Carolyn is a slim straight cut which increases the chances of this being daywear/stealth pajamas and Keana is a dressier, boxy, tailored look, resolutely un-pajama like. Named recommended a lightweight fabric and I imagine this would make a more casually 'available' shirt, (with a dead cool slouchy boxyness ) and then in a heavier weight solid colour, the Carolyn would be sharper & totally street cool awesome. Think tweed or a pin stripe and a printed rayon for the Keana. I adore the sleeve length of the Keana and the slim cut of the Carolyn. I really love them both, its one of those cerulean belt conundrums. But I do like the Carolyn for casual daywear, indeed the August 2015 issue of Harpers Bazaar Australia confirms that the "boudoir focused" & "powder room to party" look is a go which I'm sure you will agree is such a huge relief.
I'd like to see the Carolyn cut at dress length with the Keana 3/4 sleeves, for a summer shirtdress look. I might make it.
I also made a McCalls 3341 skirt, alongside these two tops because I was feeling so enthusiastic. Tha'ts come to a grinding halt I can tell you, I've plumbed the depths of sewjo & come up empty handed now.
The eleventy fifth pencil skirt in my wardrobe.
I happened to place this fabric beside my Keana blouse on the sewing table & went all oh my! they'll be golly wowsers together! Now its confusing me, I think I like it, I think I don't. I blame Dolce & Gabbana SS16.
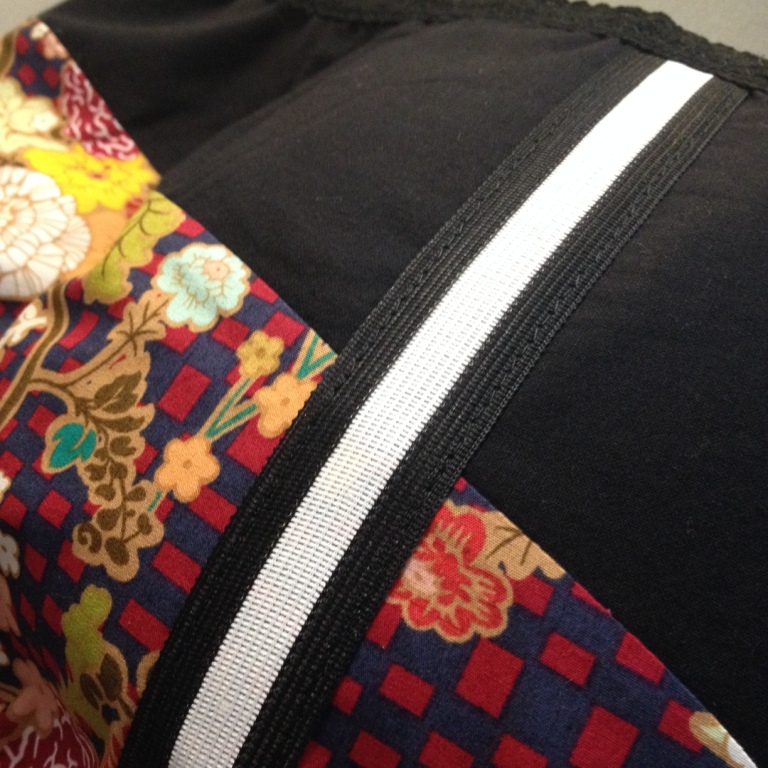
Also I already have eleven hunnred knee length pencil skirts so its not at all needed, but I can see it with a white t-shirt for summer so maybe it'll be useful. I do adore the racing stripe and need to stop putting it on all the things I havent put it on yet.
Pattern matching this was a pain, it had a huge repeat, so much so that I was forced to add a basque/yoke section in order to achieve the midi-ish length I wanted. I spent way too much time on this and then put an elastic waist on having realised too late it was too big. Bugger. Also my side stripe covered over my pattern/seam matching victory which meant I took almost twelvety hunnred photos of this before I sewed that on.
The fabric is from The Internet. I know I bought it online, but from whom?? Its a crafter's cotton despite the large repeat. The print patterns on these are so good, its definitely worth checking that section as well as the novelty corner when fabric browsing.
And except for the many Inari T's and dresses and the oft sewn Anita pants, that concludes my sewing to date :)
Presently I'm frozen in time & space without the will to tackle a new sewing adventure and anyway, I am preoccupied with gold thread embroidery. I love it so much.
