Christmas is coming, now now now. The frightening onward march of time that leads inexorably to actually having to sort out gifts for like, everyone, at Christmas, is NOW.
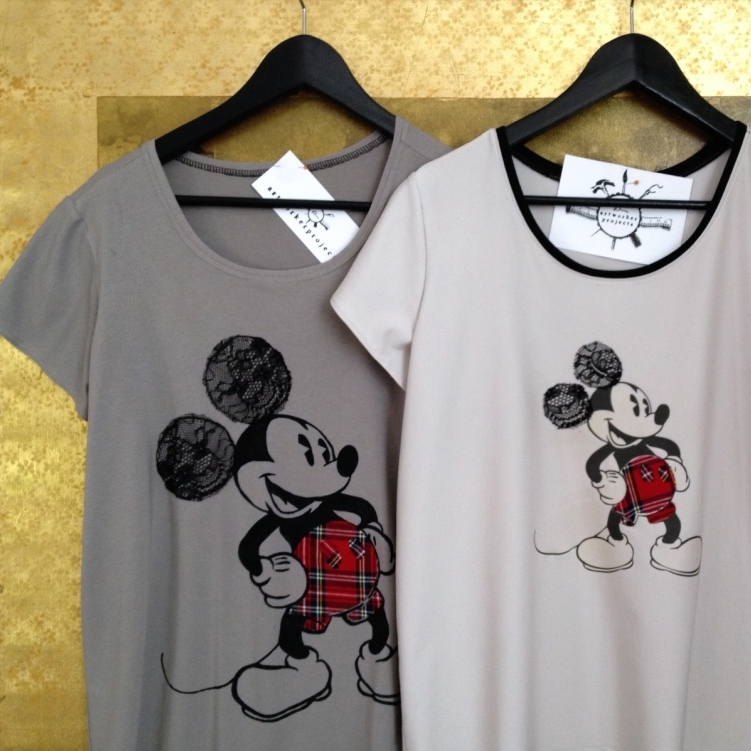
So I've made a few gifts with fabric, paint & lace applique which should cover most of the girl portion of my gift list, PHEW.
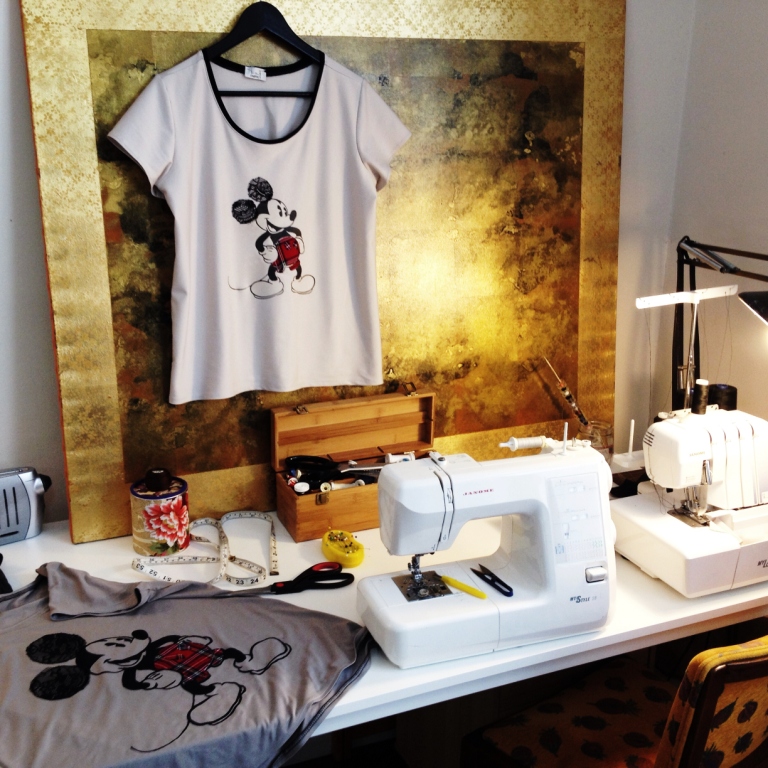
The Big Idea
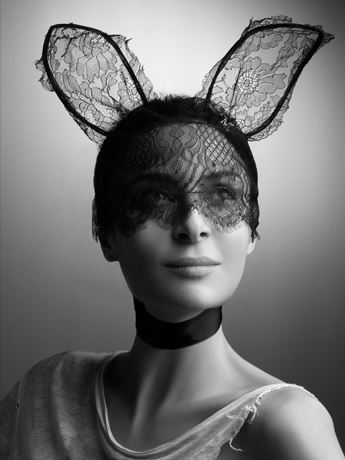
The inspiration for this came from another DIY jobbe I saw a while ago on Honestly WTF: DIY lace Mickey Mouse Ears, which in turn been inspired by the fantastic headbands of Maison Michel. I love it when things go 'round.
(And ooo la lah, that Maison MIchel, fun and cool and sexy:...)

My idea? Very simple: a t-shirt with lace applique, which much to my surprise, I can't find already done on somebodies blog but maybe I just haven't found it. Or its not interesting enough to post. Could be that
For this job, one needs:
*T-shirt, colour of choice.
Fine paintbrush.
A length of lace at least 20 x 40cm.
Optional contrast fabric.
Fabric glue.
Print of Mr Mouse from the plethora of images out there.
A4 iron on transfer sheet.
Or, no printer no iron on transfer film handy? No prob:
*T-shirt
You will need a picture of Mouse, so printer actually necessary.
Saral transfer paper (or carbon paper or chalk or whatever you can scrounge up)
Black Fabric paint
Scrap of lace & optional contrast fabric.
Fabric glue.
* DO pre-wash, dry & iron the t-shirt or beware of fabric shrinkage.
If you have ALREADY BOUGHT a t-shirt, you're good to go. I couldn't bleeding well find a nice enough plain t-shirt, so with MUCH haste and irritation, I made a few.

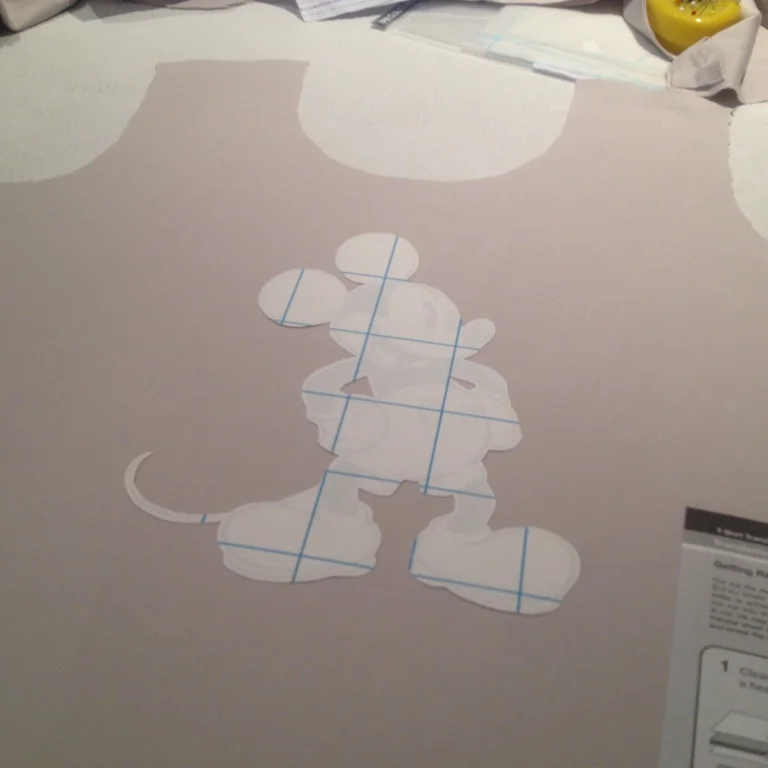
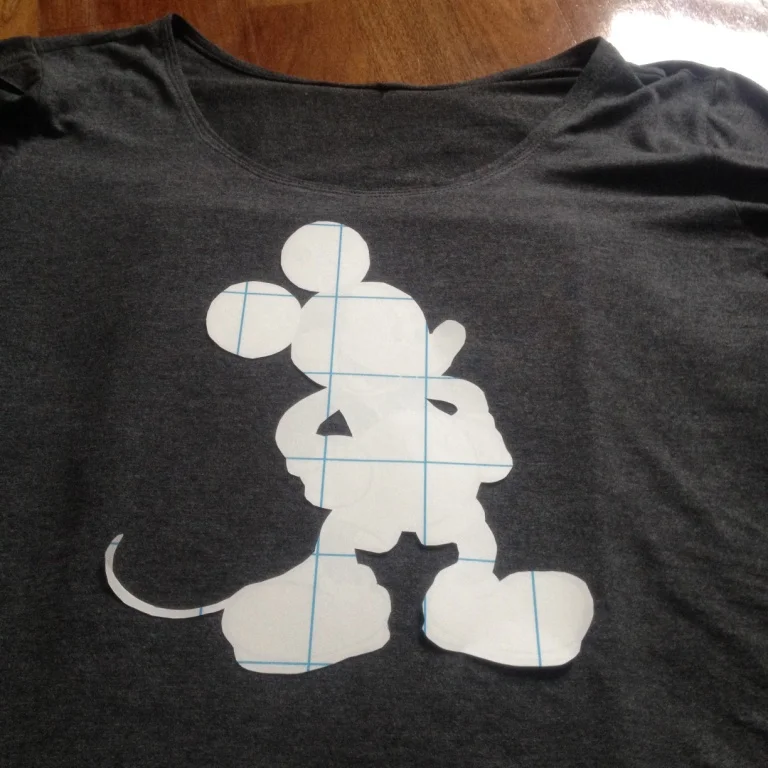

For the print iron-on transfer method, cut out around the image close to the outlines then lay the t-shirt down flat, smoothing out the wrinkles & decide where you want to place Mr Mouse. (Don't forget to mirror print if needed.)
Follow the directions as to printing & transferring the image to the shirt, or at the very least, give them a cursory glance; usually its a simple case of hot dry iron + pressure but be on the safe side & check!
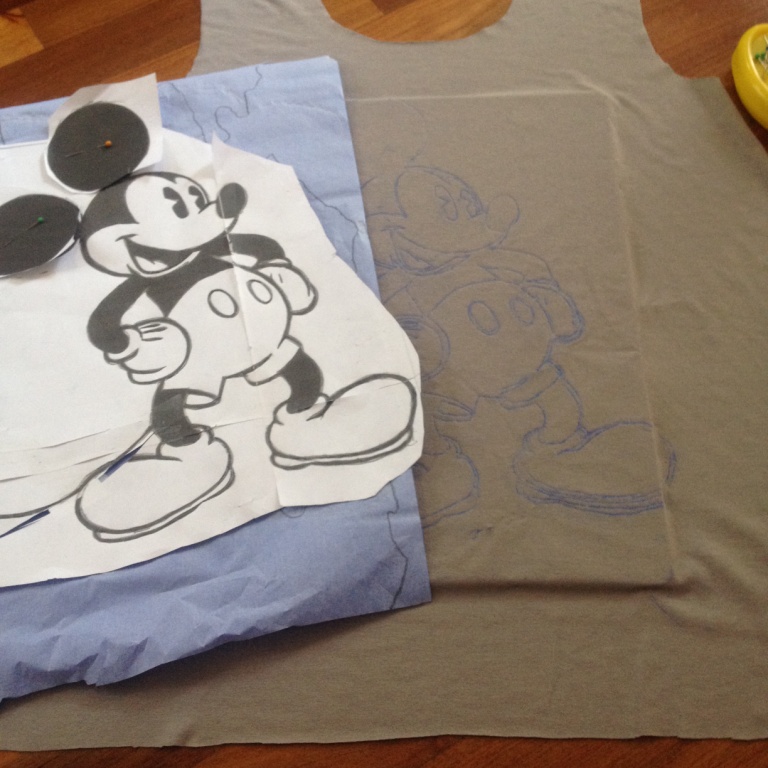

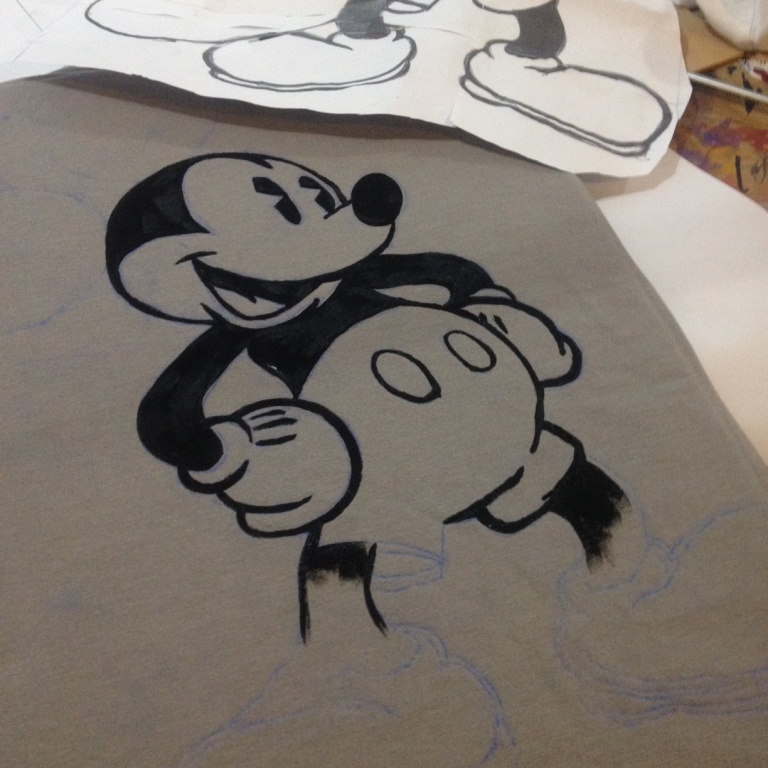
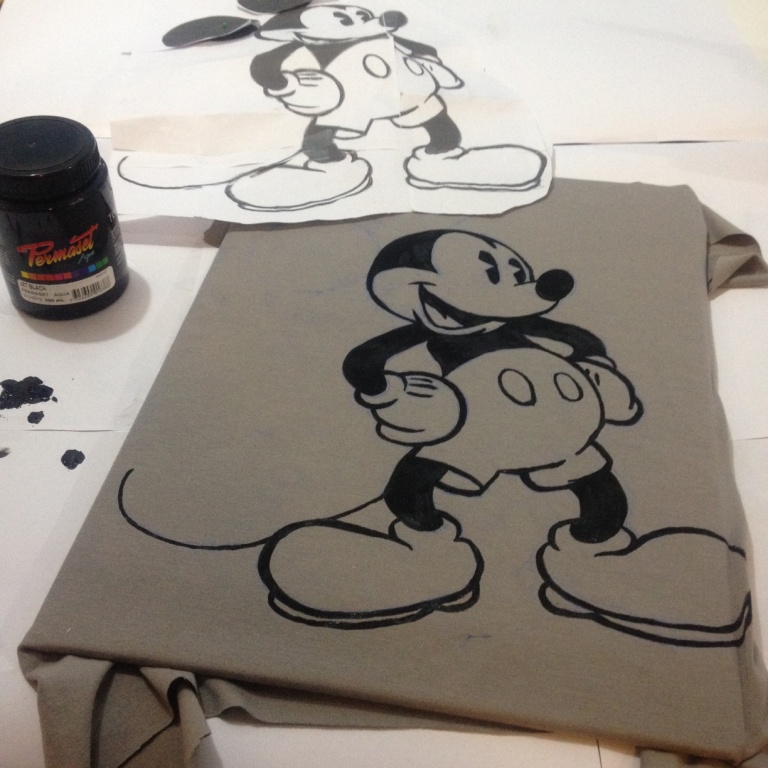
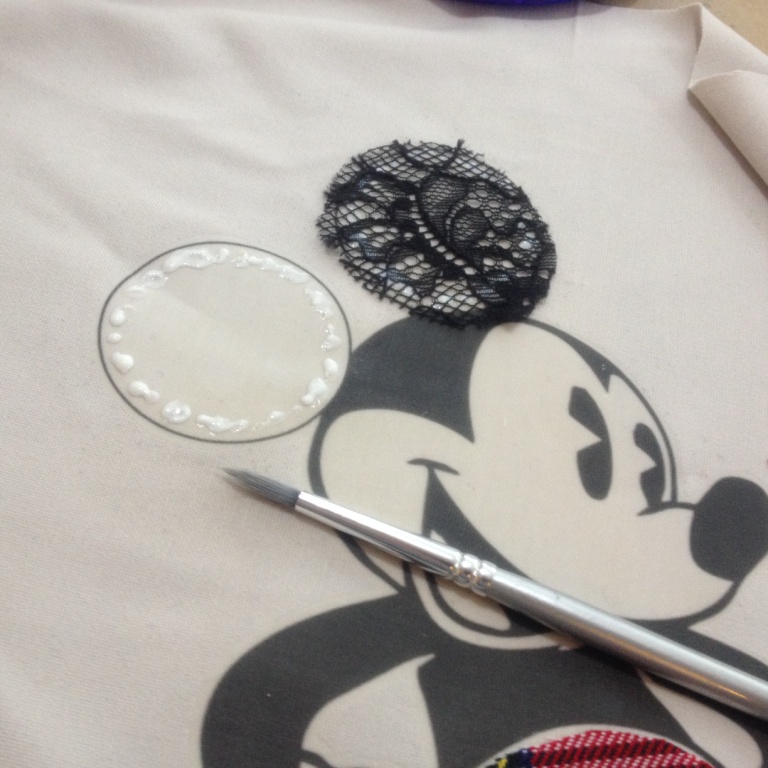
To transfer the image for painting, I used Saral transfer paper, very handy stuff to have around the studio. Use a few bits of tape keep the fabric stretched taut or use a really great screen printer's trick; use adhesive plastic book covering film behind! Just peel the backing paper off a sheet of Contact & tape the film sticky side up onto your work surface or a wooden board, or whatever hard panel you find that fits inside your t-shirt, behind the area you'll be painting. Position the area of fabric to be painted onto the tacky base board and hey!..The fabric is kept smooth and unmoving but is easily repositionable and the sticky panel is endlessly re-useable. Trace, pressing firmly using a HB pencil..
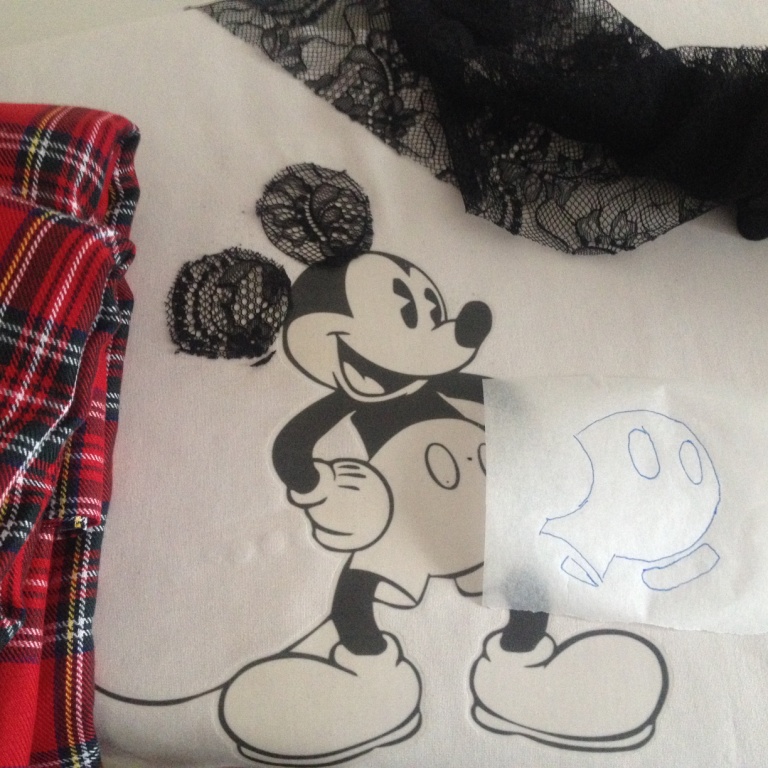
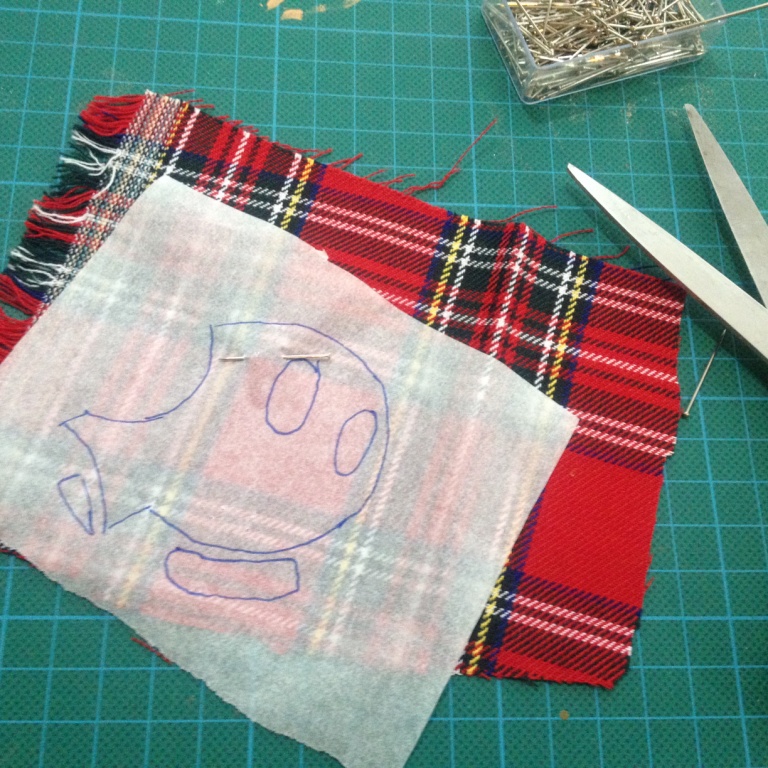
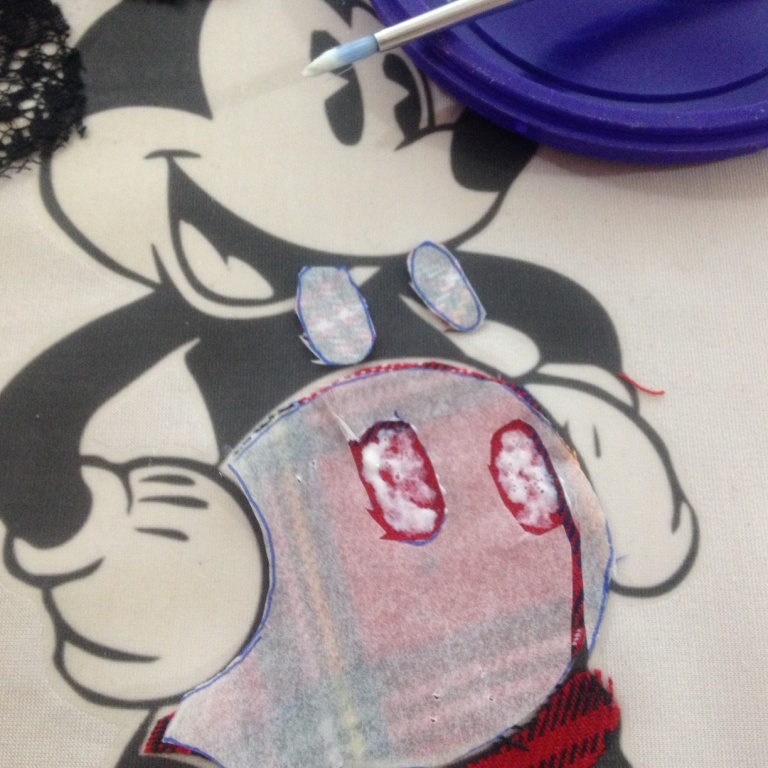
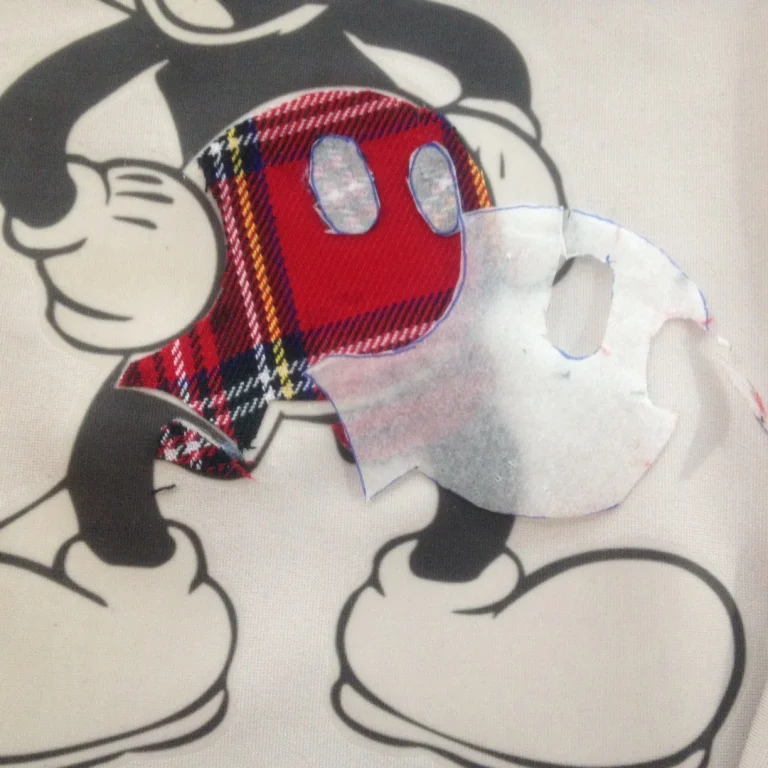
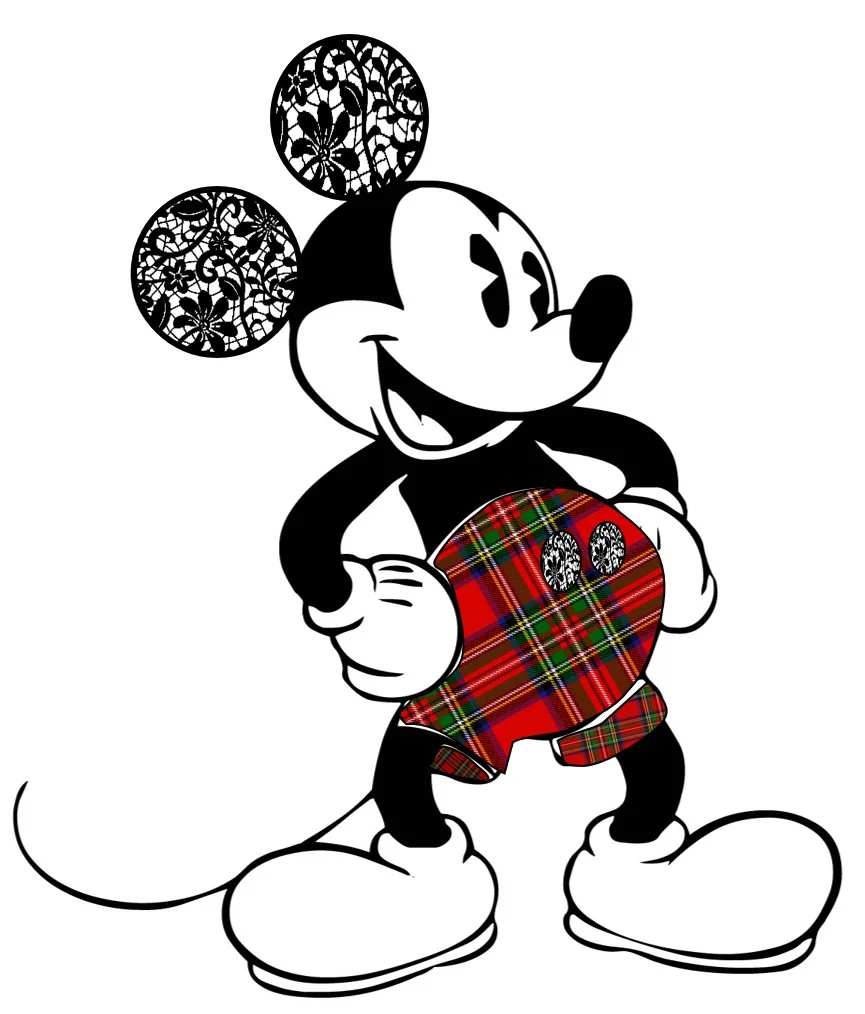
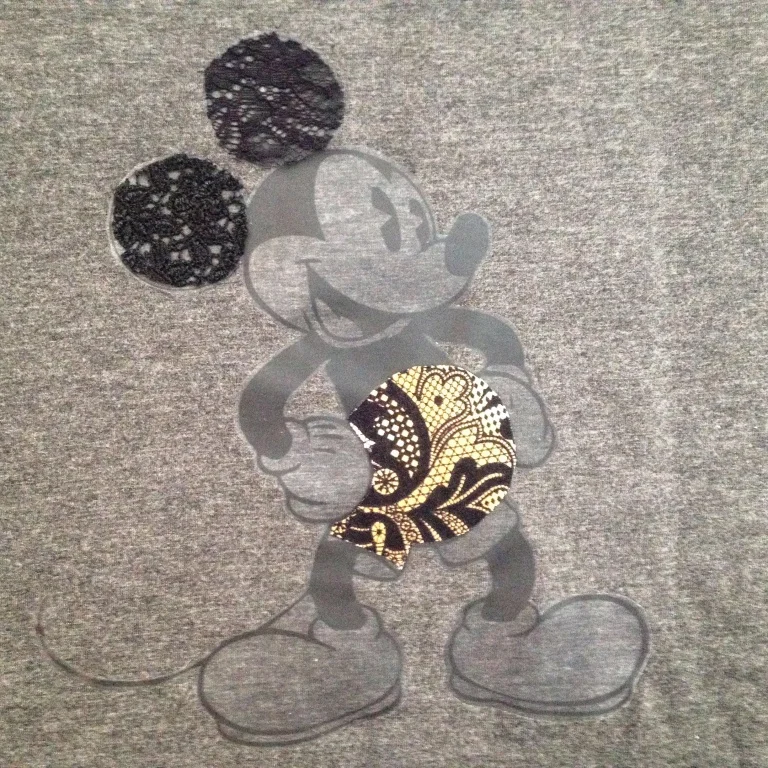
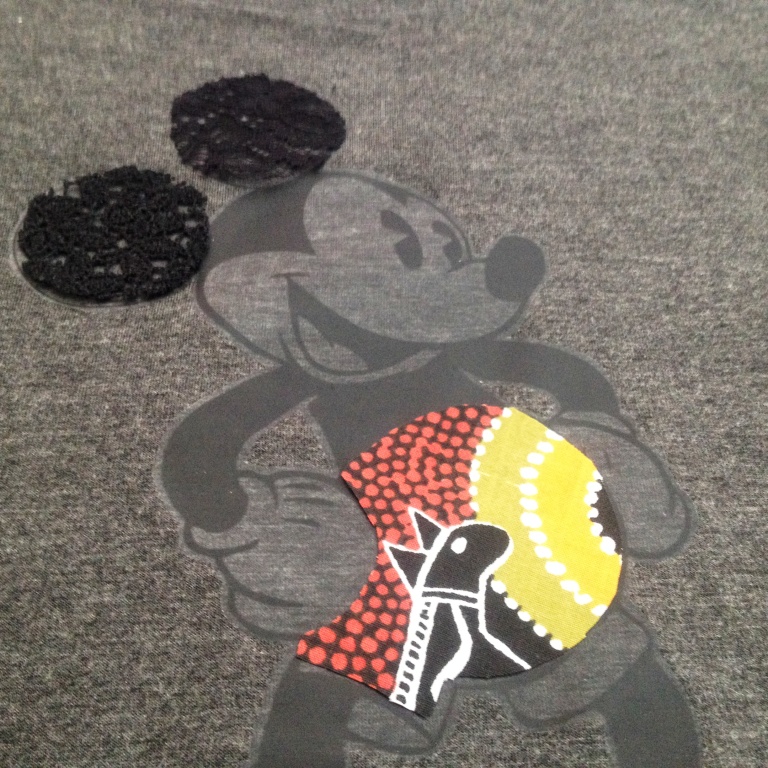
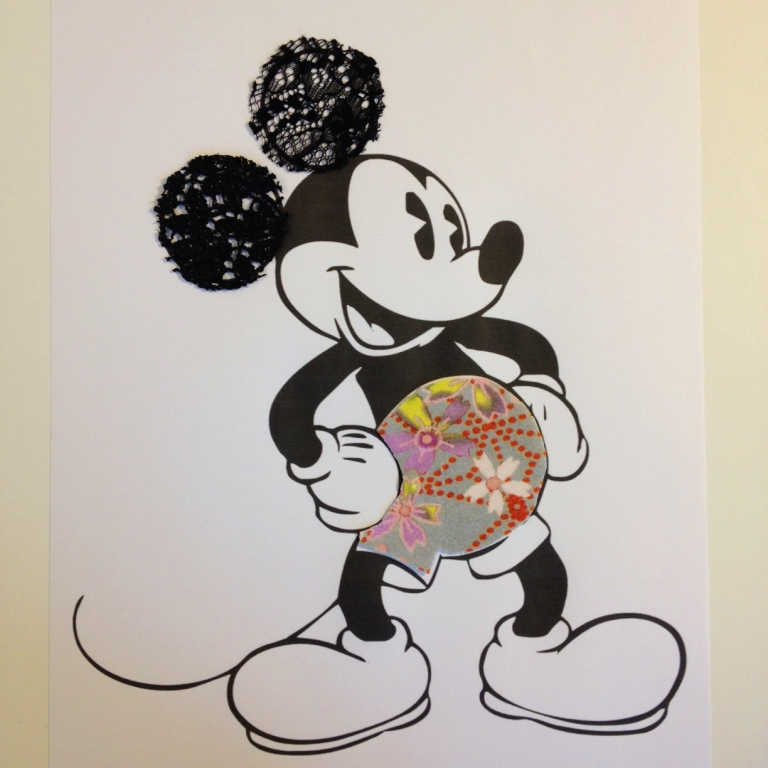
To furnish his look, make a template with tracing paper of the ears and shorts, including the buttons. Cut out the shapes & use these as a pattern. Decide which area of the fabric pattern you want for his trousers, then lightly mist the back of the paper template with spray adhesive so its tacky enough to keep the pattern in place.

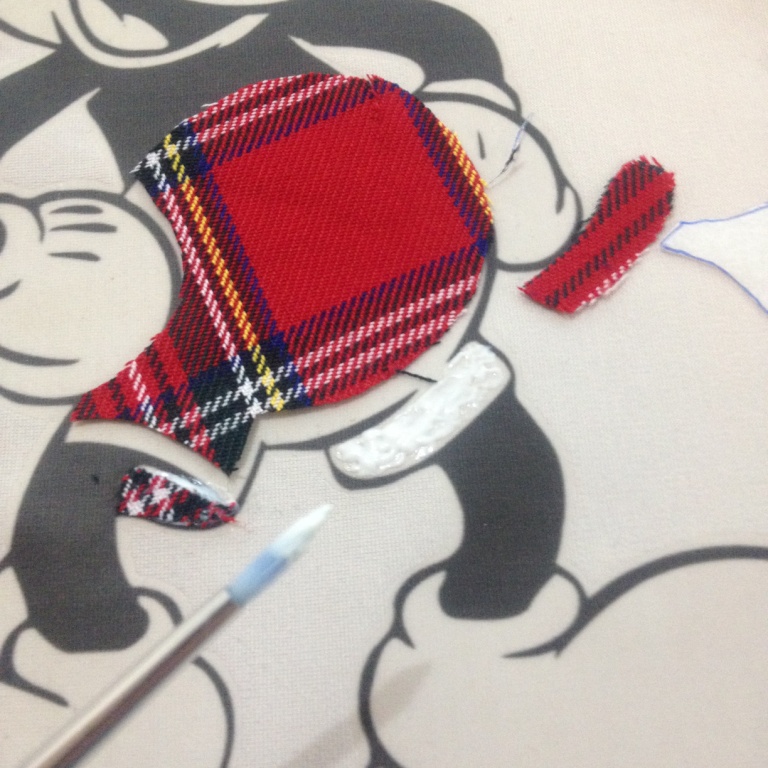
I like the rough edges of lace seen on the Maison Michel ears, kind of a cool/tough edge, so I cut mine very approximately around the ear circles. Cut out the buttons on a contrasting bit of fabric but keep the template for positioning.
I like to use a fine paintbrush to dot the fabric glue where needed, it's more accurate & controllable.

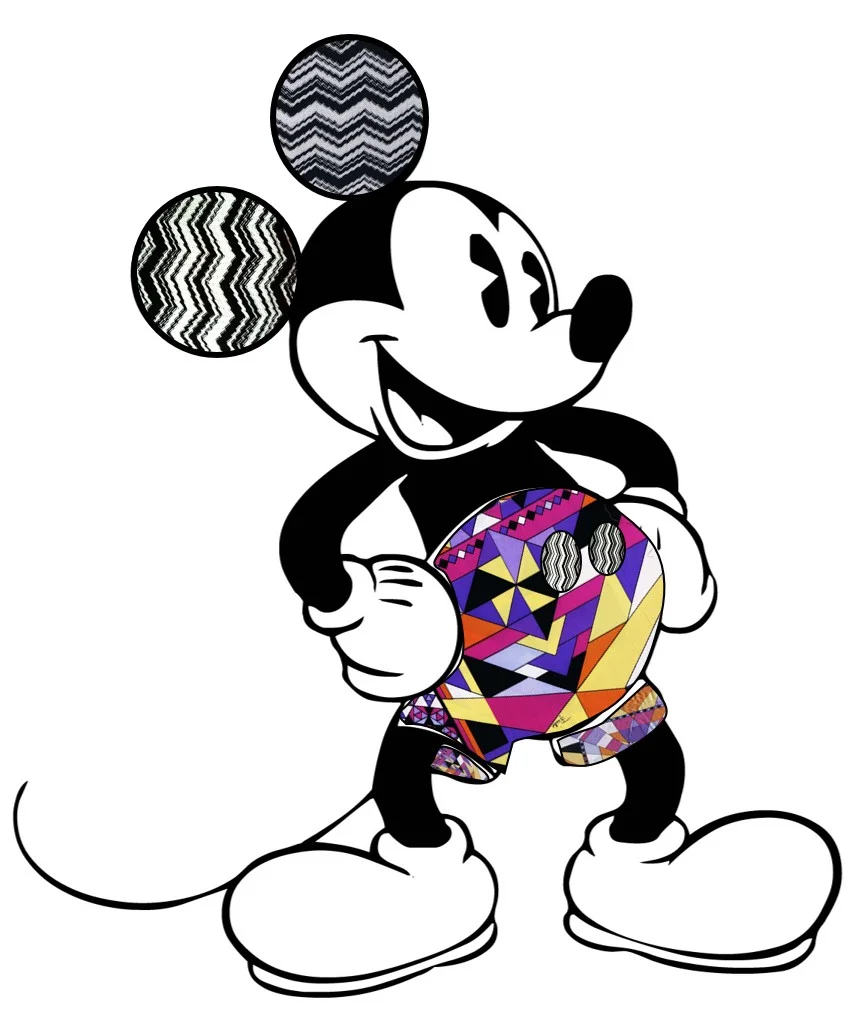
As I'm doing this in response to Christmas gift imperative, I went for the tartan; is that Christmasy? Tartan also - somehow - has punk undertones and I'm down with that. But I was tempted to dress him up in many different scraps of fabric, endless variations available...
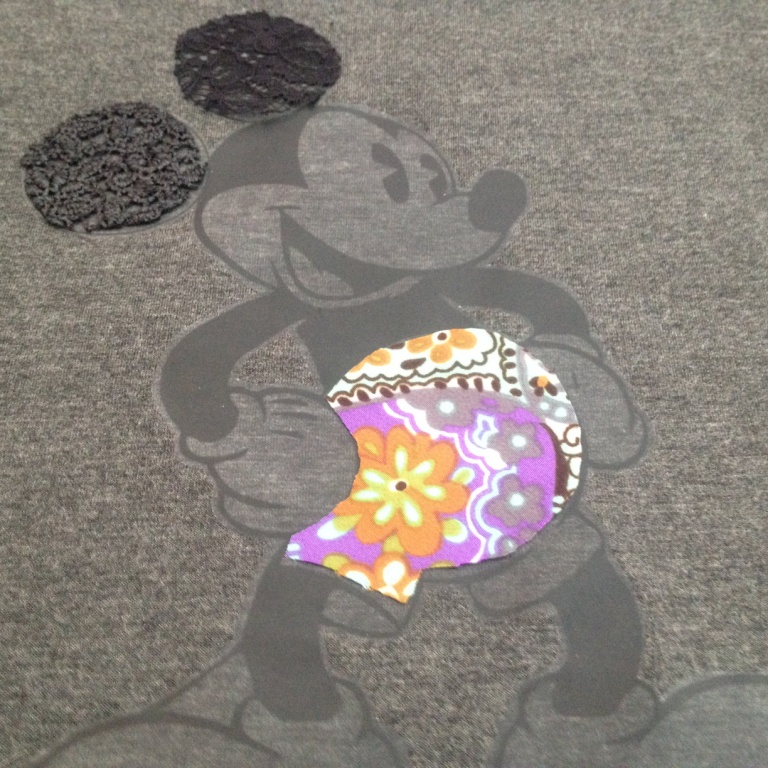
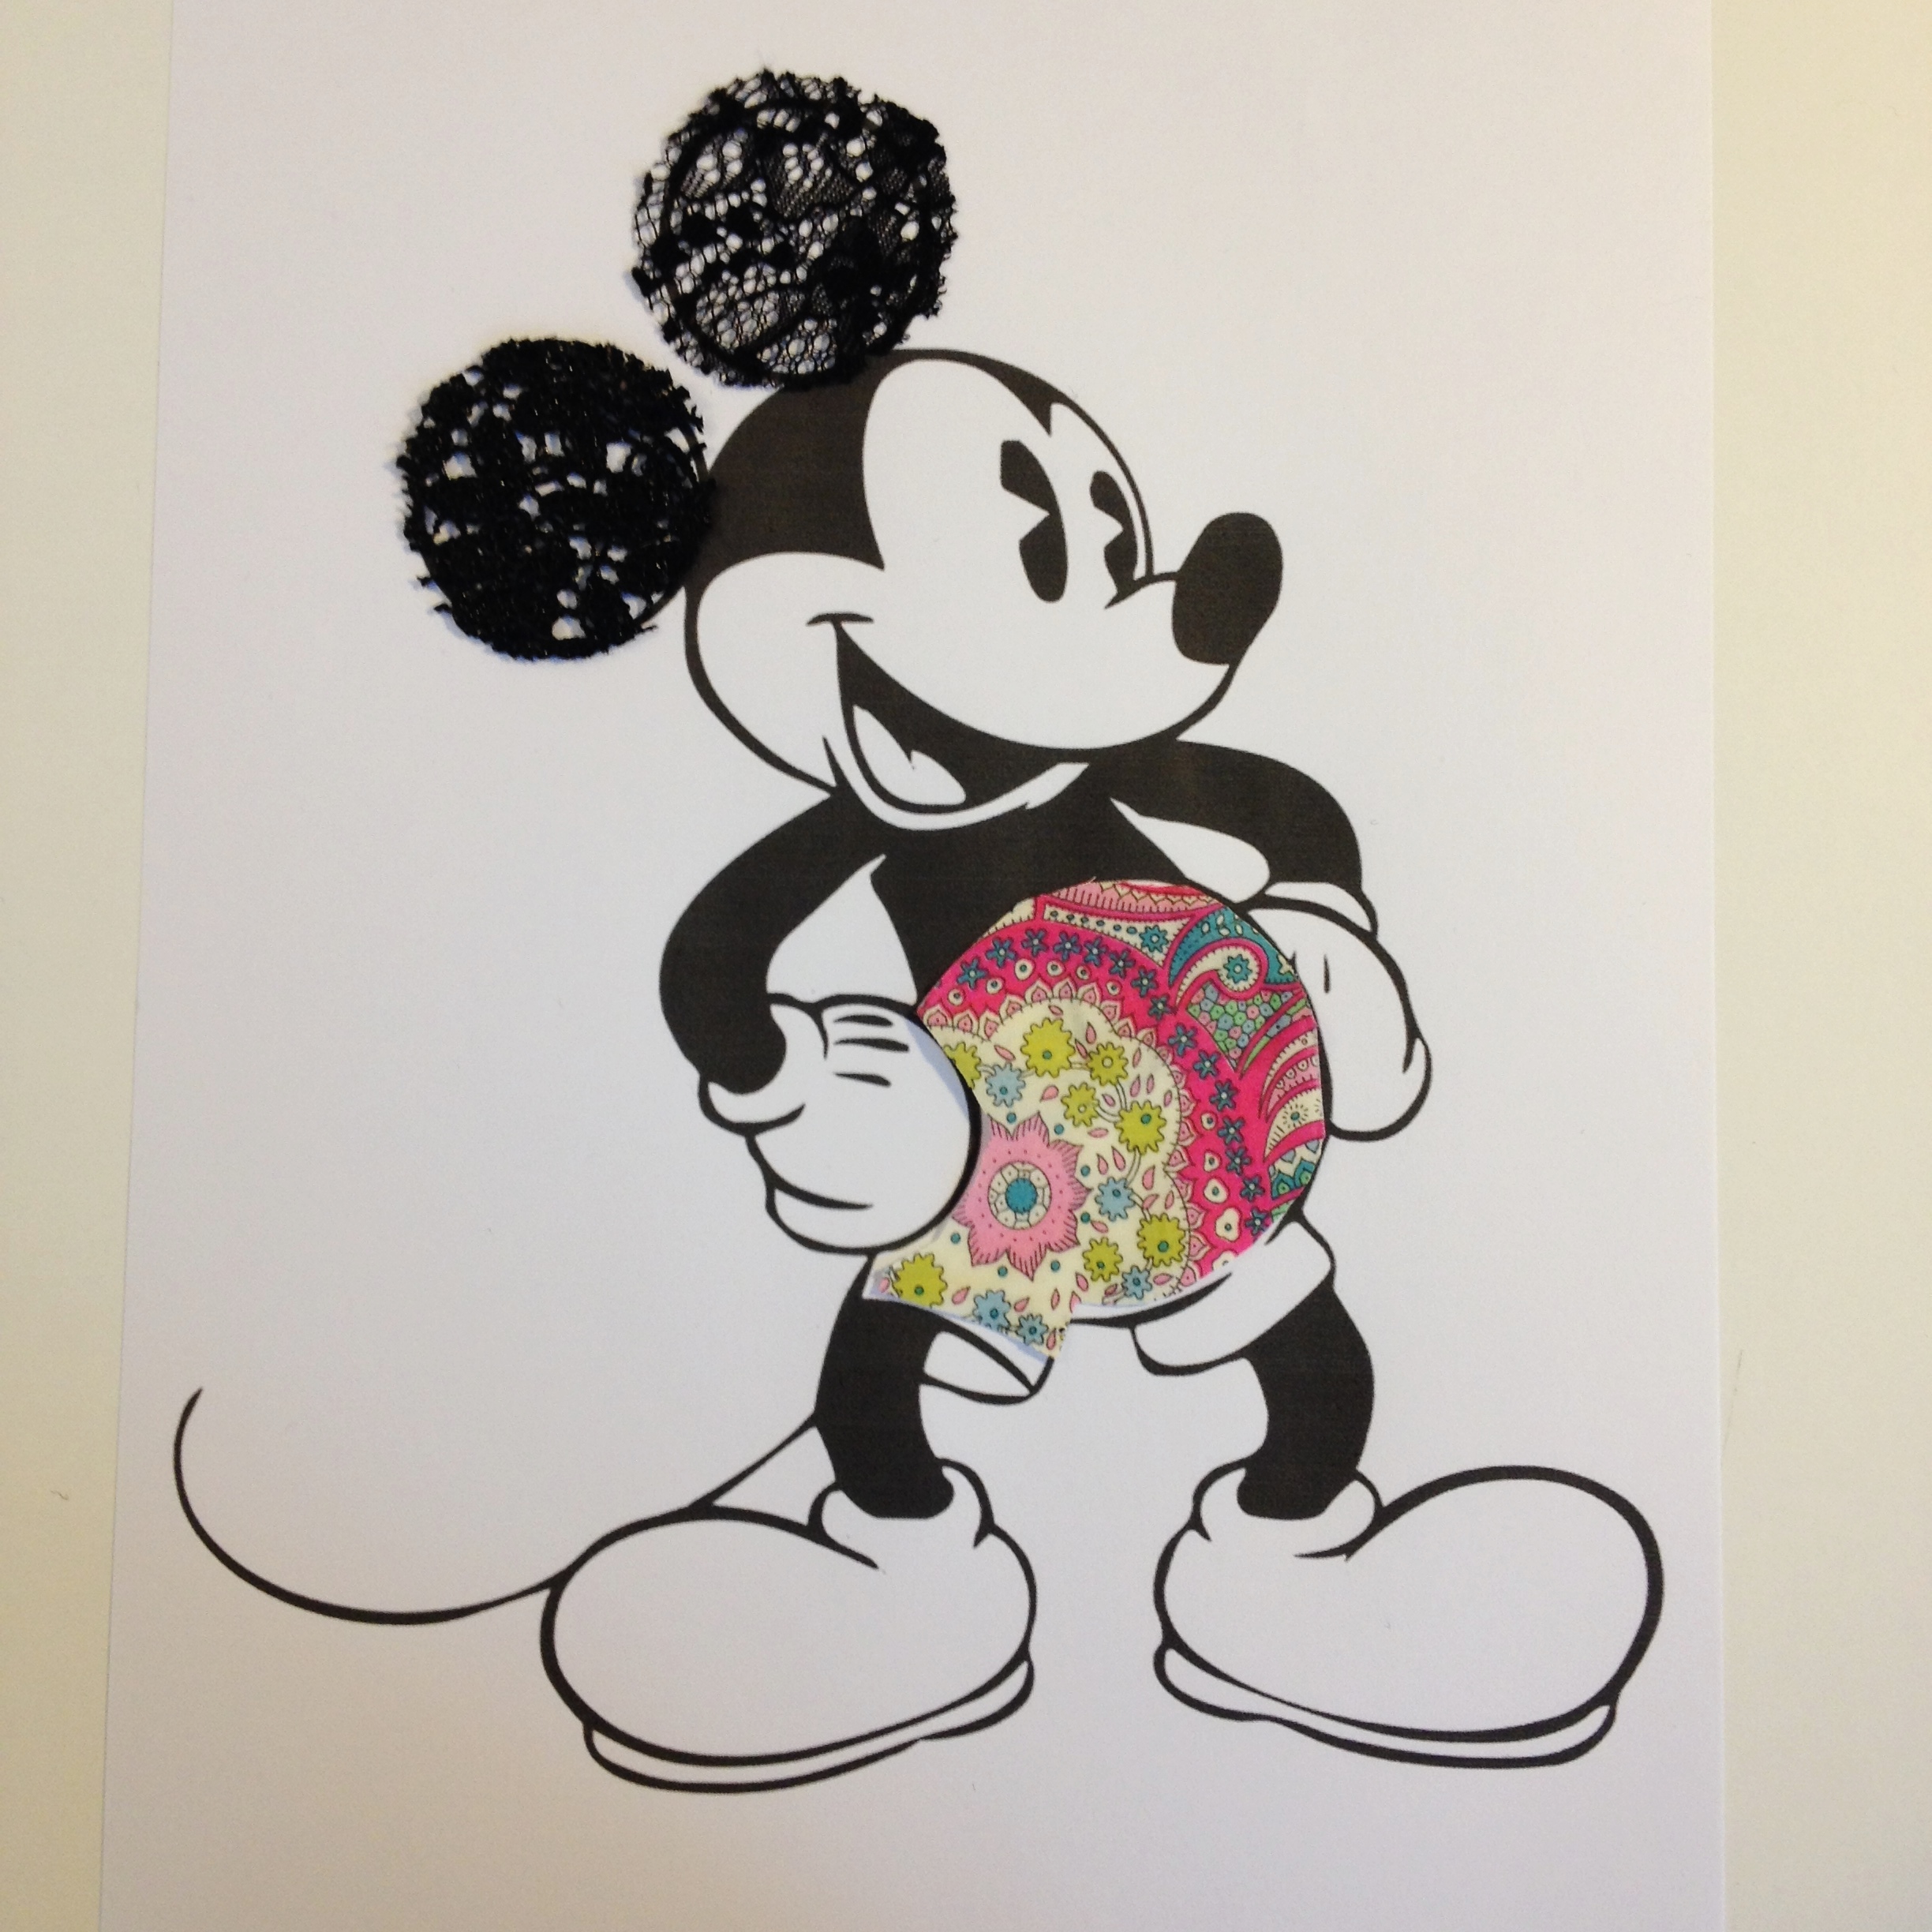
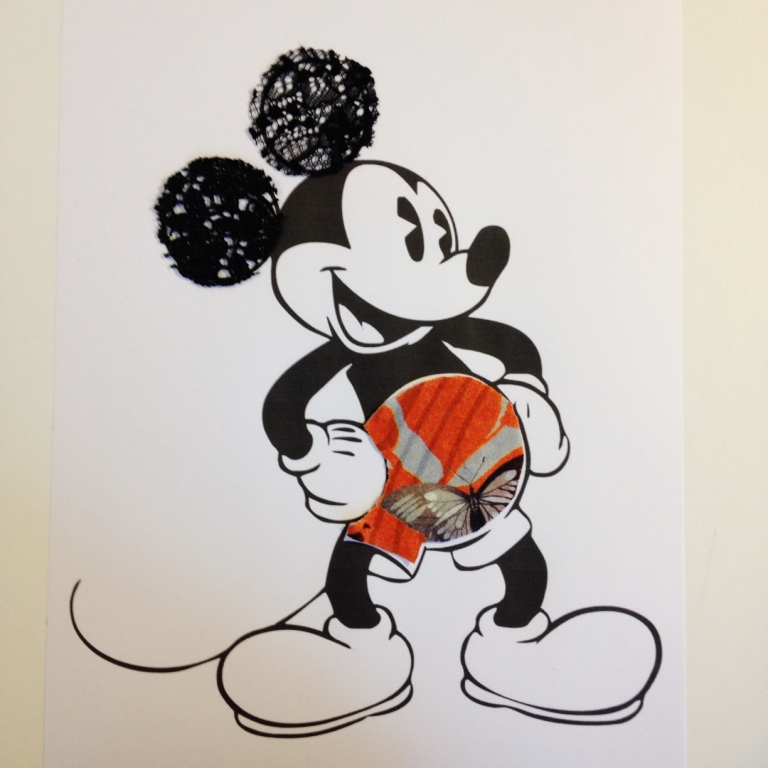
Or stick with so hot right now plaid or mix it up with Missoni & Pucci, babe. Dude looks like them's some good drugs.


Mickey Mouse eh. So cool.

From Style with Stylebabe
Can we have a Miley picture? Why certainly! Especially when Marc Jacobs looks so adorable.

From Style with Stylebabe
I came across many, many images of Mickey Mouse shirts in fashion - see a whole load in one article, here - but none, like NONE of him with lace ears which continues to amaze me. Then I had this GENIUS idea: doily ears, yeah!
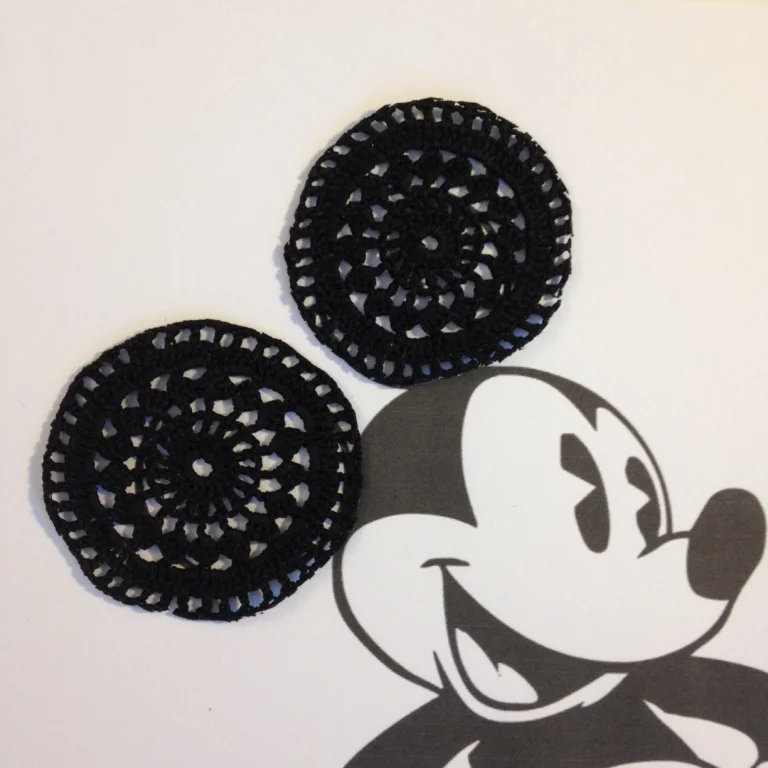
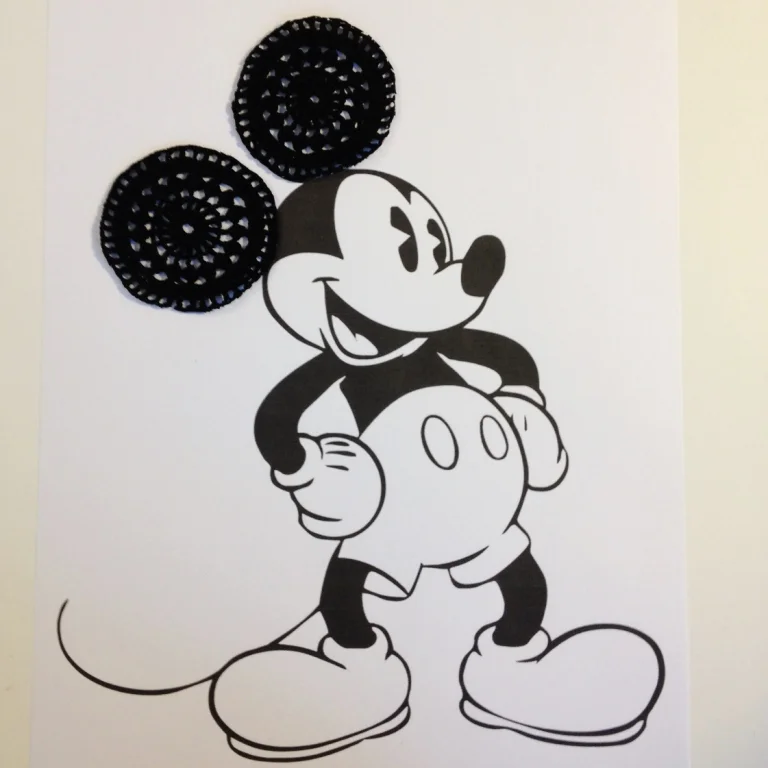
Oh yah, you saw it here first. All kinds of creative genius, HERE FIRST.
As for my shirts, I'm still working on them; y'know when you're doing something really simple, a that'll-be-quick type thing and it never goes right, no matter how many times you unpick it & start again?? That's this. It's taking a while. Also I'm very busy painting all my doilies matt black. I'm leaning towards giving artworkerprojects gift vouchers (like I’ll ever honour those!) to be honest and that gem of an idea is gaining traction; patience is not anyone's virtue this close to end of business 2013
Starfleet Command
Thats it, I have time to waste, doing everything but this.
But WATCHOUT, 2014; artworkerprojects will rip it up. I have big plans.

Peace and love.