Theres not much to go on when typing “working with aluminium wire” into Google then trying “using aluminium wire” then “tips on aluminium wire”, then “knowing about aluminium wire”, really wanting to hear someone’s anecdotal experience of using it creatively at scale but receiving no reward except more Pinterest pages of generic “wire art” images, so this post is for…me. And you, if you want to know about using anodised aluminium wire. I really love it & have learnt a few things in using it. This is a nuts & bolts post, not a discourse on the critical content of the artwork of which it is a part. This 12ga (2mm) wire stuff is so shiny softy chunky…

Making mobile sculptures
I started using it when making a mobile sculpture commission with my resin ornaments. I had picked some up somewhere in the past, so it was ready to hand & fantastic for kind of thing I wanted to make. However for this, there is one drawback; it’s very soft & wont bear much weight so it limited how large this piece could get. It drooped, it really drooped. I didn’t want to use horizontal members of sturdier brass or alumium tubing to balance the load laterally because I love the look of using just this wire on its own, but I had to in the end in order to fulfil the brief.

Now I’m using it to make large scale fragments of lace to produce the manifestation of an image I see in my head

The design came from a piece of Chantilly lace from Tessuti. My sewing friends will appreciate

Idea. This is where it’ll all go as a layer covering over the frame and painting on canvas
The artwork I’m making features a fragment of lace, mirrored, laid over a painting & extending beyond over the frame, such as you may find in wings or in a Rorschach pattern. There are three motifs to each half so in making the whole I’ll do it in 6 interlocking items. I’m thinking that this will make for an easier install, because securing six pieces individually means I’ll have more leeway & less engineering but most importantly, the stress on all the joins will be less significant. The whole thing may fail or just look stupid

Transferring the design to backing board
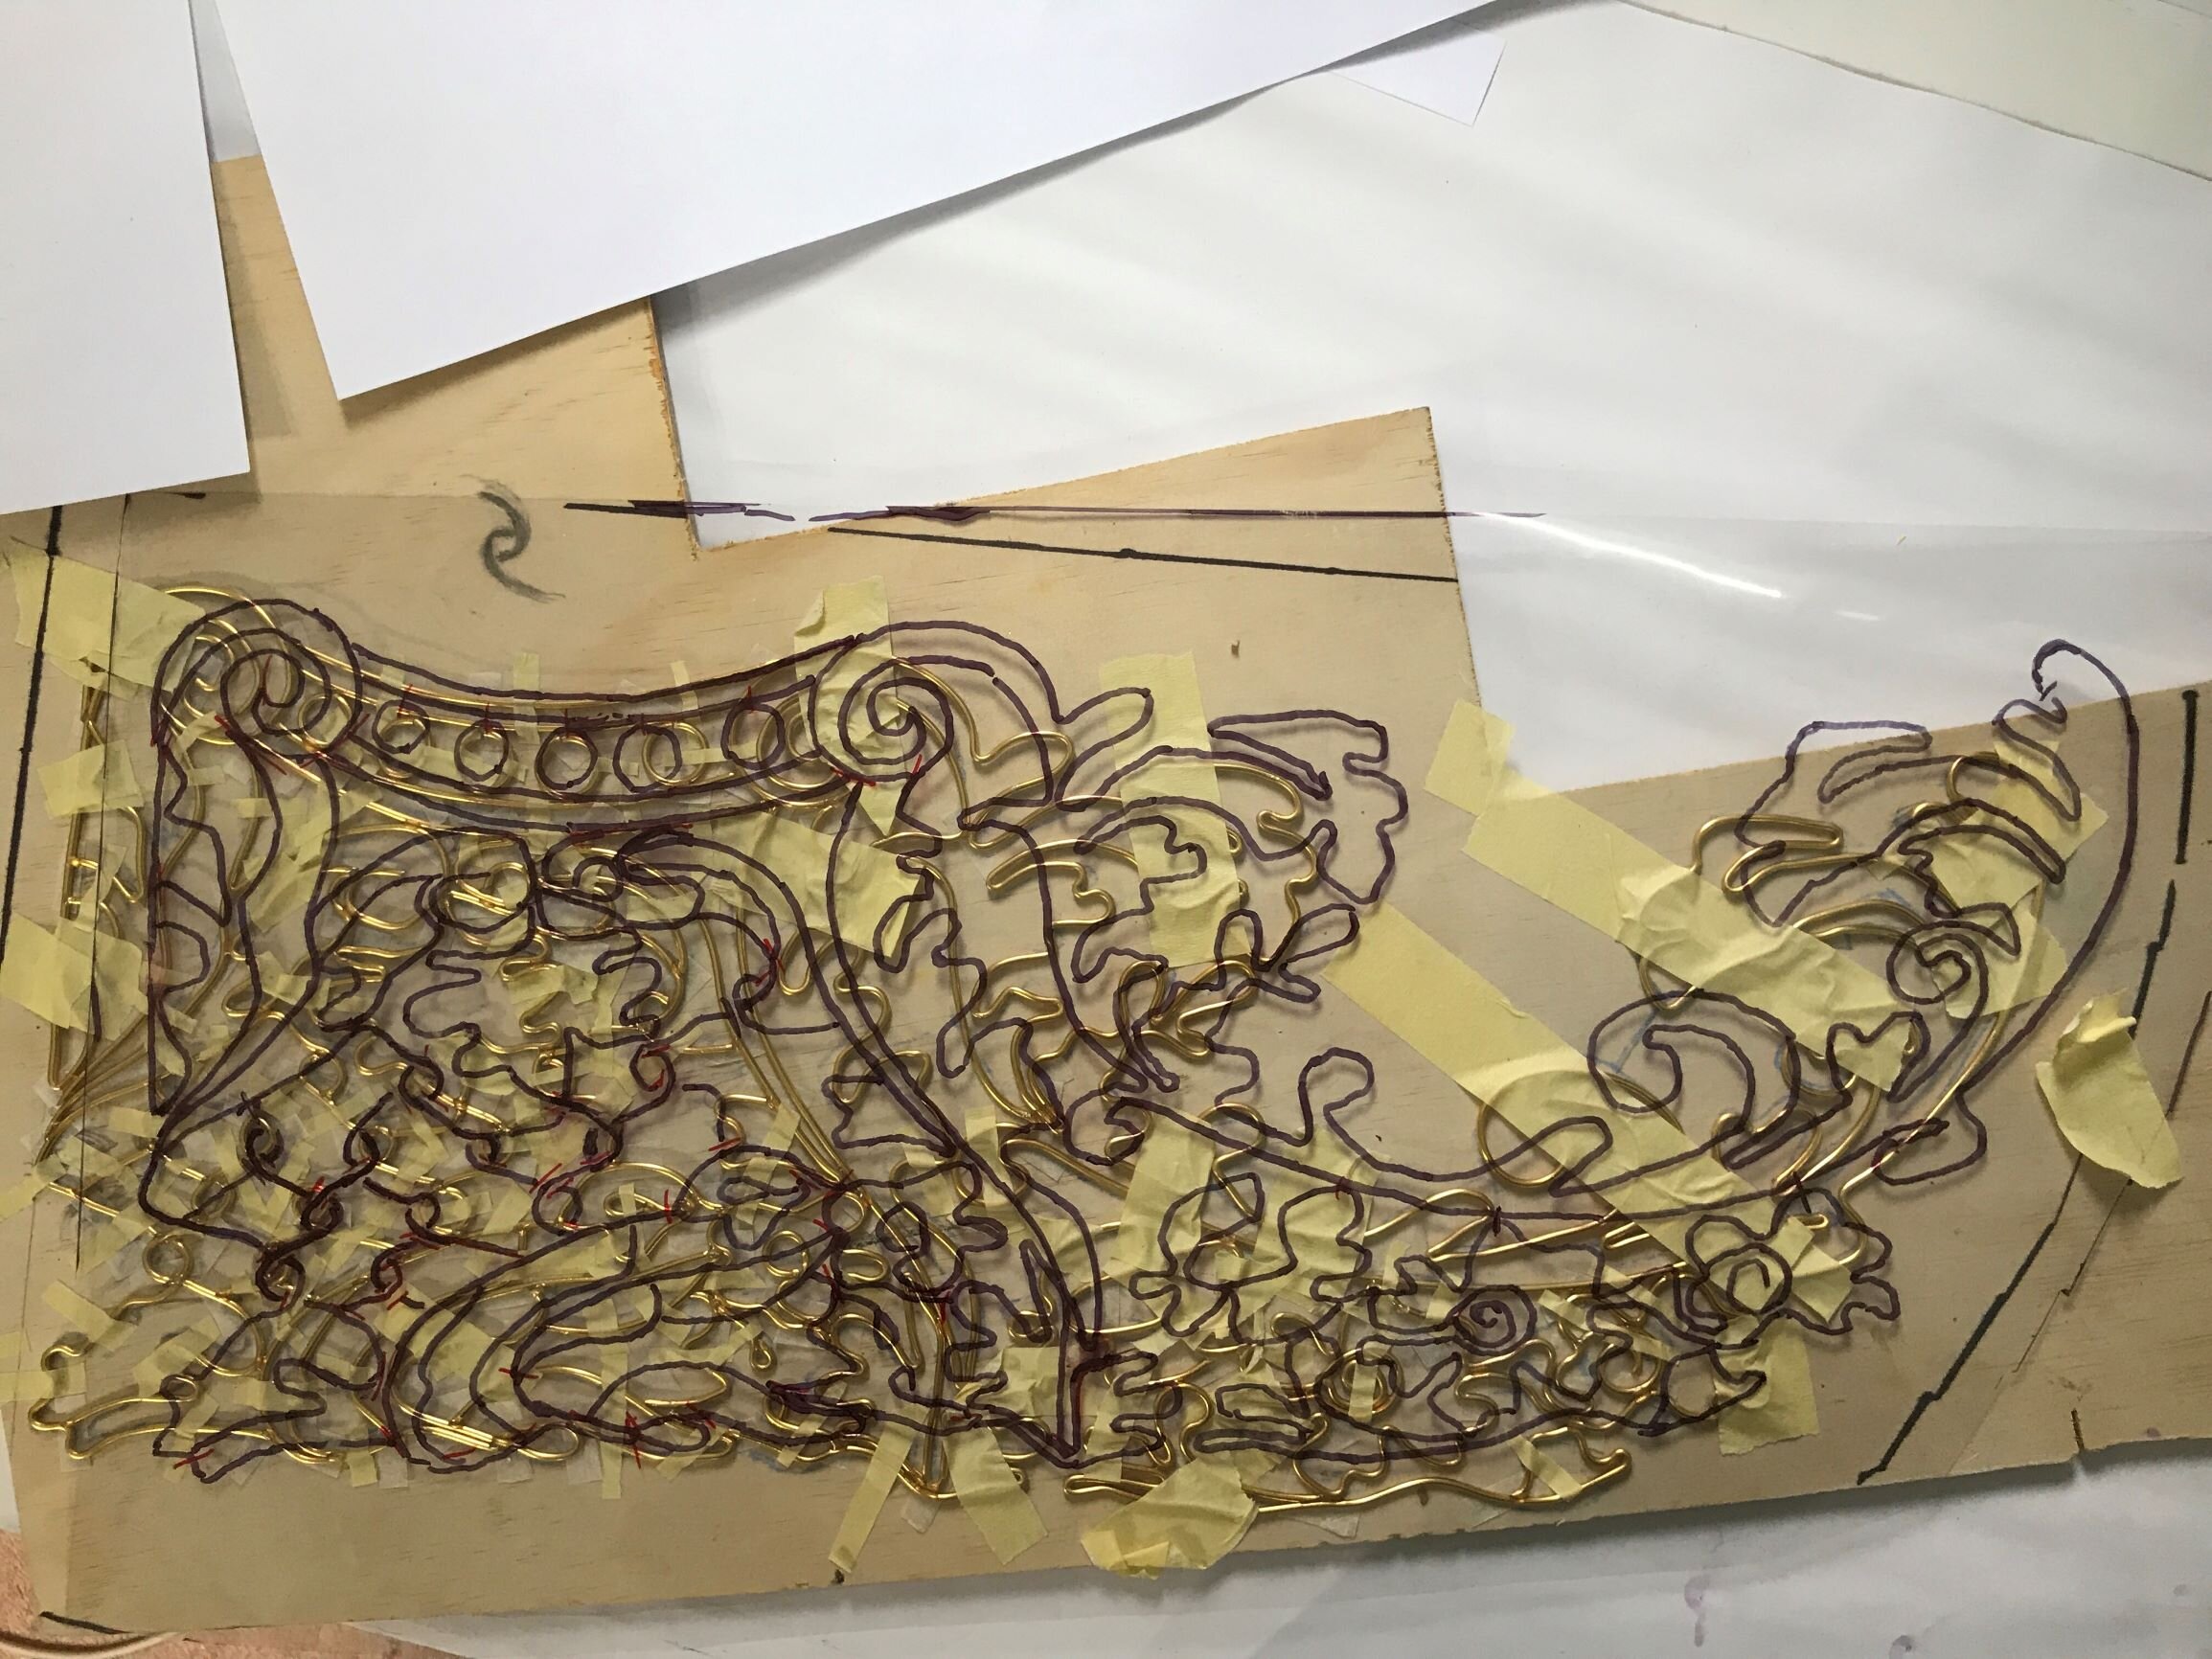
Mirror imaging the lace once the first side completed, tracing through clear acetate then flipping it & photocopying that as my template for the other side, not using a mirrored copy of the original design. They should match each other more closely this way


Late night studio
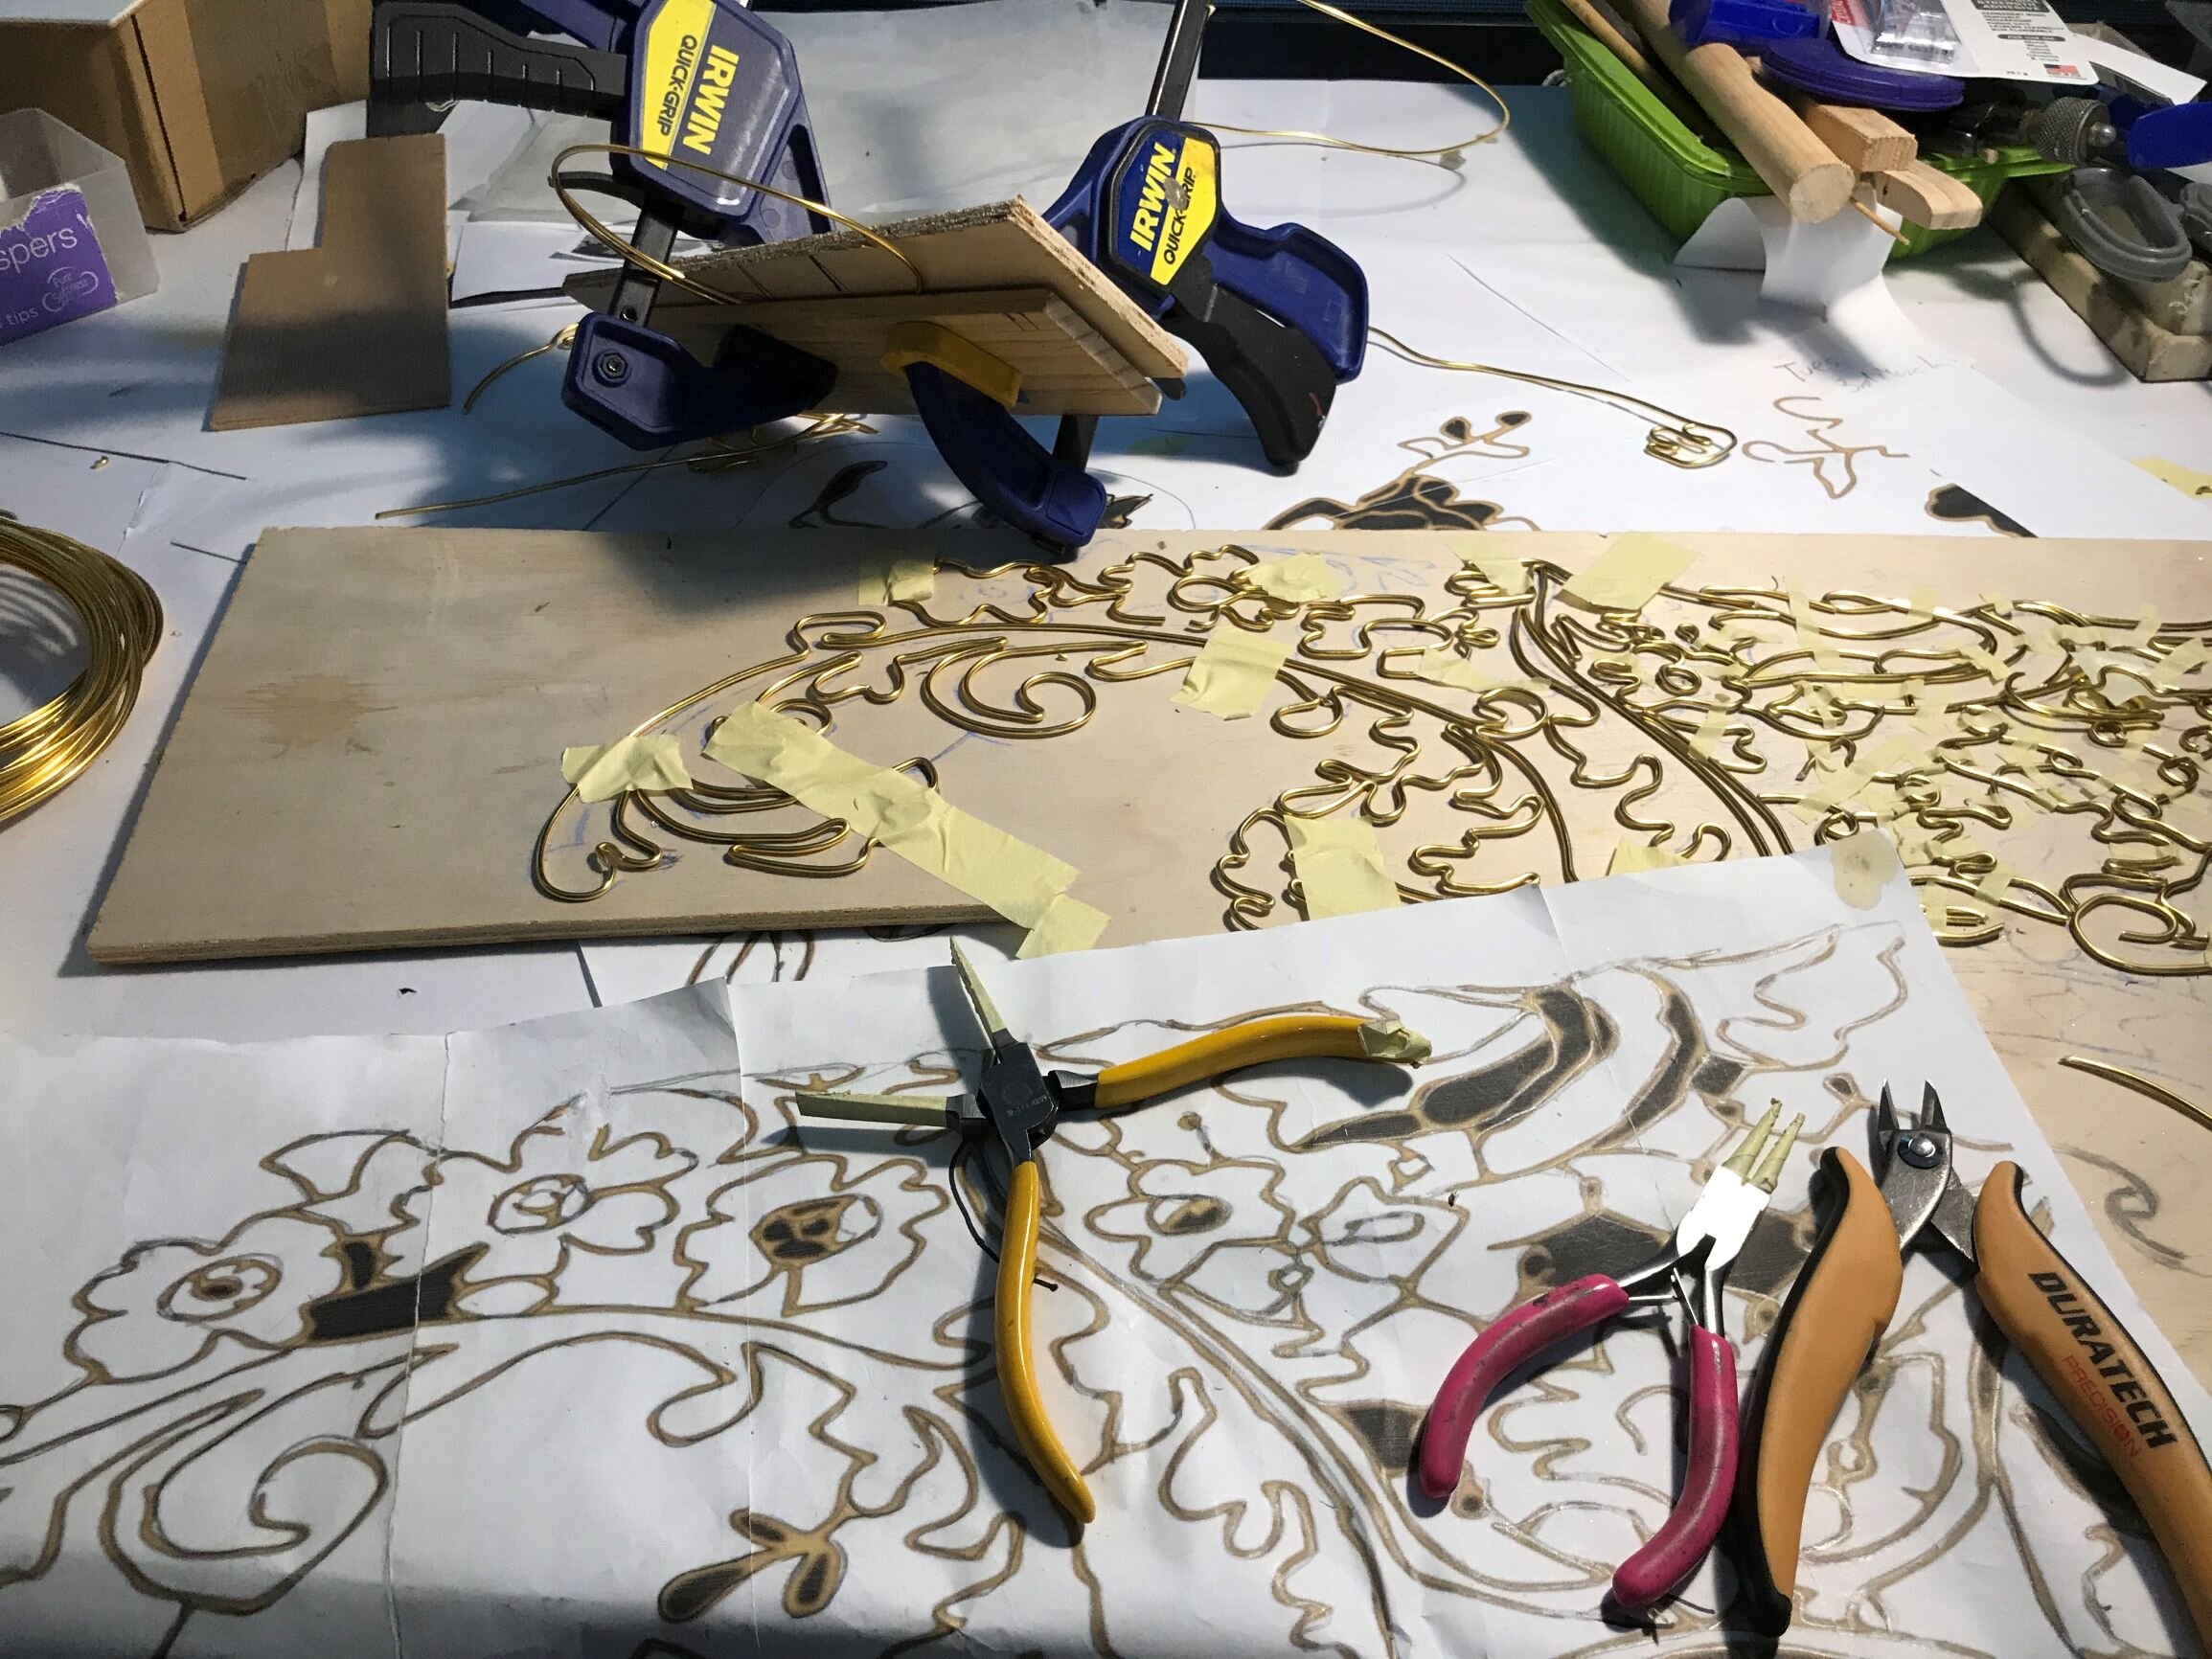
There is such a luxe feel to this stuff, its so buttery soft that it only takes hands and a few tools to work it & after a while found that I was really only using:
two pliers; one round, one flat nosed
1 pair of flush cut snips
two quick clamps

Lots of colours, I bought them here
Before proceeding, please note that anodised aluminium is permanently coloured, it wont rub off or fade away or tarnish but it is a surface treatment only, and a very light one at that. The colour is a chemical reaction over bare metal and it scratches off at the slightest scrape. Some colours are better than others but it is very difficult, perhaps impossible, to touch up so take care. Be really careful with it. Discarding one perfect bend because it got scratched hurts

When first making mobiles, the simplest & best guidance I found about working with wire came from Mark Leary. How to ‘just’ bend a loop nicely and reliably might seem to be self-evident, but is something one has to get the knack of; someone has to show you. Then you ‘just’ keep doing it until you do it well, or well enough to start making something real of your own.

Making lace means hundreds of small, curved bits of wire have to be joined together. Aluminium is a beast to solder, its a specialist job and I didn’t want to spend the time required to get really good at it, so I had to look for adhesives* and I looked at these:
Zap-a-gap, no, and the gel version isn’t either, it still doesn’t have body enough to fill & bridge the gaps between the wires
Superglue in all its guises, no, same as above
JB Weld & Metal Bond, no didnt look good and I dont need a conductive bridge
E6000 no: too sticky & hard to control with tiny application points like this, and leaves great glue threads that drape over everything. Really stressful glue for this job. The clarity & flexibility of it would be perfect but it really was messy.
Same for Shoe glue from Woolies, its brilliant stuff and is probably just re-branded E6000 but neither was practical
Acrylic gel medium. This stuff is generally really powerfully hard & sticks to everything & I had high hopes for it but no. Until…
• EPOXY RESIN! Good old Araldite. Its the best.
*If you know differently or have more info on this subject, please share it! I know of times past where people (men) made jokes about women gluing metal together (“isn’t that pitiably stupid, gluing metal! Women are too weak to make proper, manly bonds by welding or solder, there’s no point in even showing them”). Those were bad and stupid times; I have figured out a good glue for this metal and I know I’m not the first. Do you know more? Tell me please!

Freshly applied epoxy, which sadly seeped through & adhered to the backing board. One is never too experienced to fuck it up.
Whilst one of the negative qualities of epoxy is that it discolours over time - although I’m in favour of that in this instance because it matches the warmth of the gold wire - one, or rather two combined, positive qualities, is that it shrinks when cured and has such a body weight to it, the fluid is so viscous, that it can bridge gaps. So I can confidently bead it on to the joints knowing that bead will subside as it cures, so the lump-ness of it isn’t as big as it first looks. The bond is excellent as the anodised surface is very porous & sucks in the glue

The one, best tip I can give you about Epoxy is that YOU HAVE TO LET IT CURE. For like, days, leave it covered up somewhere to bake nice and hard.

BUT, epoxy is a fluid and is subject to gravity, so to counteract it potentially seeping through to the base underneath, I slip teeny strips of silicon paper underneath every join. However, if it does make heavy contact with the paper & has to be peeled away, the few shreds of fibre it leaves behind adds strength to the bond and isnt visible, being underneath. Perfect. As you can see in one of the previous photos above, I learnt this the hard/stupid way; it did stick in some in places & re-gluing the bits that fell apart added to the existing glue lumps, and I ended up re-doing it all from scratch anyway. So silicone paper. I mean I should have known. Really.
I have tried a few surface treatments to disguise the clearness of the epoxy so it emulates soldering and think I have cracked that one too. I will update on that in the future

This wire is the Lilac colourway, it looks great on the roll where theres lots of it but out on its own it just reads as metal-ish

You can see above some little nail holes; I thought to try bending the wire around these but it was too tight and the wire scratched against the nails; it took too much time & fiddling to be practical
Being solidly cylindrical, wire slips around a lot & needs taping in place. The masking tape has to be applied in non-joint places (because that’s where the glue goes), which is a bit annoying because the join is exactly where you want the control to be.
But most of the job is fitting the stuff together to get good face-to-face contact at join points so as to minimise stressing the adhesive. I tossed out many pieces of wire trying to get just one curve right, or to better match the angle of a cut. Masking tape alone is insufficient to hold the bend of the wire in place, it must be more or less permanently formed into its required shape. Masking tape only keeps it in position it to its abutting match
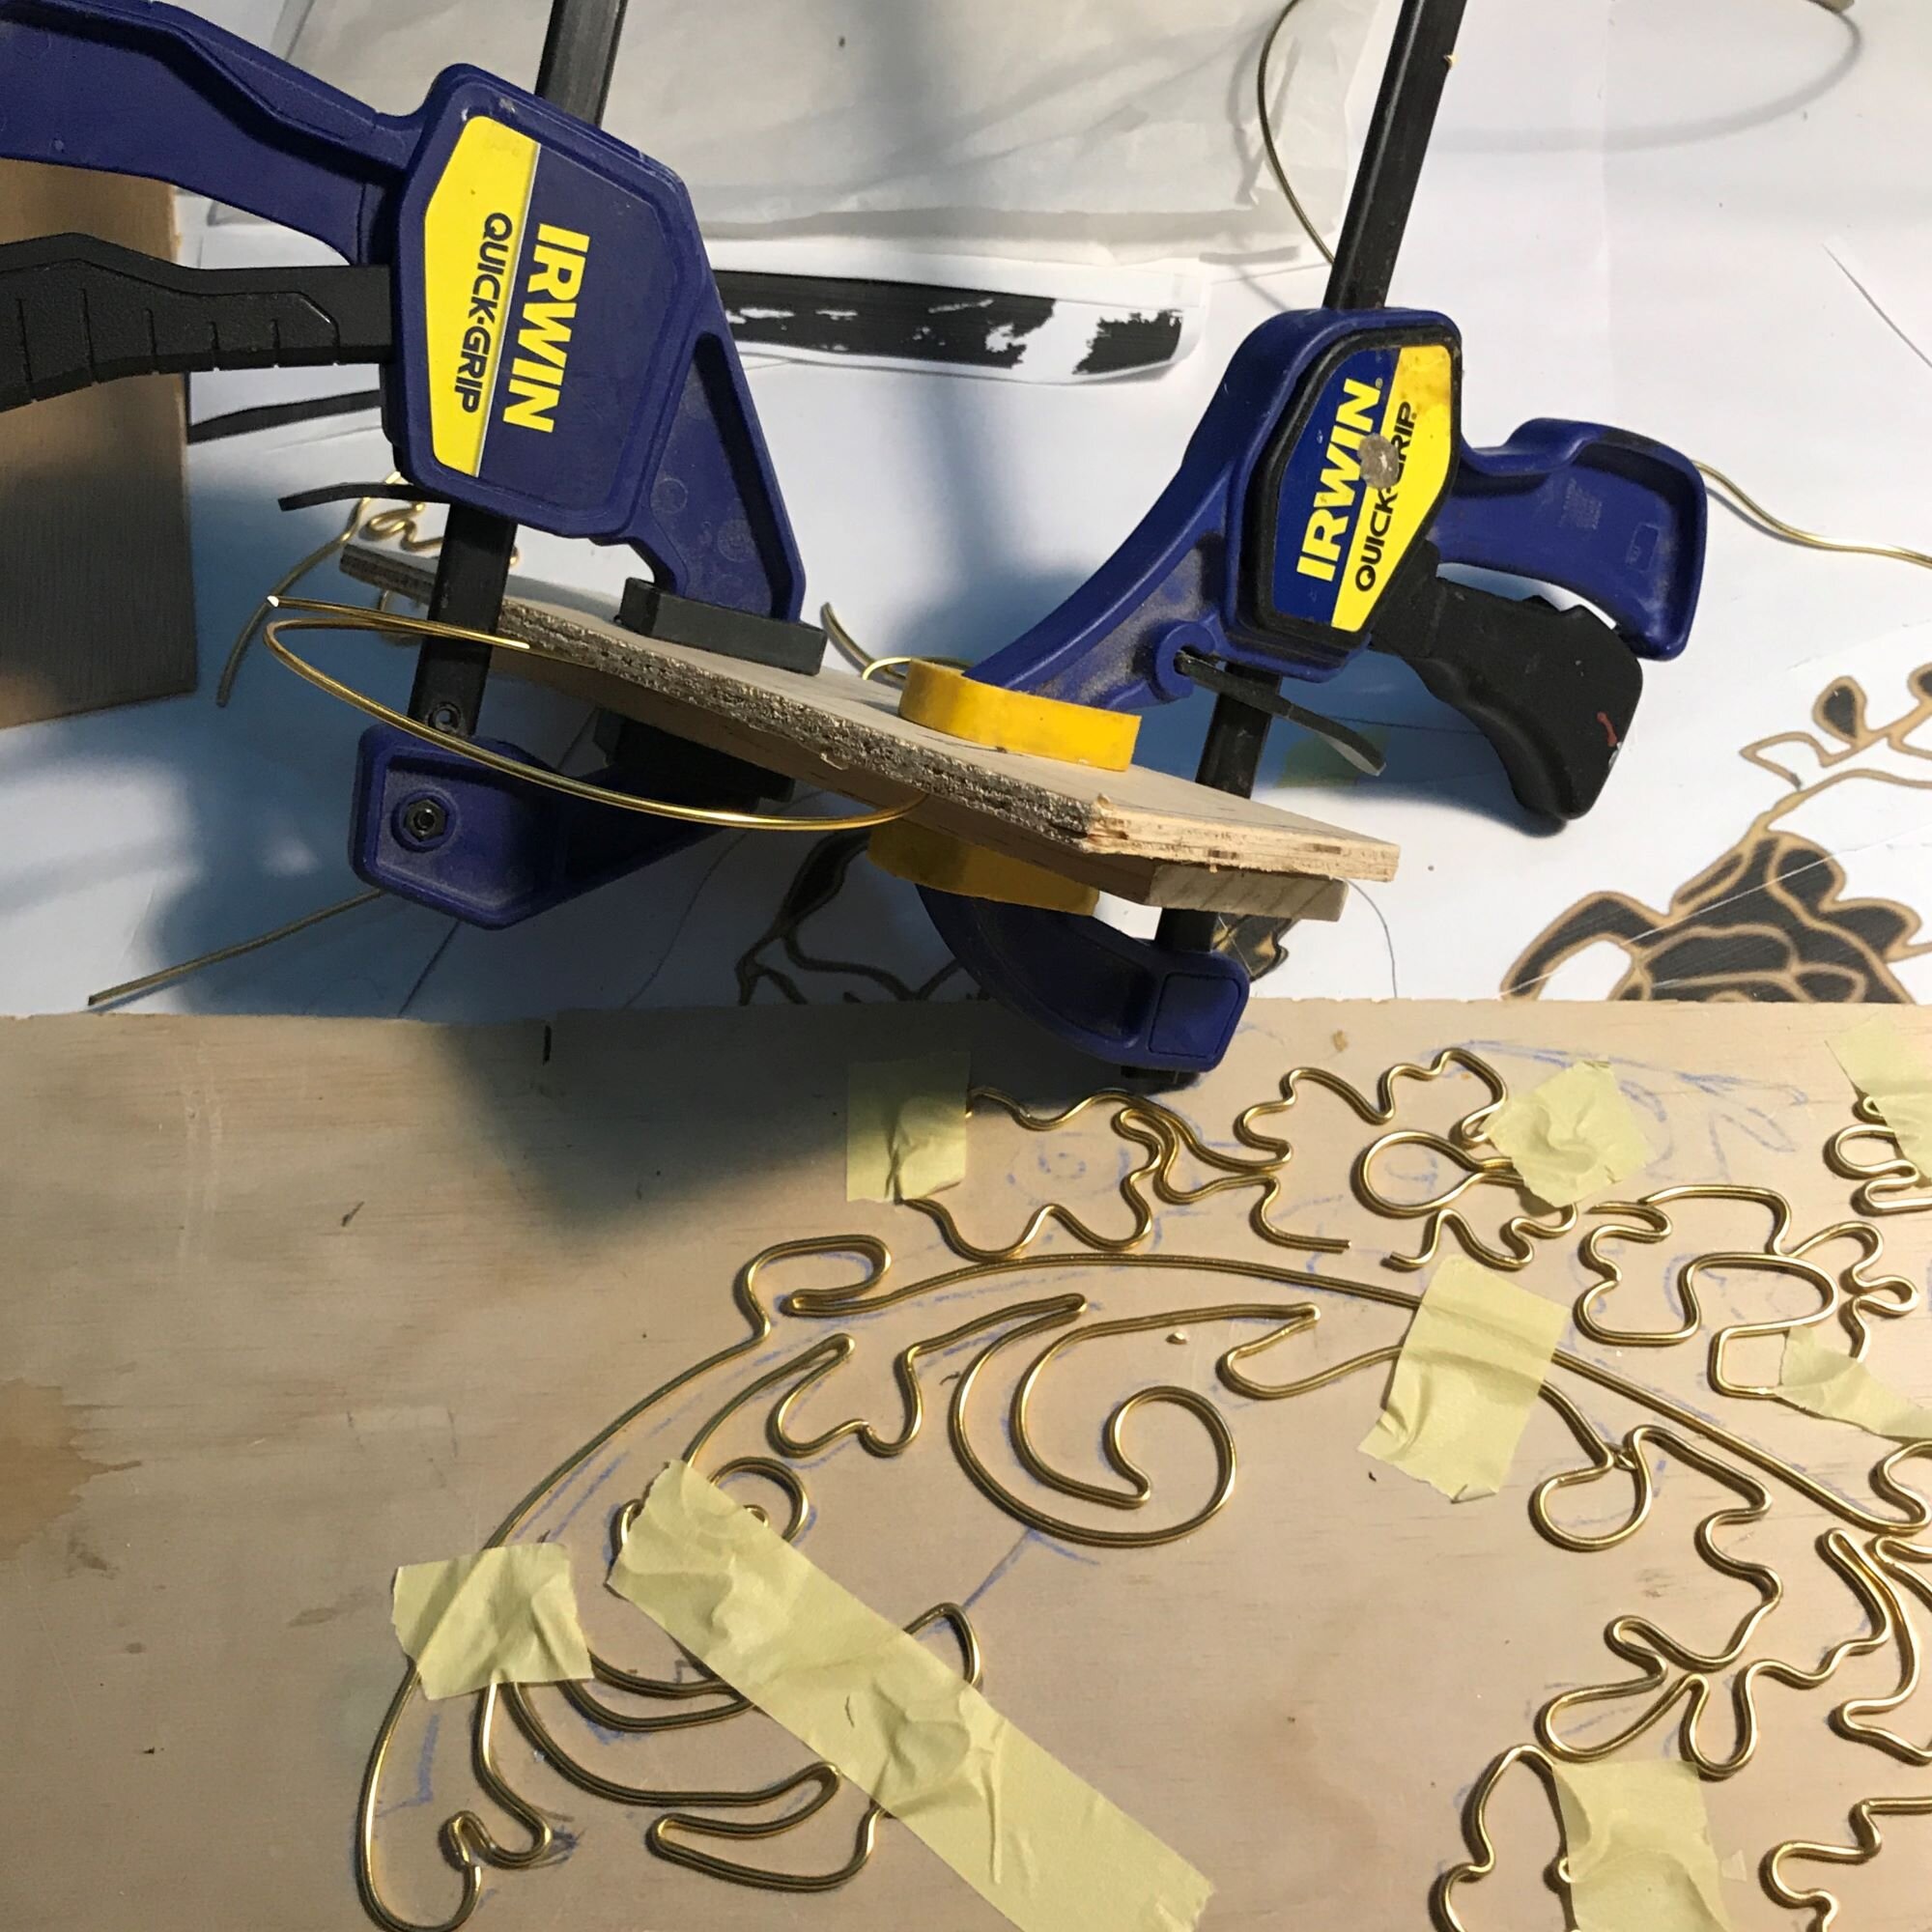
The next hurdle is making it sit flat because it twists with all the bending. There’s latent memory in wire forming, a recovery force that has to be trained out & ‘encouraged’ into its newly required shape by time & pressure. These quick release clamps are great for quickly flattening sections of wire; to avoid scratches it has to be sandwiched between pieces of wood to convince it to occupy the one, same plane. A vise is also good but the clamps are handier.

Emergency clamping

That should do it
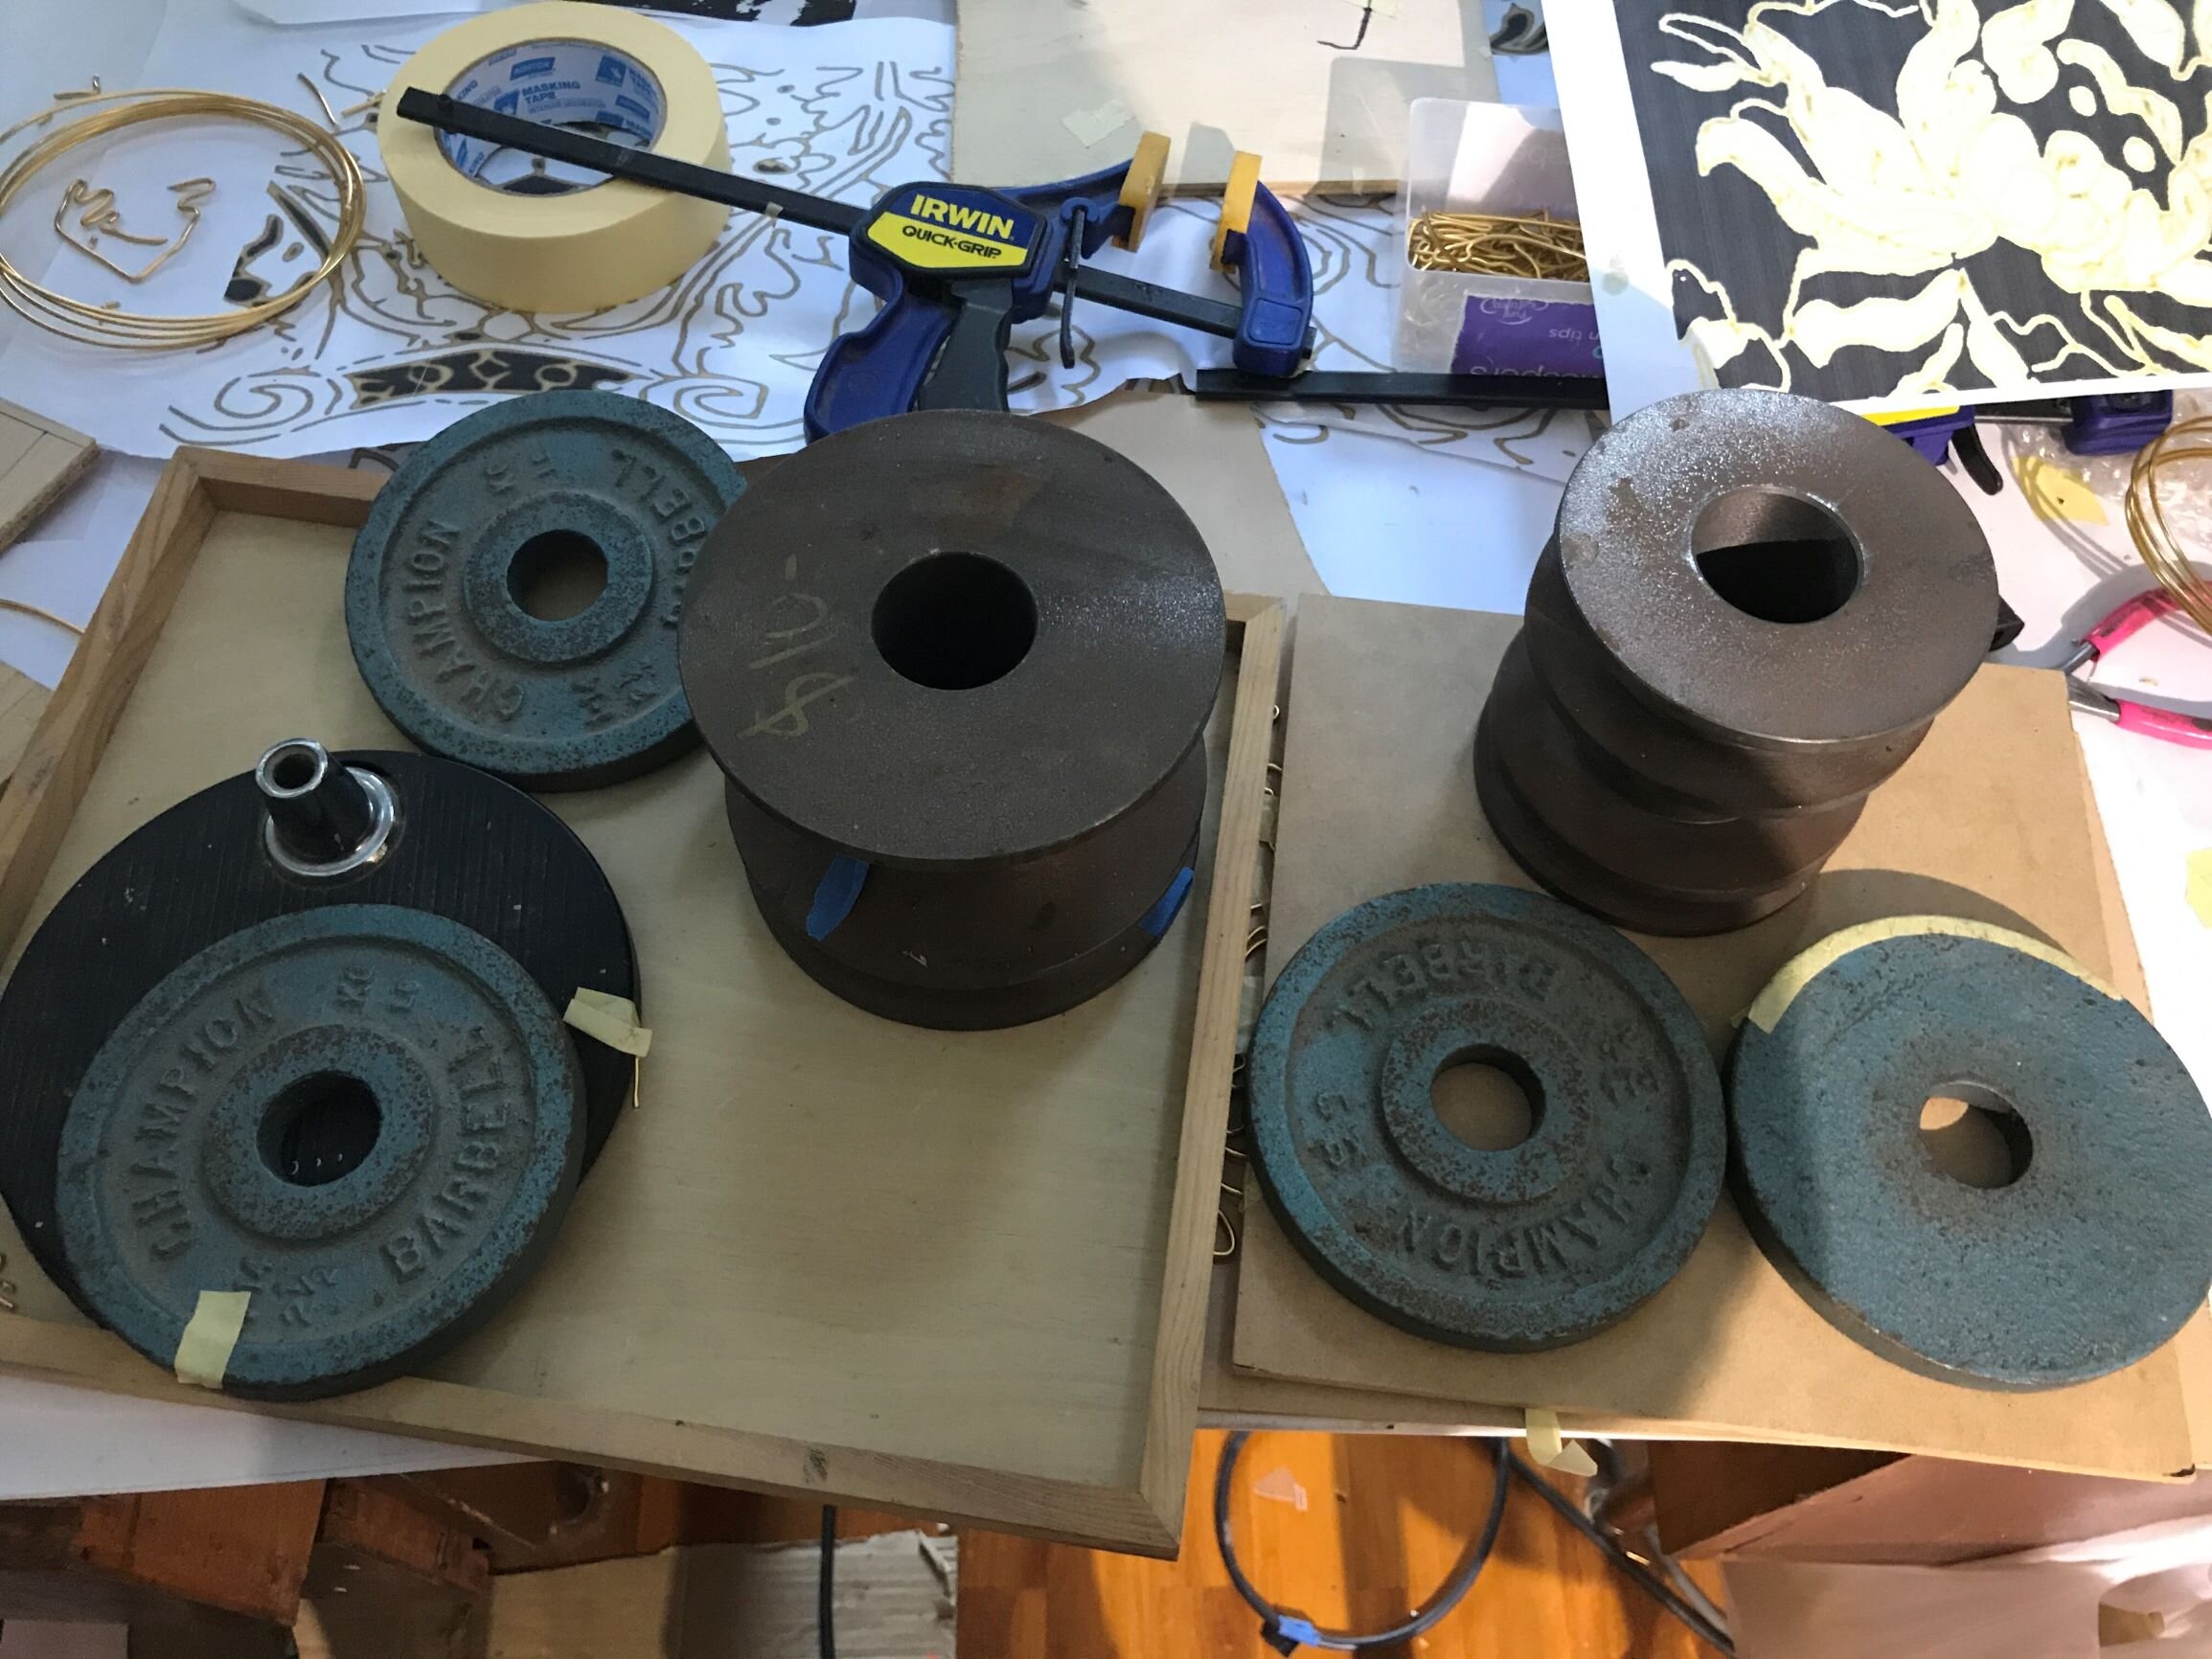
I made all this over several days & left it clamped overnight each time to settle it down. In this process, the wire relaxed & often moved apart so afterwards it all had to be checked & rebent if necessary while some bits had to be redone completely. It never becomes completely flat, but that I think is the nature of any wire material. Different directions of torsion in one little piece will always be at war so you need serious weights. I bought these excellent chaps seen above at Hare & Forbes, out the back where they put old, random bits & pieces from God knows where. A little treasure trove, similar to a fabric remnant sale. Aren’t the steel spindles amazing? If tools could make you weep from the perfection of the machining….

And thence to pliers. The flat nose pliers are also good for flattening & straightening small pieces of wire. I have many pliers (I love pliers) and tried most of them. (All of them, needless to say, well taped up at all times). The pliers above on left are of poor-to-average quality from a craft shop while the yellow handled pair on the right was given to me by an elderly gentleman who had been an electrician in the RAAF. They are extremely high quality (thanks Ross!) & made in Germany & they are absolutely genius for sharp bending, even though one wouldn’t at first think so them being flat, rather than round nosed. I dont know where they might be sold but these are mine & I now have no respect for the pliers on the left as well as any other flat nosed pliers yet to come my way. None could better these.

I have three round nosed pliers but ended up using just the pink handled one which I’ve had for a long time, so I know the heft of them. The size of the prongs seems well judged; sometimes a tool just feels right

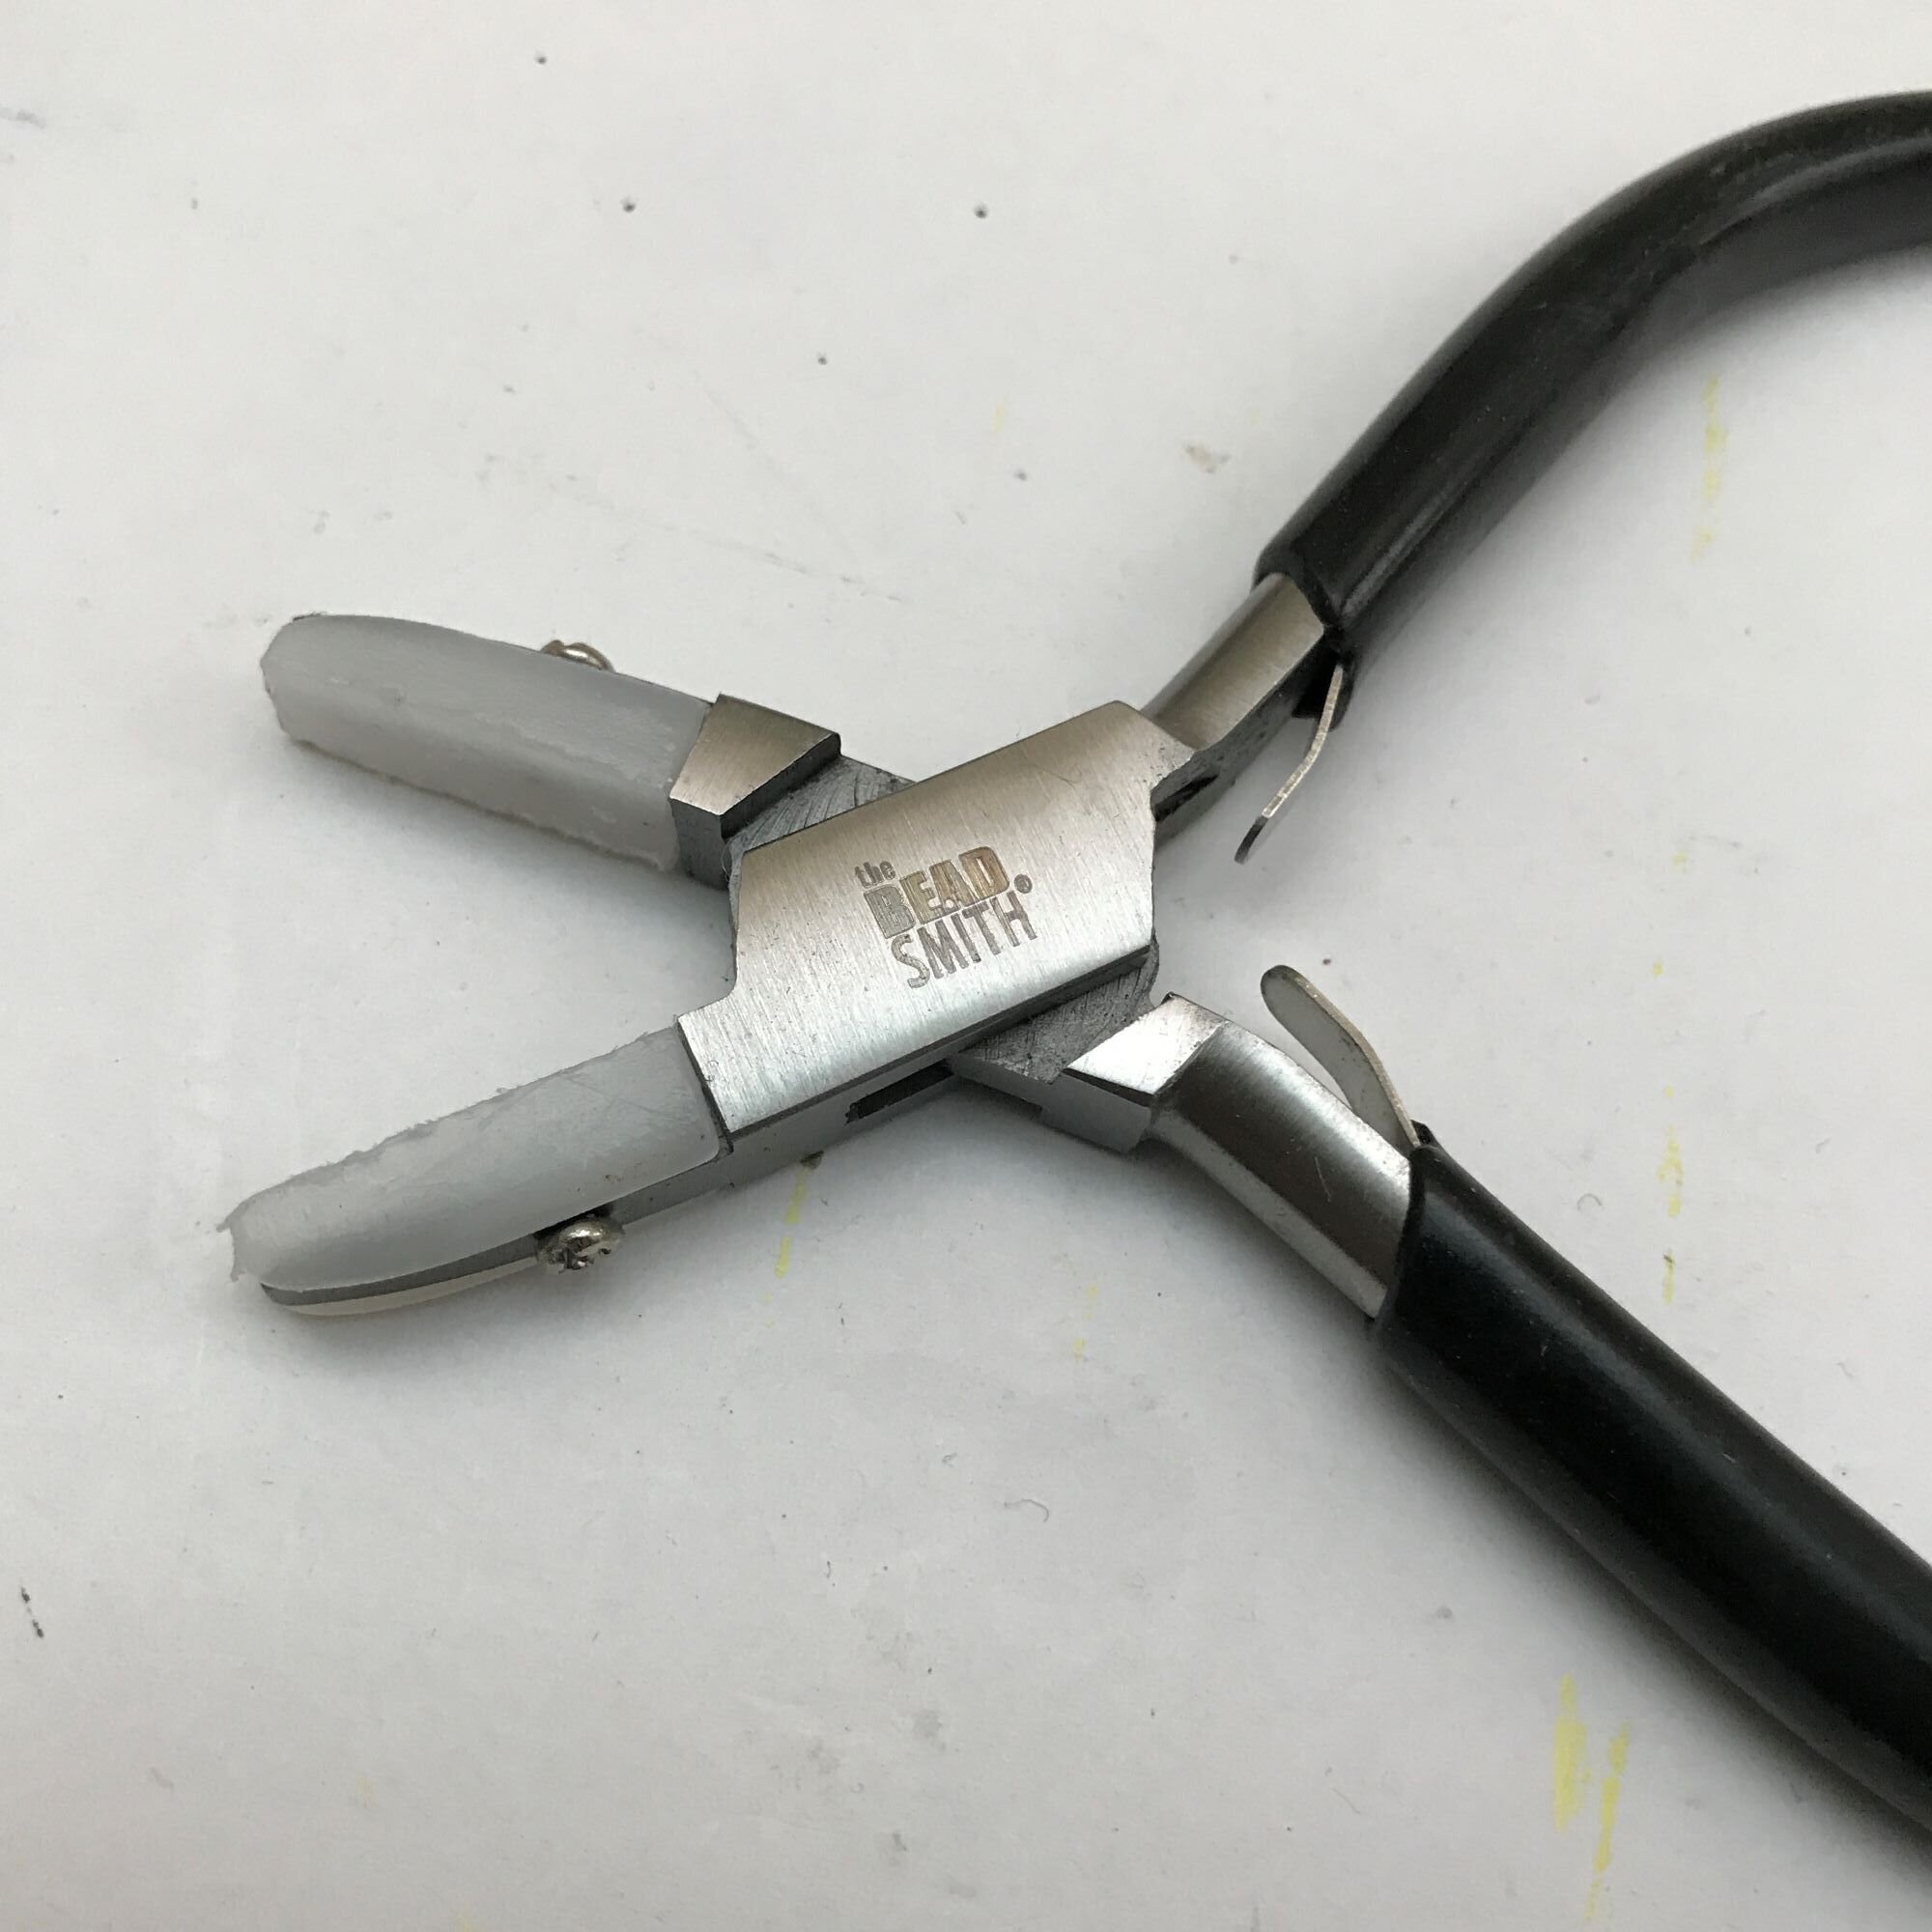
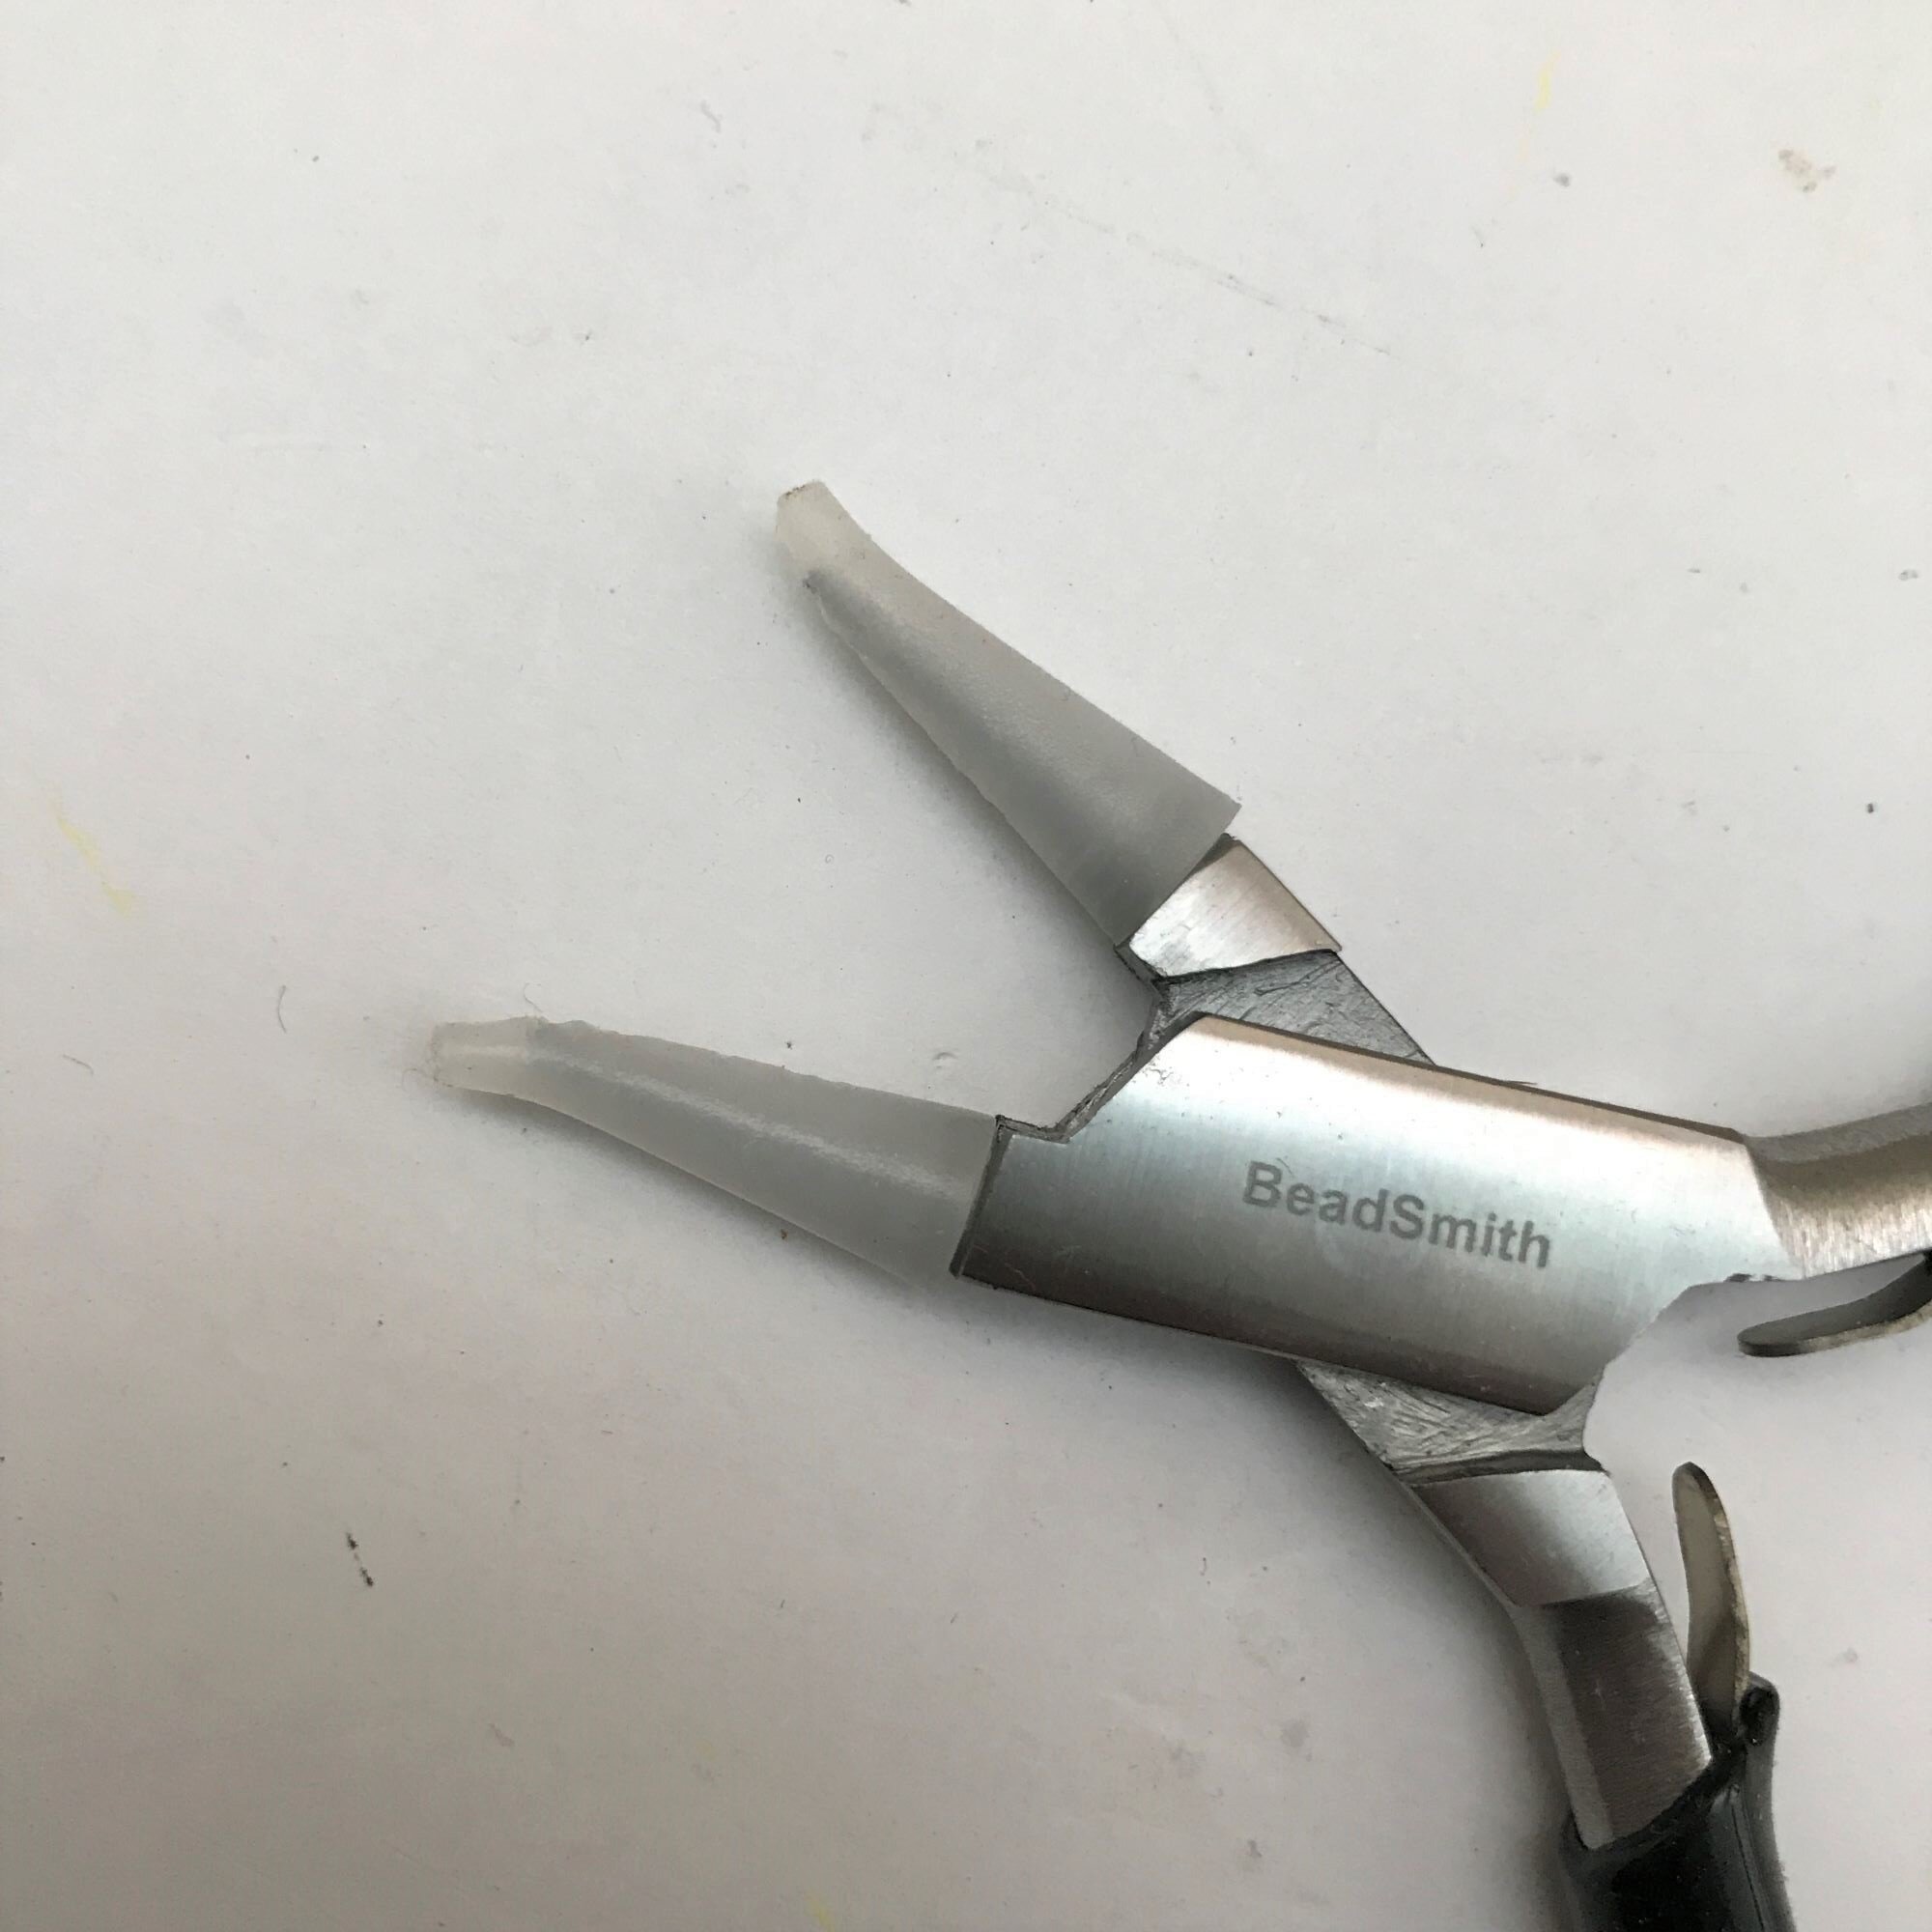
As for this, I’d say dont bother with nylon jaw pliers as is generally recommended, or at least not the blocky cheap ones like these. There’s no grip on them so they slip around, so in order to control them you grip them really tightly which ends up making big tool dents on the wire. This consequently damages the soft nylon & they quickly mashed up/fell off. Throw them out the window. No doubt there’s better ones, but for me, taping the bare metal pliers has been far more reliable without spending big on such specific tools, it just takes time to re-do it every few bends.
But, in the end, some trace of tool marks seems unavoidable when working with soft metal at these small scale acute curves, so you just have to re-do anything thats too offensive & accept the limitation of the material for the rest


Further to tools feeling right, regard the above cutters. Making flush cuts & flush cuts at complex angles is central to the success of the whole joining thing. I am in possession of six pairs of snips (it just happened, it wasn’t a planned thing), two of which are blunt AF so for new, really sharp ones, I’ve tried these two and found the cheaper option the better: Duratech Precision cutters from Jaycar, with the twice-the-price Xuron Maxi-Shear from Hobby Tools in second place


Snipper flush cut blades are flat on the underside so theres a straight blunt cut on the ‘good side’ but in order to make this flush edge, the blade pinches from the other side which leaves the typical pointy end, the ‘wrong side’ of the cut.
Its generally best if the angle of the blades on the wrong side is as wide & shallow as possible so you can see exactly where you need to cut. The Duratech snip is at a very tight angle, which led me to buying the Xuron, where the “head shape allows excellent sight lines to help increase precision”. They are both good, but in the end I actually prefer the weight & feel of the Jaycar snips (far more positively ergonomic) & have become better at judging the mark

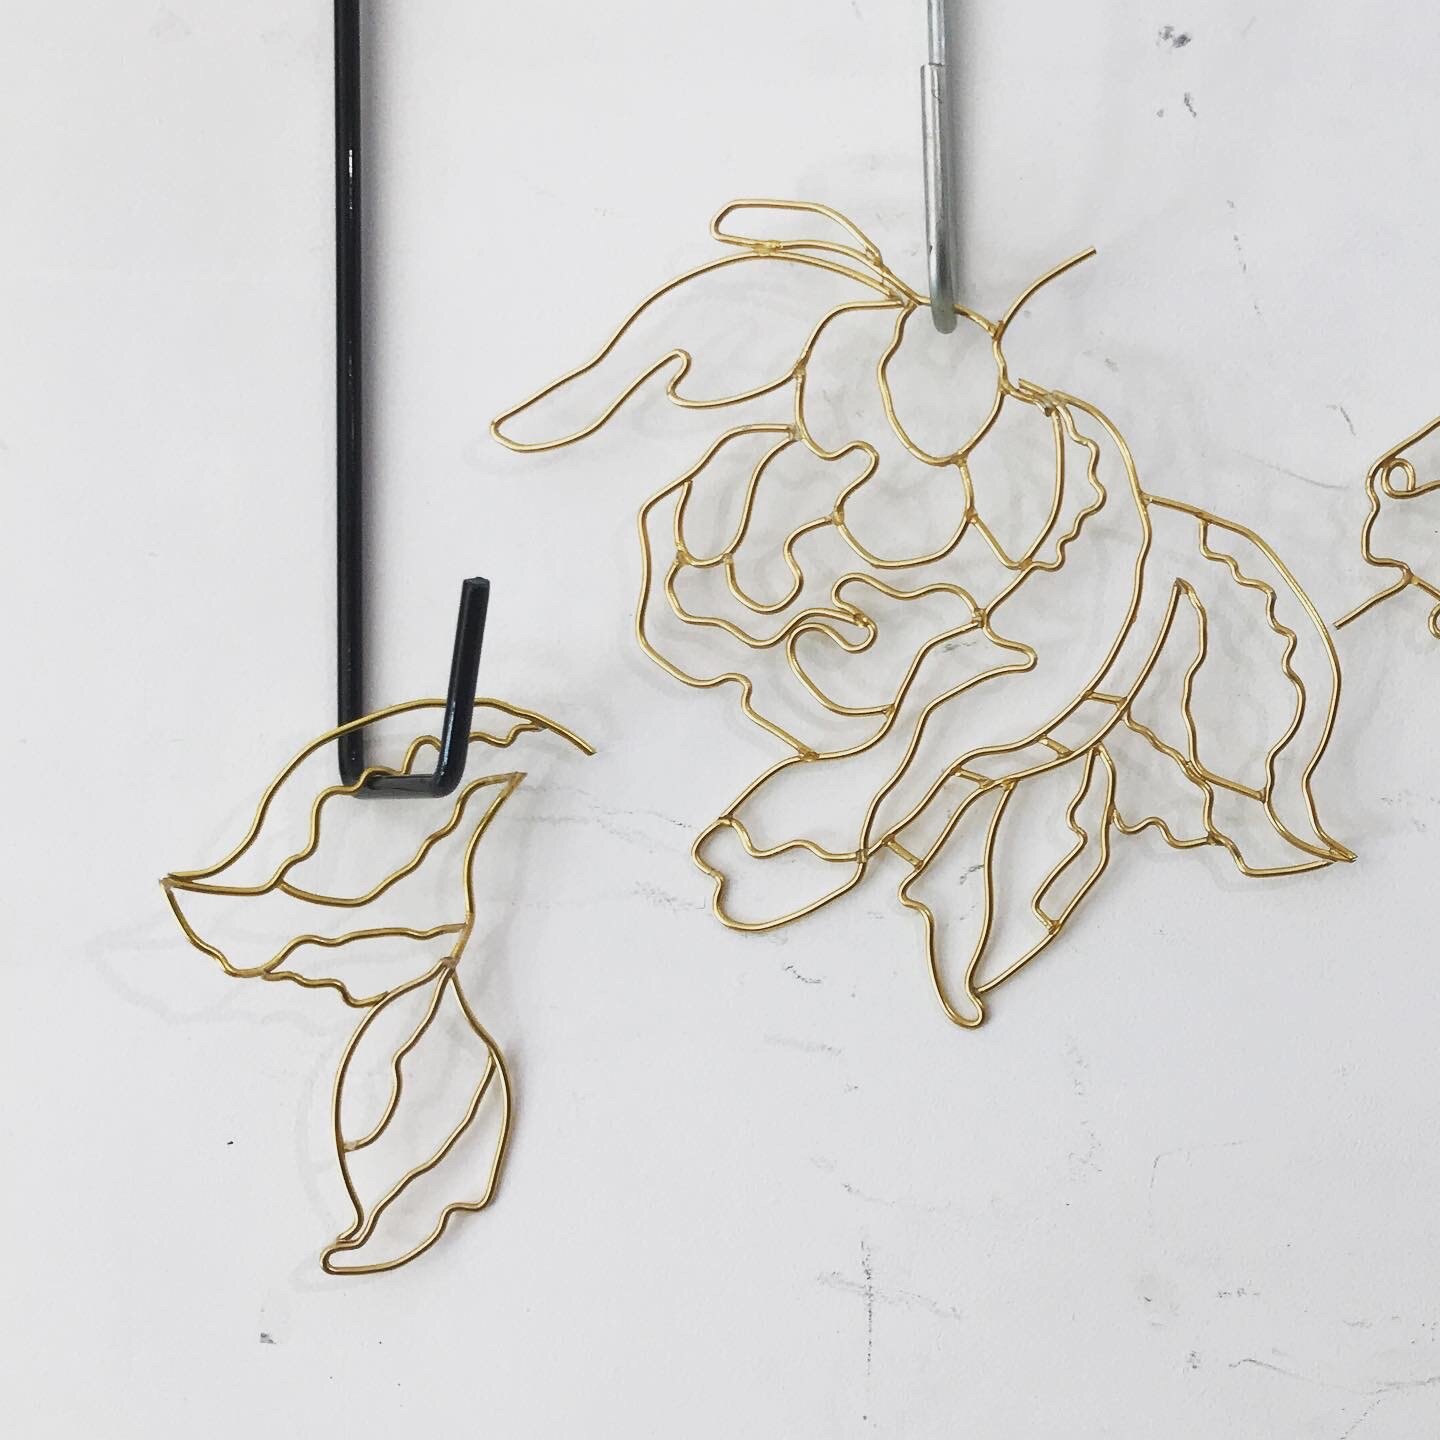
But isnt this stuff just lovely?


All glued up and tape removed….ready to see if it holds together!


And here it is! Boom. Although I made samples before commencing the real thing, there was absolutely no way knowing if it would actually work other than just doing it, so I’m glad, because I’ve made all six sections already. Its all made

Work in progress
To recap, this is one piece of lace from the six that will be fixed over the whole canvas and will spill over the frame at the sides across the black frame. Its a 4mm drop from the frame to canvas & I want the lace layer to look like its hovering, not nailed down just magically held in place over everything via some cunning invisible stitching. The painting still has a lot of ground to cover & the frame will also have a attributive decorative detail that I think will look amazing…sure hope that one likewise works

But this is exciting. I’m very happy with this metal lace component. Here endeth for now.
I love putting together these artwork progress posts when making something comprised of unique parts. I’m super motivated by the making & learning & I want to dwell on it as it’s being created, or once I am well into it, or just completed, so I epic-novel it in these posts. I practically roll around in it I love it so much. Some things look simple but creating them takes time, dedication and sometimes, deep thoughts. I make many things & undertake seemingly disparate projects via commissions, but some pieces - like this - package up quite well in documentary style, so thanks for joining me on this one!