Want really really sharp clean edges when painting, essential for those hard edge colour blocked abstracts & patterns? Of course you do!
It can be done
Here we go, tutorial, advice and how-to time ...or …
time jump to the year 2021 and watch the vid below for a quickie

Or watch on YouTube here


Now, I haven't seen this method spoken of or demonstrated anywhere, I've come up with it over time and this is the way that works for me. I've done this on paper and canvas, and even on the ridged surface across a canvas this technique works and this is how I do it...
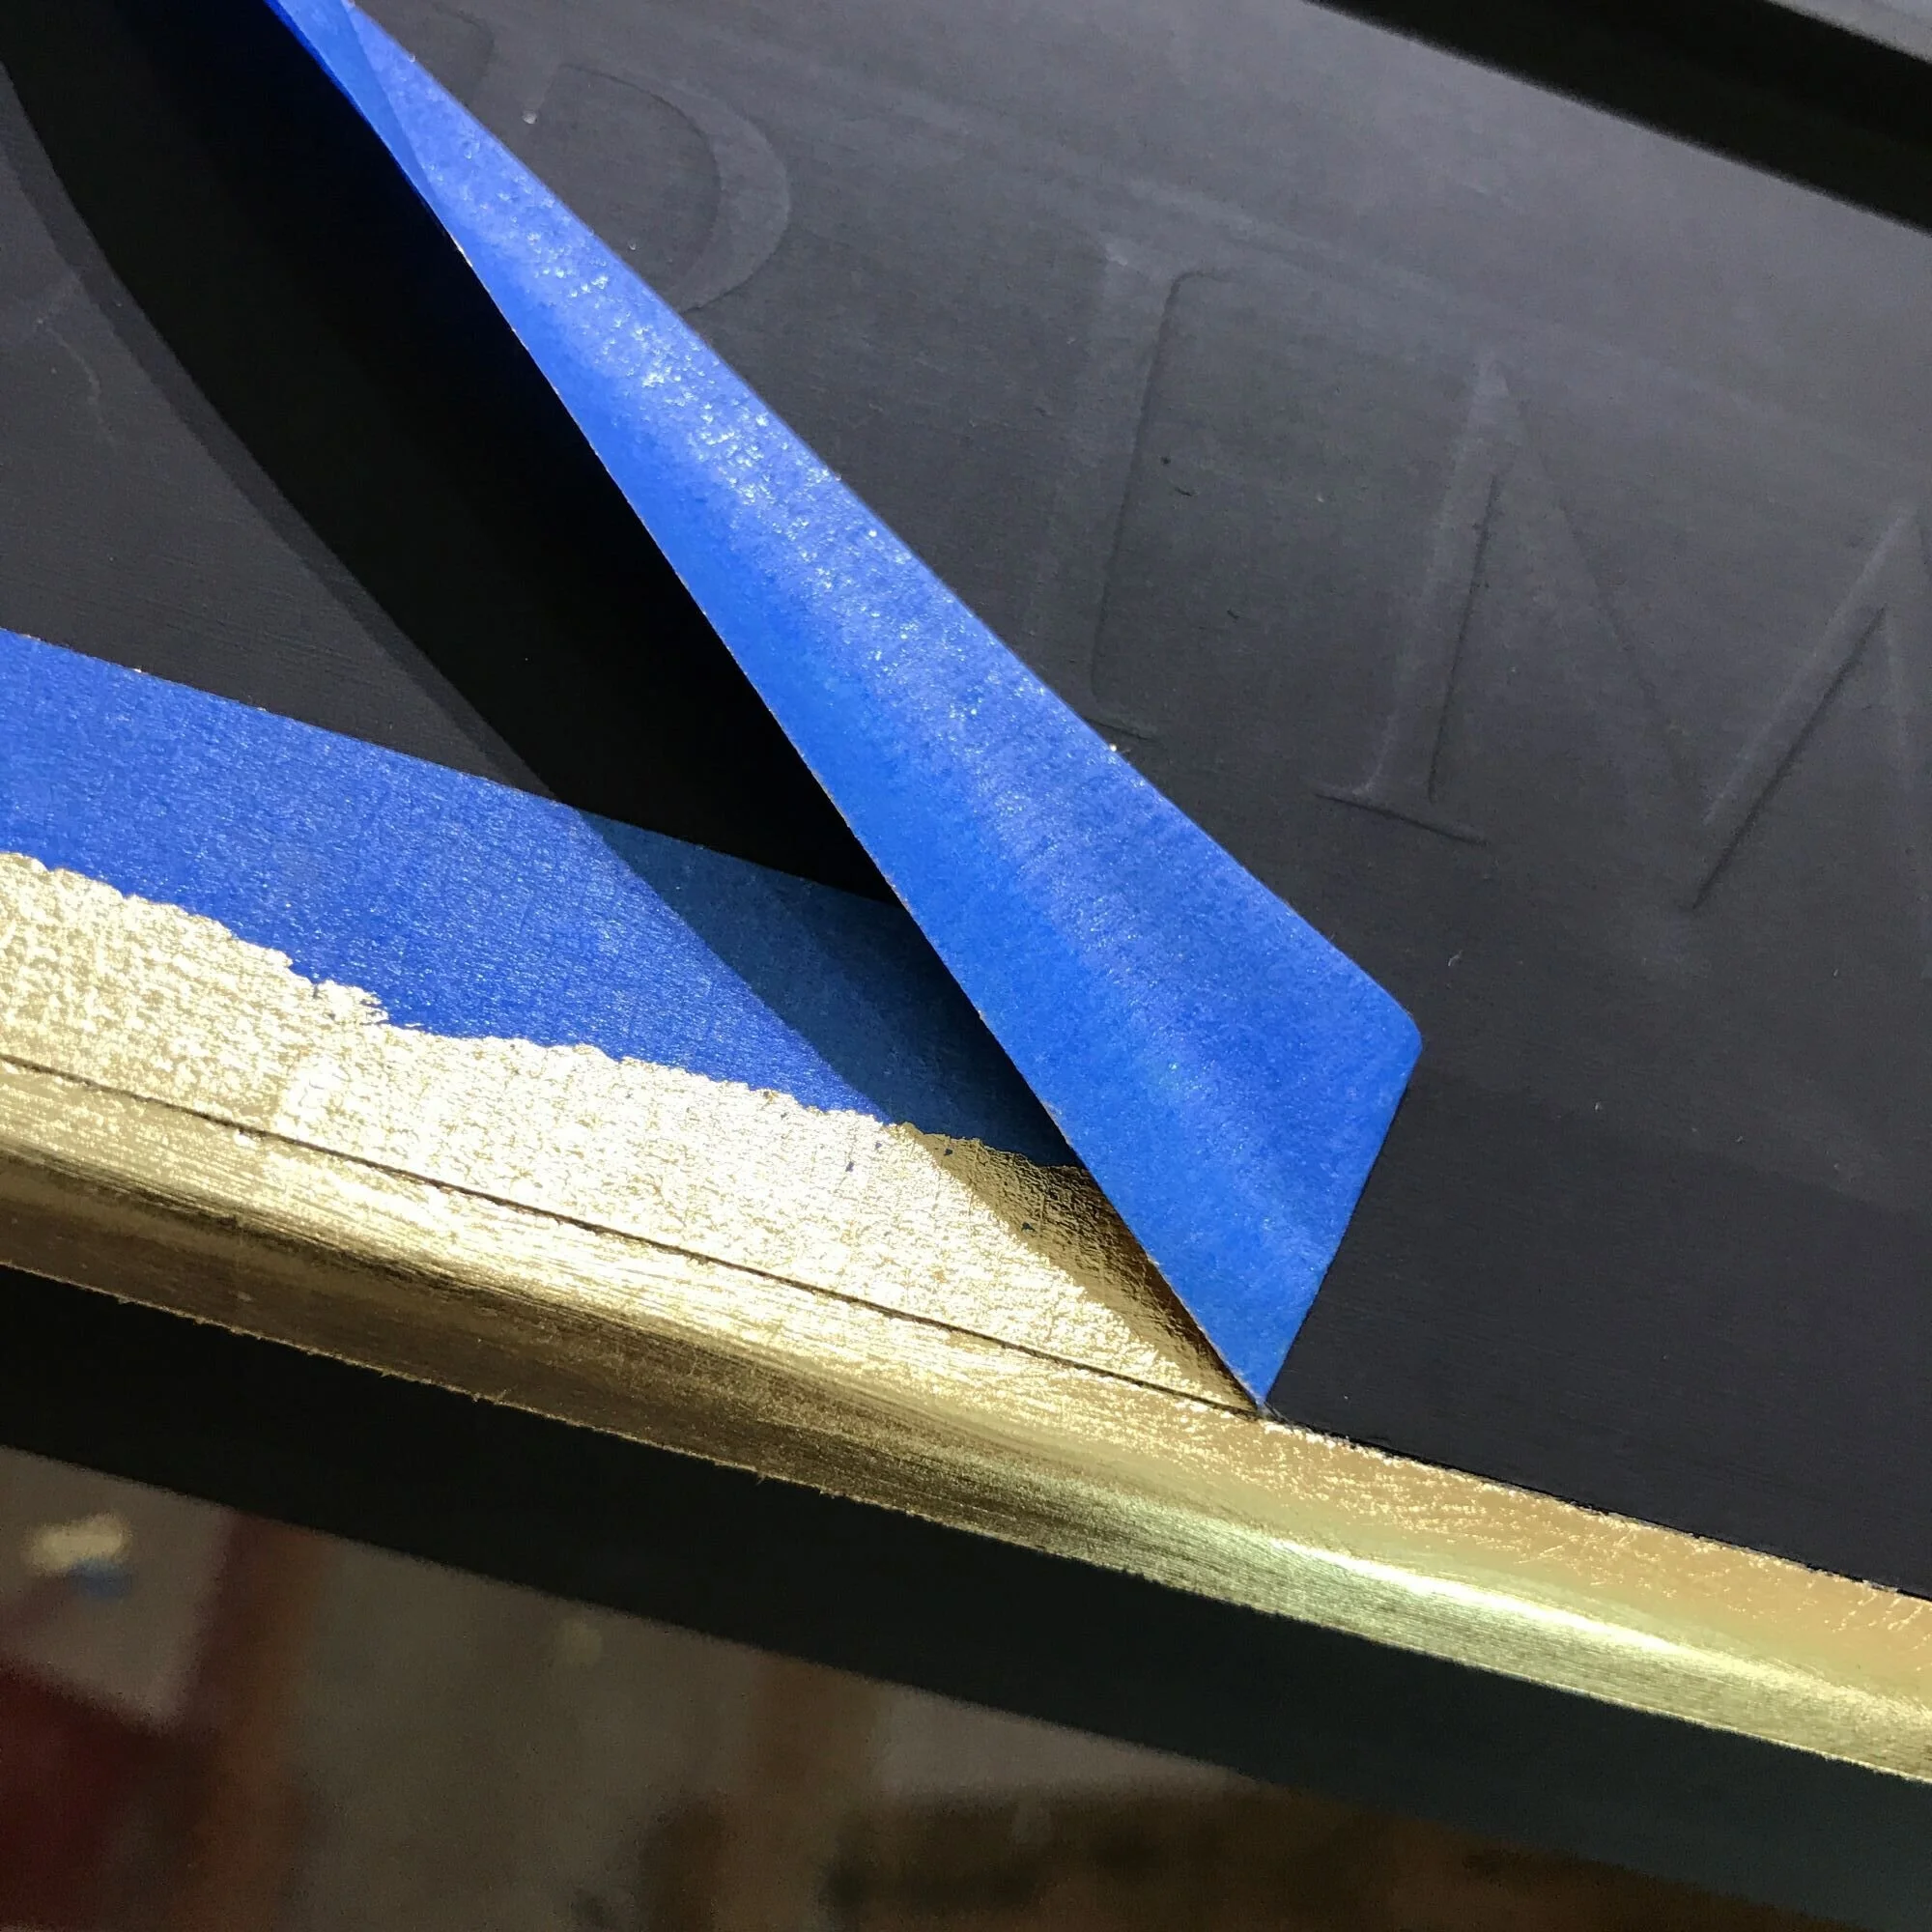
The trick, I have found, to really sharp, clean edges, is to seal the edges of the masked area by painting the base colour, (whatever shade that may be), over the masking tape line, before painting any new contrast colour*. This way, if the edges of the masking tape are firmly & fully adhered to the base surface, the bleed through will be that of the base colour, ensuring that whatever pattern or colour goes down next will be confined to the areas between the masking tape. Where its supposed to be. And with incredibly sharp edges. Because any bleed will be invisible! Because its the same colour as the background! Voila!
* This technique works over any base colour, if a line or area crosses over several other colours, substitute clear medium or varnish for the sealing coat.
I shall now proceed to demonstrate this process & prove it to you.
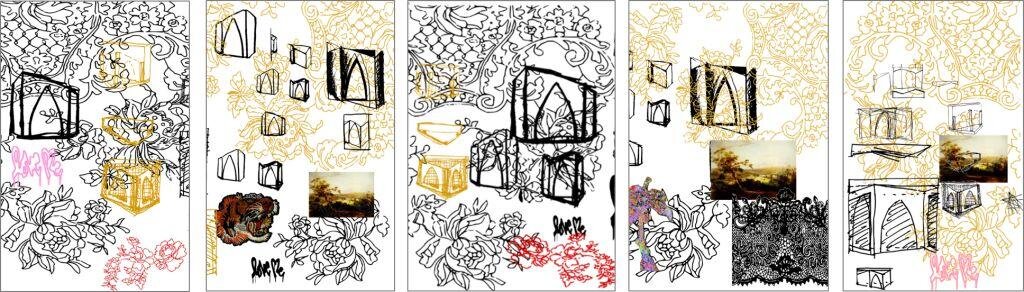
Here, on the artworks above and below, my surface is white Canson paper mounted on board & basecoated with white artist's acrylic, so this surface has quite a bit of tooth. Most if not all surfaces have some degree of texture and roughness but again, this technique remains the same whatever the base media.
So here I'm wanting to paint block areas of colour on the white background by masking different areas & painting them different colours...So, as white is the colour that every other colour gets painted on top of, thats the thing to seal the masked edges with. With me? Yeah well here's a step-by-step:
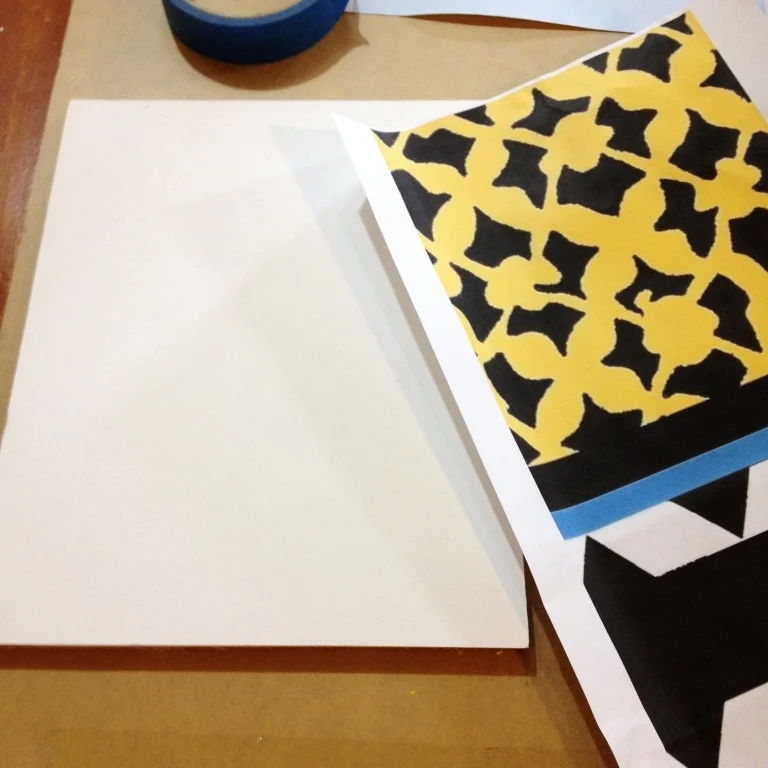


This is the advice part: get your head around the design. Really, imagine your finished piece, know what you're on about. Most designs will vary from design to realisation & there's always something magical that happens during that translation, the way an image unfolds and changes as its being made, so be open to that whilst keeping the end game in mind. In this case, the dimensions of the design need to work within the dimensions of the board and I winged it since I knew pretty well the look I was after with this series of images.
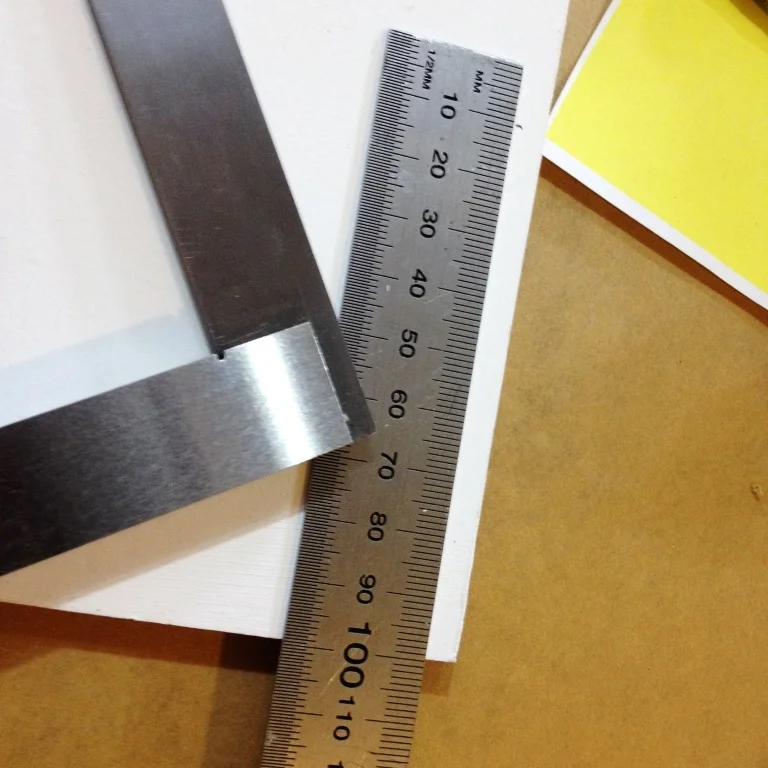
More advice: measure with an accurate ruler - steel rules for preference - and never measure from the "0", its too hard to get it spot on. For accuracy, a good rule is to start at 100mm (or 10mm if your work is quite small) and measure up or down from here. A small try square is excellent as a guide for your ruler; that way you're measuring at 90 degrees from the start mark, rather than measuring at any old angle which would of course make your distances completely different. 100mm from zero at one edge and won't meet up with 100mm from zero at the other unless both lines are at ninety degrees from the zero. Yes? Trust me, a small try square is totally worth it if, like me, doing number mathsing is really hard & you need any advantage available. Buy one.
Advice again: mark your mark with a DOT. A DOT, people, not a scribble back & forth. One mark made lightly, that's all you need. And ferrcrissake, use a fine point pencil, not a ballpoint pen. Make a an additional mark about halfway across the distance for better accuracy when masking. This piece is small enough for one midway checkpoint measurement mark but with larger pieces it doesn't hurt to make a few extra marks for guidance & accuracy. Masking tape bends & stretches; keep the line a line, not a curve.


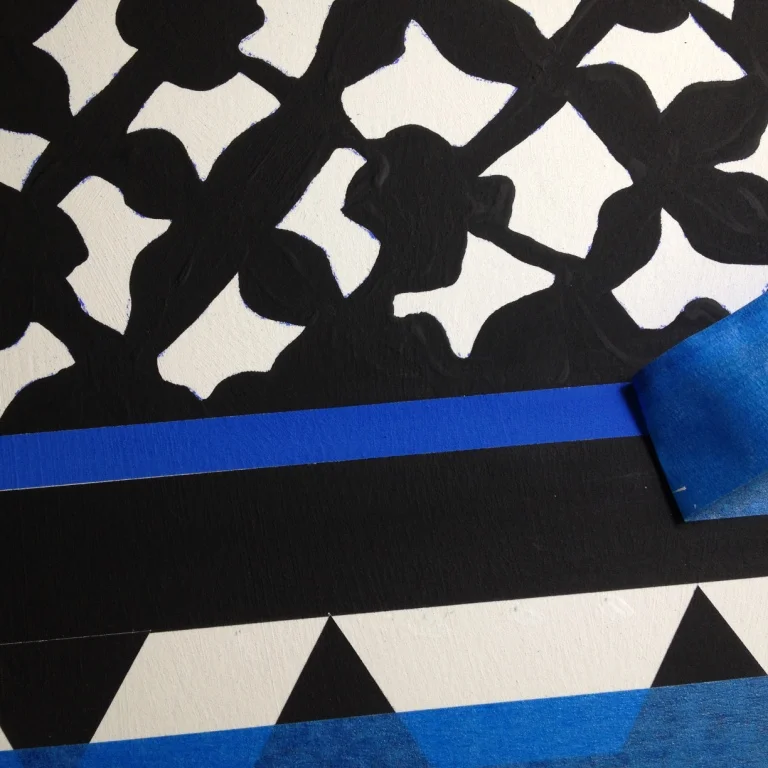
Time for science: having masked the area in question, run the back of your thumbnail across the edge of the masking tape. Do this several times & when your thumbnail gets burny, use a finger one instead, make sure the entire edge of the tape is making contact with the surface, so it deforms into whatever texture the base is. Like I said, this works with paper and canvas both.
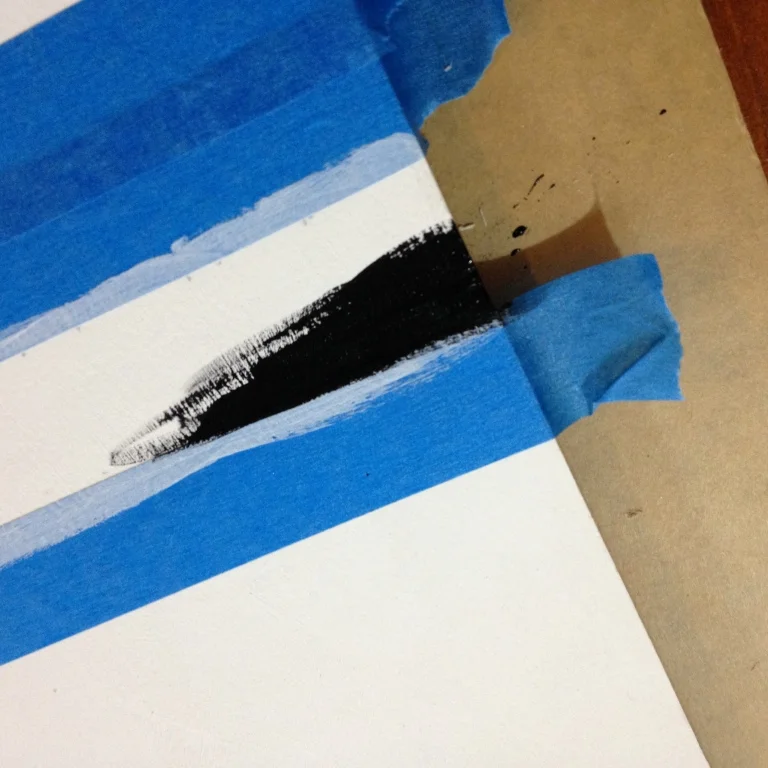
Then, seal the edges with the base colour, white being mine here. As I explained, the thing this does is, any bleed through under the tape will be the same colour as the base colour and therefor cant be seen when the tape is removed; as there's a gradient shift from base to tape, the colour that you put on top of this sealer layer will only be applied to the area between the taped lines. I'm unsure that I've explained this well at all so here, I draw you a picture of rocket science...
Isn't that the dinky-est illustration you ever did see!
Exhaustively thorough explanation of step one explained, phew, this accurating painting is hard but I'm doing it for you, kids, so pay attention.
Next, paint your new contrast colour in a thin layer, dry, then a second layer for a nice opaque cover. Do one section at a time till completely dry. Or, burn through half a dozen 'studio' hair dryers like I do. Sure, use a hairdryer BUT be aware that paint needs to cure as well as dry, so it will still be soft for quite some time after painting; how much depends on a lot of factors, from ambient temperature to the age of the paint you are using, so know your product and don't rush. This is edging like a pro.
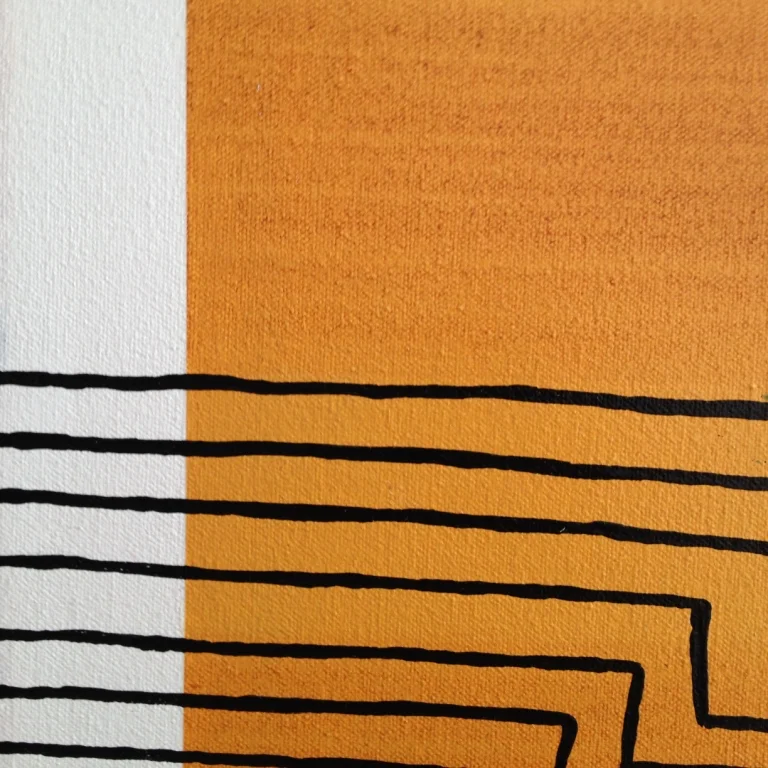
I have also used this method with semi-transparent acrylic glazes, for example when doing stripes as seen in pic above left. As you might expect, the watery-ness is always going to be a bit more bleed prone so I removed the tape just after the paint had set up a bit so any bleed through was soft enough to wipe clean with the edge of a sponge. Also the glazing medium retarded the drying time considerably but that's enough explanatory painterly detail for heavenssake. There is a painstaking aspect to doing these clean edges and you gotta pay attention but the immense satisfaction when the masking tape is peeled away, oh! yeah that's so goooood.
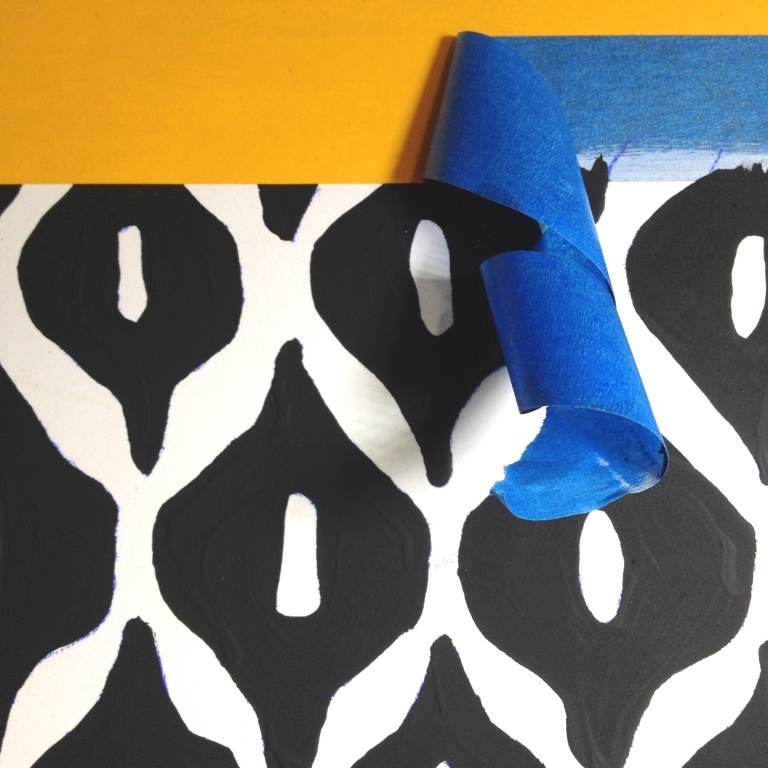
And onwards to that glorious time, the unmasking!
Generally, I'd advise running a blade lightly down the line of the tape as sometimes if the acrylic hasn't cured properly, it's still too plastic & can pull away badly. That's like so heartbreaking. The exception would be paint on canvas as blades + canvas is not a happy combination unless you mean to be cutting it up. But otherwise, even the weight of the blade alone can help although with these small pieces, I didn't do this and it was fine. Pull the tape a few inches at a time, don't tear it off in a big rip, help it separate sensibly, go slow and pull at a shallow angle at a 45% angle towards the new colour's side. Watch out for really tacky tape though; this blue stuff is common painter's tape from the hardware store but if you can find it, Easy-Mask is the best really. Easy Mask is like the holy grail of masking tape, it's that good. This blue stuff is pretty sticky but sometimes, particularly when weather conditions are hot & humid, I take the edge off the tack of the tape by sticking it to fabric (usually my tshirt) to reduce the grab so it isn't so dangerously sticky. More again with the scientifical painting! Cant stop me!
There you go, told you it works.
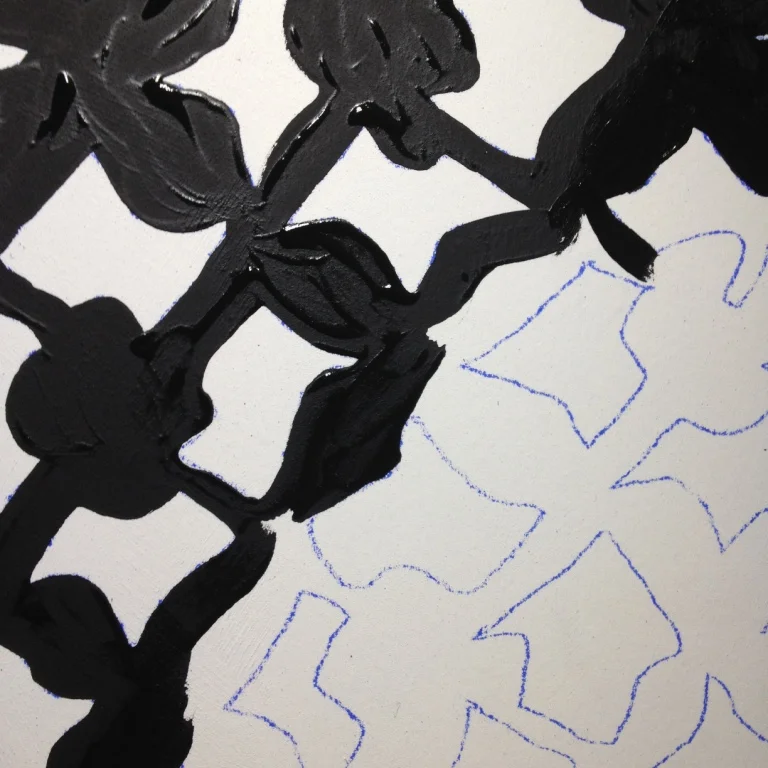
Transferring pattern with Saral paper.
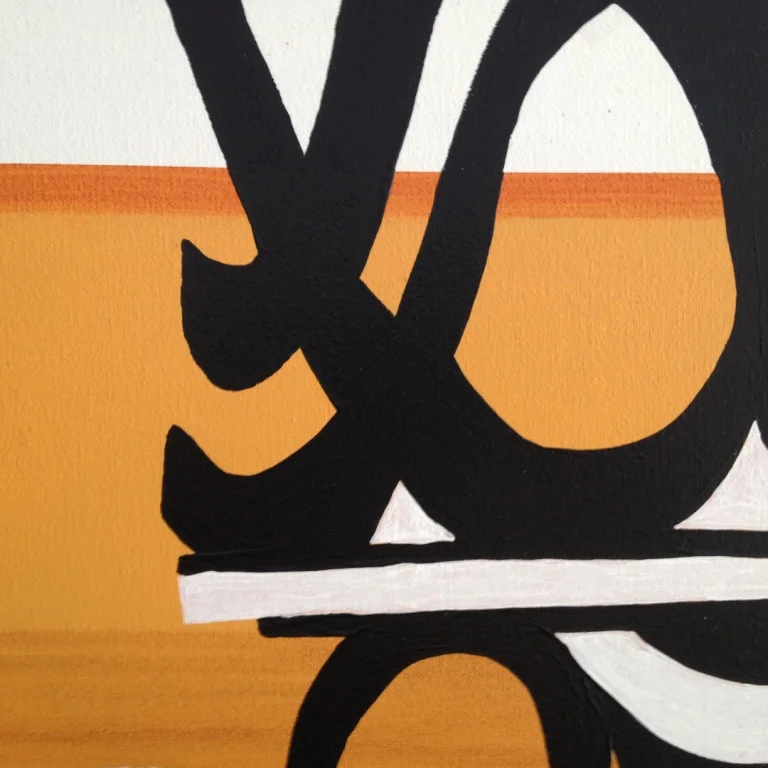
So that's it but I'd better add a few words about crisp edges when freehanding or 'cutting in' with artist's acrylic. Counter-intuitively, a really fine brush isn't always the best, in fact it can be disastrous sometimes as one needs to constantly recharge it with paint and large sweeps of paint are impossible to achieve in one go. Of course the scale of work changes along with all other variables but I love a good synthetic 3/10 or 5/10 round brush for smaller work. I have a pretty damn fine collection of every size I think, but I keep going back to the 3-5/10. The paint used has to be creamy, not sticky, sludgy or gooey (I sound so strict! Mummy!) and the brush fully charged with a good bead at the tip. Touch the tip just shy of the guide line and push the bristles down, flex the point with a slightly angled pressure. What you're after is for the brush to push the paint up against the line so it fills any texture in the surface, then gently and with great control to sweep in a nice smooth arc against the line. Bingo, sharp edge, every time. After a couple 'a decades practice anyway. This is one of the few times where I can assert my sciency authority so dammit, I'm going all out; look to my gallery below and tremble in the presence of Superiorpainter, mortals.


There endeth the lesson. You're welcome. Happy New Year 2015! Smiley face!